

Introduction: 10 MORE Woodworking Tricks the Pros Use


Staying on top of any woodworking project is a balance of hard work and little tips learned from previous projects. This Instructable is here to help you with the latter (the former, you're on your own).
Whether to speed up the build, or make things easier, take these tips and tricks from the professionals into your own shop and use them on your next project. If you want to see even more woodworking tips and tricks, check out the first part of 10 Woodworking Tricks the Pros Use here.
There's always more to be learned, so make sure to share your own tips and tricks in the comments below.
Step 1: Clamp Any Angle

Not all projects will have perfect 90° angles to allow for easy clamping during assembly. To give clamps something to grab onto for angled pieces, custom inserts made from scrap plywood can help make your next glue up much easier. The plywood insert shown here is cut in an isosceles right triangle shape (a right angle with the other two corner angles being equal 45°).
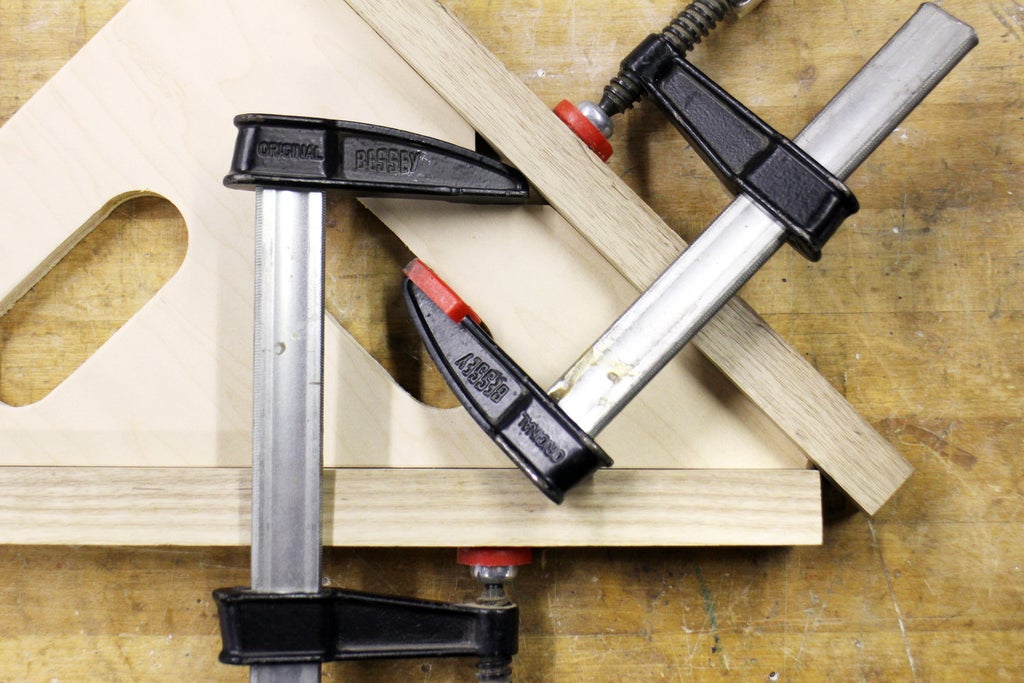
There are notches cut into the sides and pill-shaped openings drilled out from the middle, these are there to provide a surface for the clamps to grab onto.
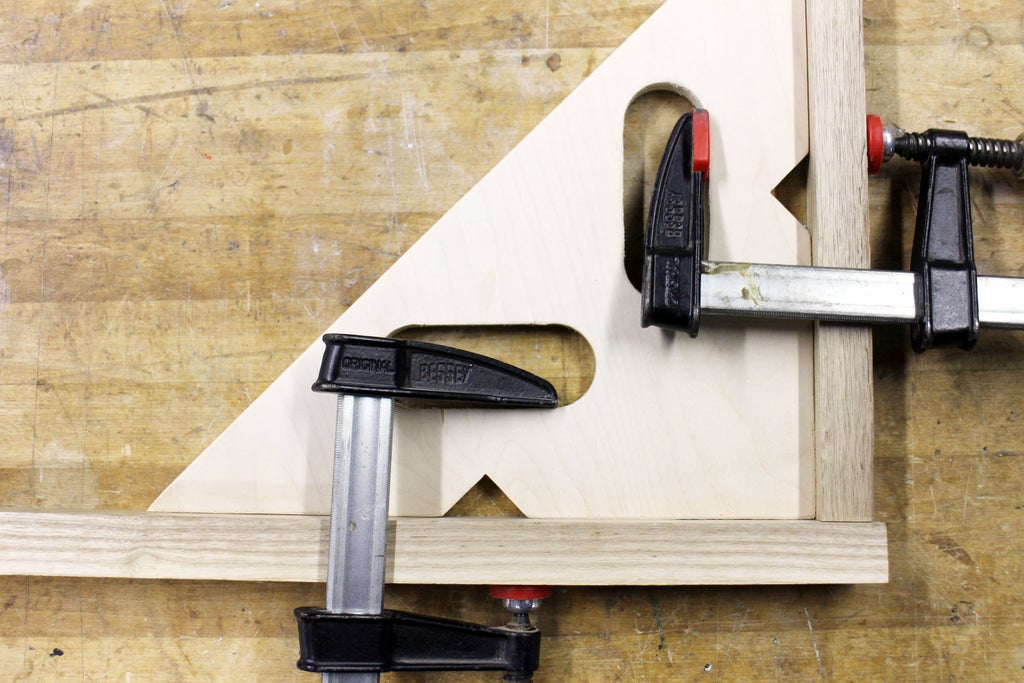
These plywood inserts can be cut into any angle, and having a few on hand of common angles can help make clamping much easier.
Step 2: Clamp Wide Boards

Securing wide board laterally is simple with a few scraps of wood to act as blocks, and a wedge-shaped piece to lock everything in place. This is great for when you have a large piece you need to secure for sanding, or any other operation where there will be a lateral load applied and you need the work to stay stationary.

Screw one block above the board parallel to the top edge and push the board up against this first block.
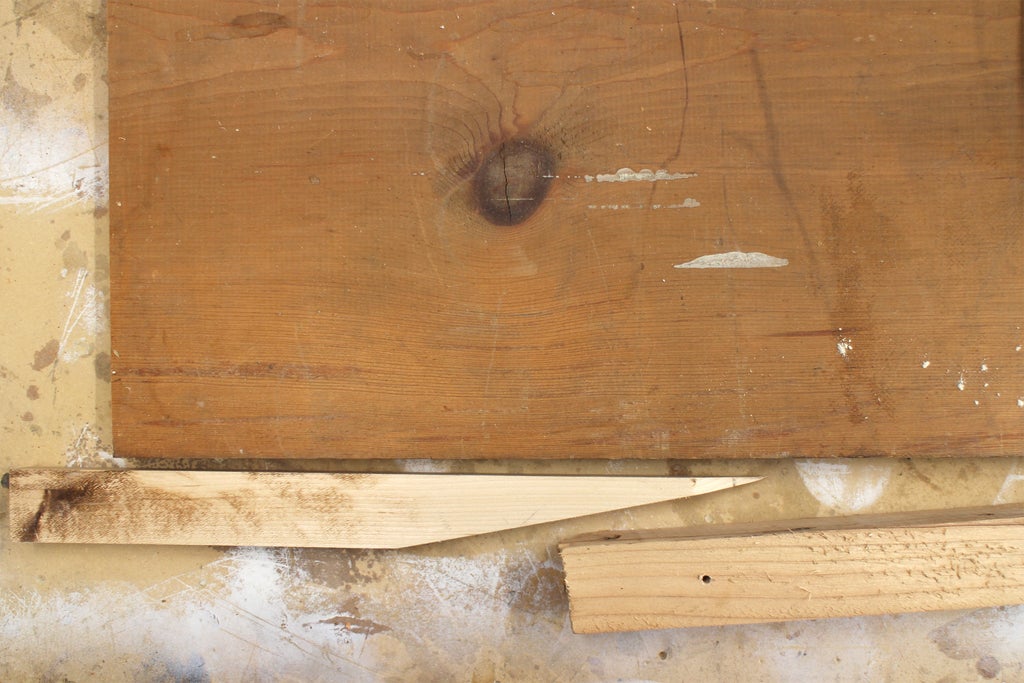
Screw a second block below the board, about an inch away from the edge. Slide a wedge-shaped scrap of wood between the bottom block and the piece to be secured. When the wedge makes contact with both surfaces it will push against the block and lock the board in place.
This is a great trick for really wide boards, or off shaped pieces that are difficult to secure in place.
Step 3: Blade Storage

This might seem obvious, but storing your sharp tools properly is something that is often overlooked. Wood planes have a sharp blade that protrudes from the bottom, and storing then flat is a sure way to quickly dull the blade. Instead, store planes on their sides which will keep them sharp.
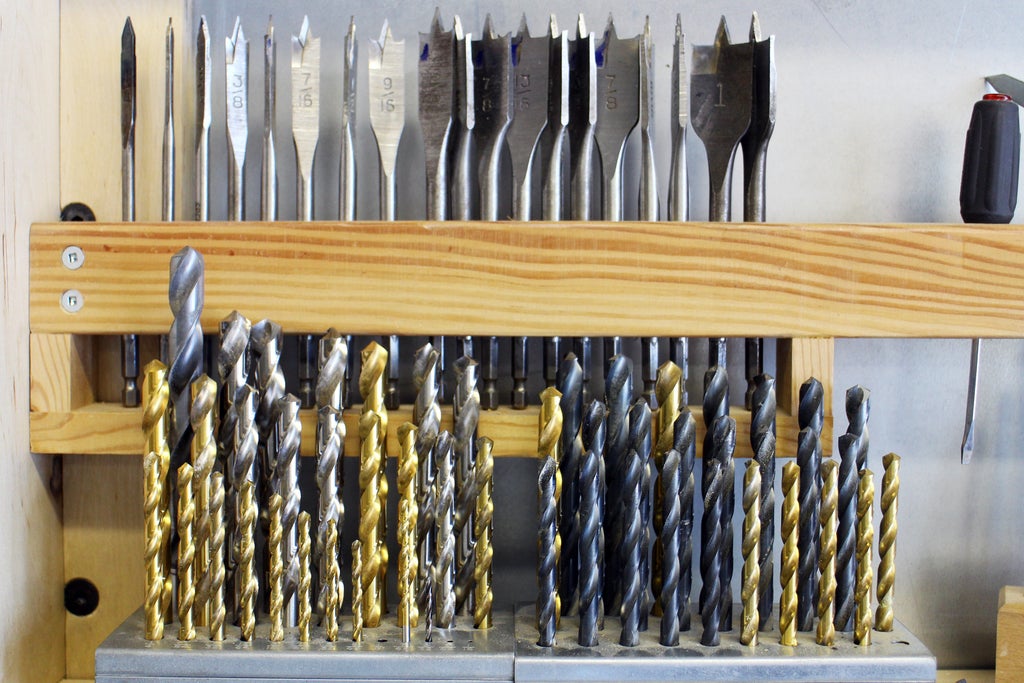
The same advice can be applied to all other kinds of workshop blades, like drill and router bits. Resist the temptation to toss your bits together in a jumbled pile or drawer. Keep these types of blades upright and separated from each other to prevent the tips from getting dull.
Step 4: Centered Holes in Dowels

Making a centered hole in a dowel might seem trivial, but the most you think about you begin to realize that it's not as easy at you might have originally thought. Luckily, once you know how to do it the process is simple. This process should be done with a drill press, which will keep your drilling perpendicular to the work.
 |  |
You'll need a drill bit that matches the diameter of the dowel you want to drill into, and a handscrew clamp to hold the piece while it's being drilled.
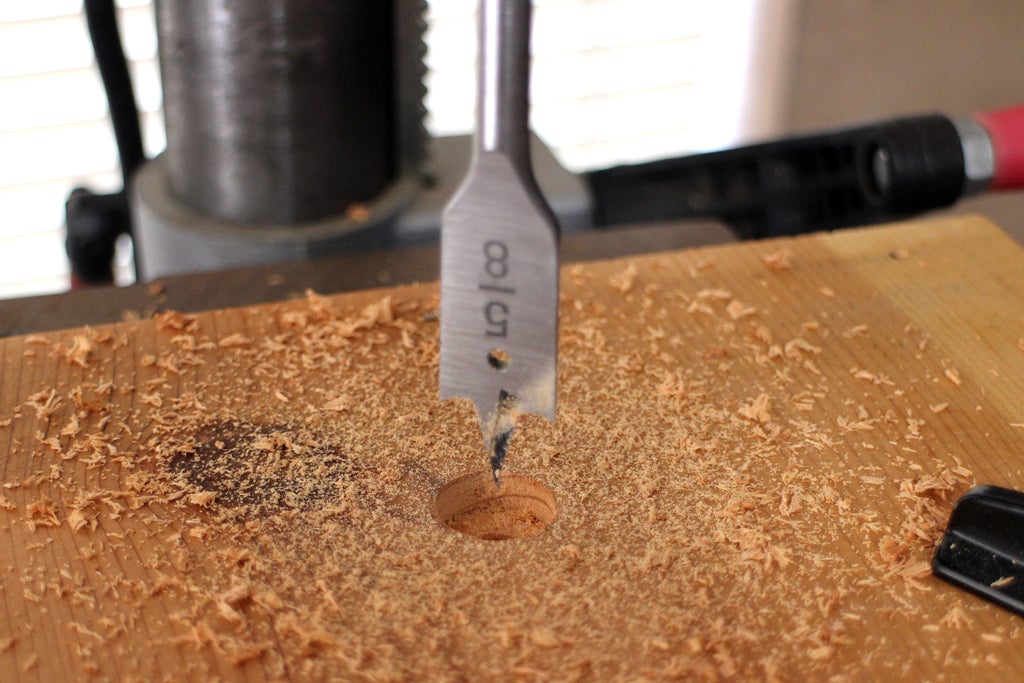
Start by loading up the drill bit that matches the dowel diameter and drilling a shallow opening into a sacrificial piece of wood.
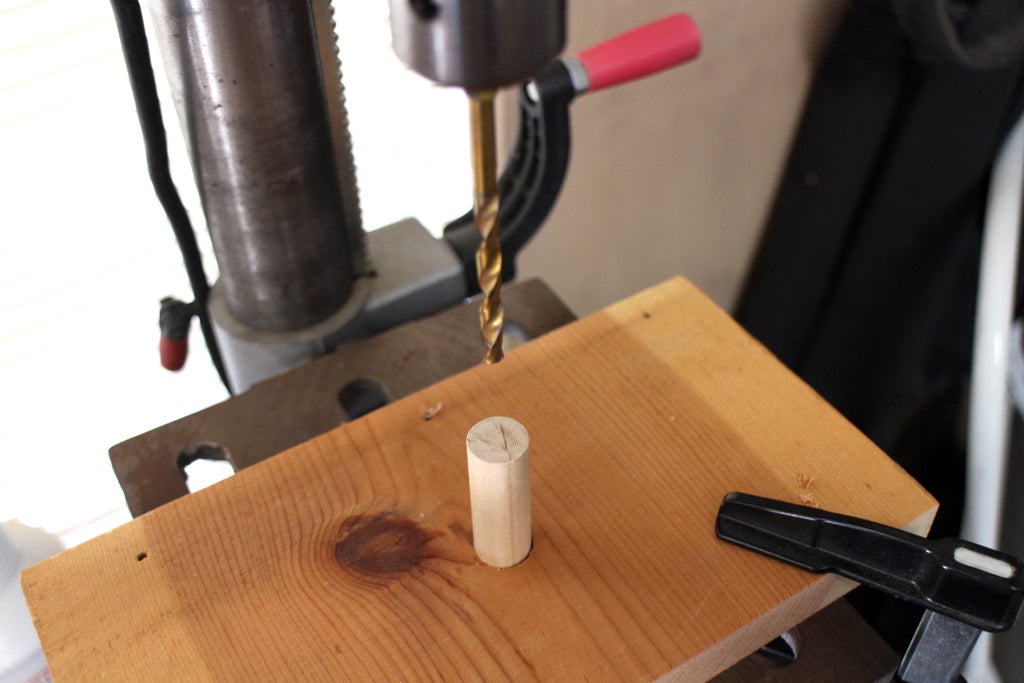
Keeping the drill press work base locked down, change up the drill bit the the size of the desired opening, and place the dowel into the shallow drilled opening in the sacrificial wood. Tighten the handscrew clamp around the dowel, ensureing the dowel stays centered and upright in the shallow opening.
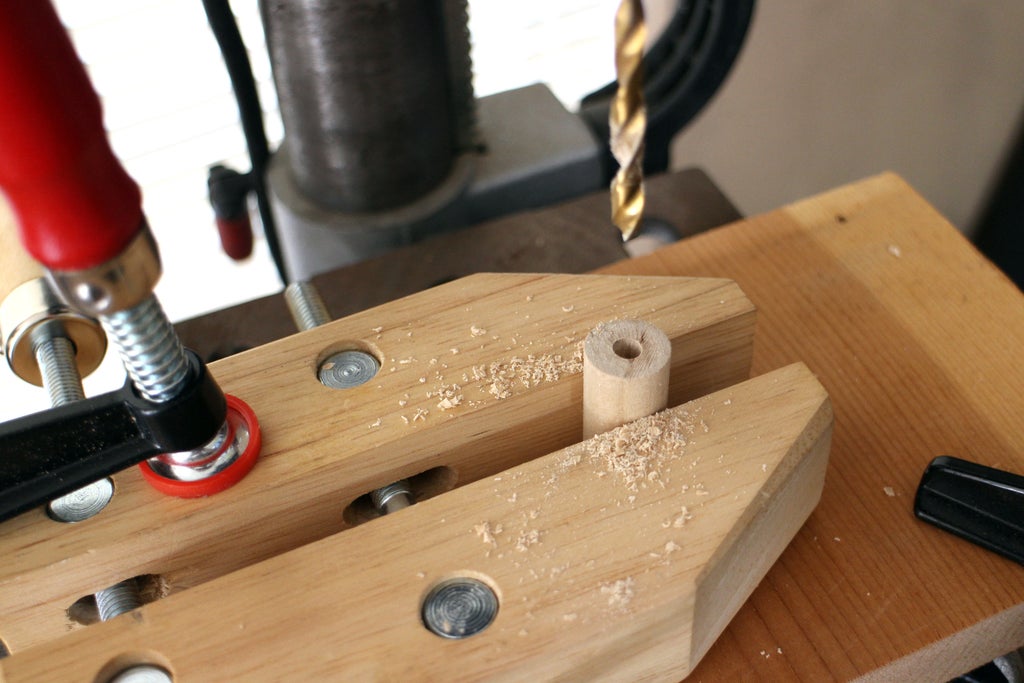
Lower the drill bit down into the dowel. The shallow opening will keep the dowel registered in the center of the drill press, and allow the smaller bit to drill perfectly in the center of the dowel.
Step 5: Drilling Straight

Drilling perpendicular to the work plane ensures proper screw alignment, and keeps your project neat. You don't need a drill press to make square drilled openings that are perpendicular to the work, all you need is a squared scrap to help guide the drill bit. Most wood you can buy will be roughly squared, allowing this trick to work with almost any piece you have on hand.
Place the squared scrap on your work piece and line the drill bit up against the side of the scrap, perpendicular to the work piece. Rotate the scrap around the drill bit to ensure the drill is perpendicular in more than one axes, then start drilling. This tip is discussed in more detail in the Drilling Perfect Holes lesson in the Woodworking Class.
Step 6: No-Burn Holes

Using a hole saw to make an opening in wood can cause burn marks, partially due to the speed of the bit, but mostly because there is a large contact area where the teeth meet the wood and there's nowhere for the wood shavings to go.
Standard drill bits have a helical twist that allows wood shavings to travel upwards and out of a drilled openings, hole saws do not. Start your hole opening and stop after the perimeter has been defined in the surface of the wood. Switch out for a smaller drill bit and create a cavity inside the hole that touches the perimeter of the desired hole opening, then switch back to the hole saw and continue drilling the hole opening.
The small cavity will act as a deposit for the hole saw savings and allow the hole saw teeth to flush the shavings away from the contact area, which should prevent burning.
Step 7: Fix Holes in Wood

Whoops! You drilled a hole in the wrong spot. No problem! This simple trick has your back, whether you're making erroneous hole or wanting to cover screws that are sunk far below the surface.
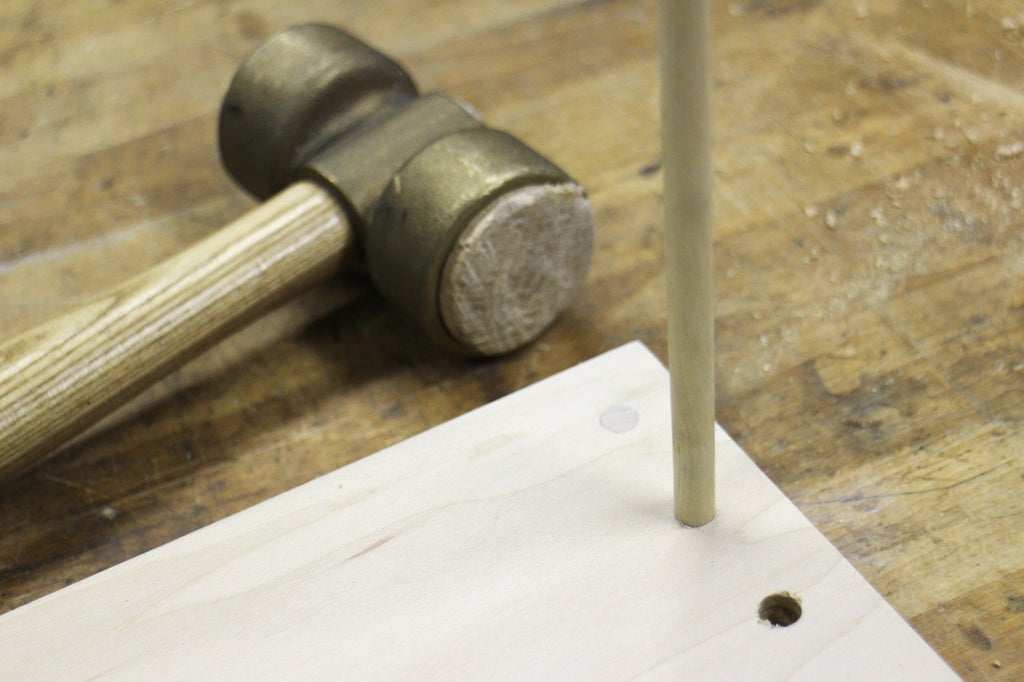
Find a wood dowel that matches the size of your opening, or use a plug cutting bit to make your own plugs from a scrap of the wood you are using.
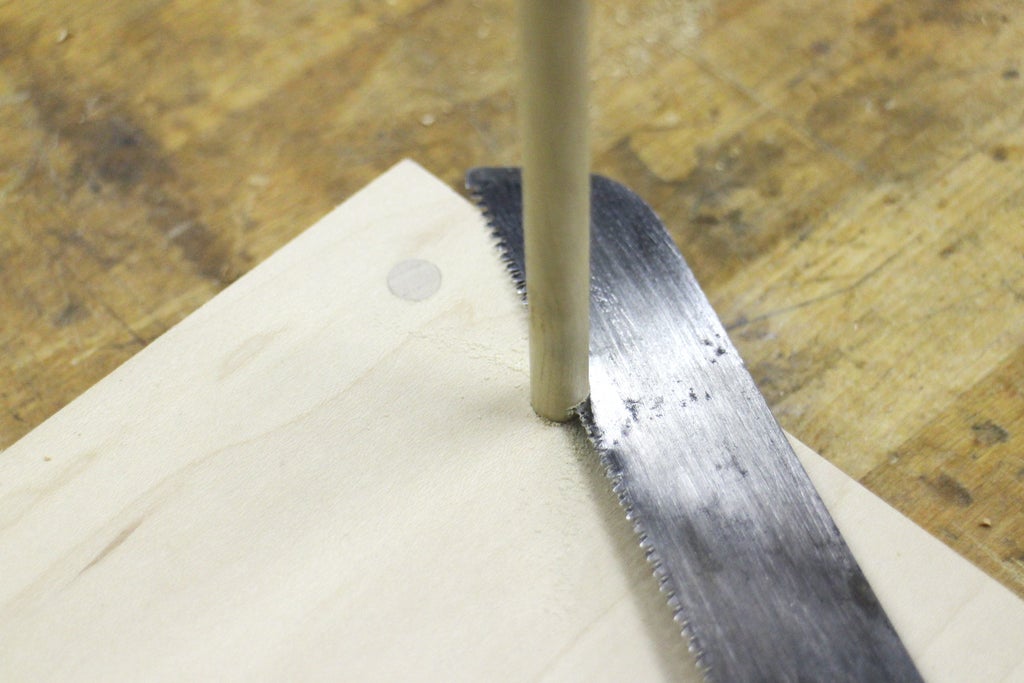
Insert the dowel (or plug) into the opening and saw close to the surface of the wood. There's no need to cut as close as possible to the surface, which could damage the wood if you slip, since sanding will smooth out the plug.
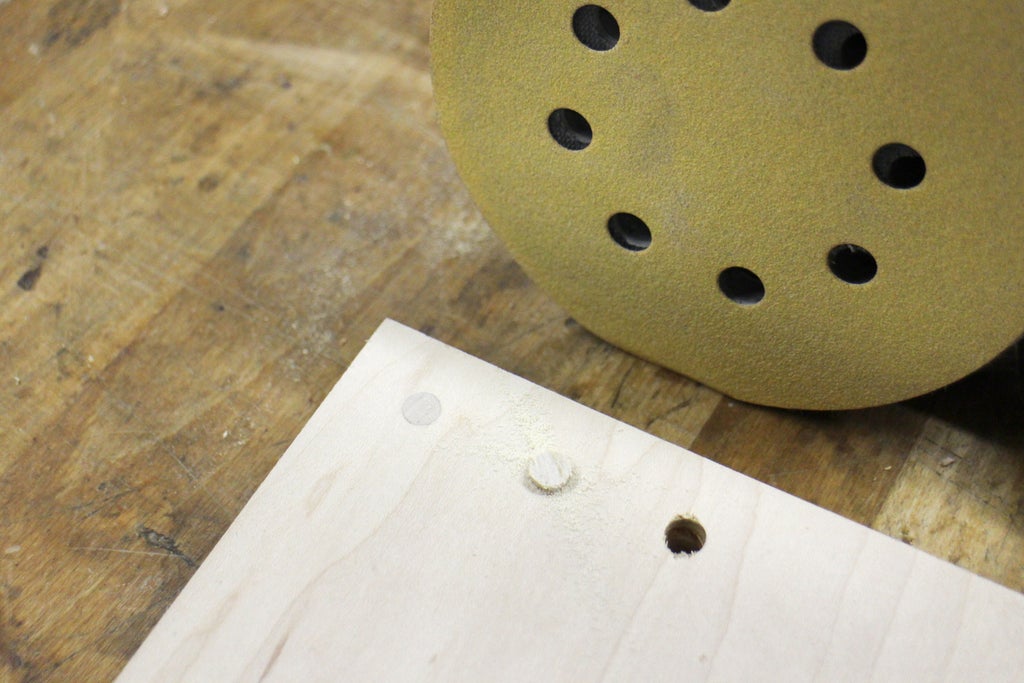
Use a medium grit sandpaper like 120 grit to smooth the plug and bring it level with the rest of the work piece. Though it won't look as good as new, it will look much better than a hole where there shouldn't be one!
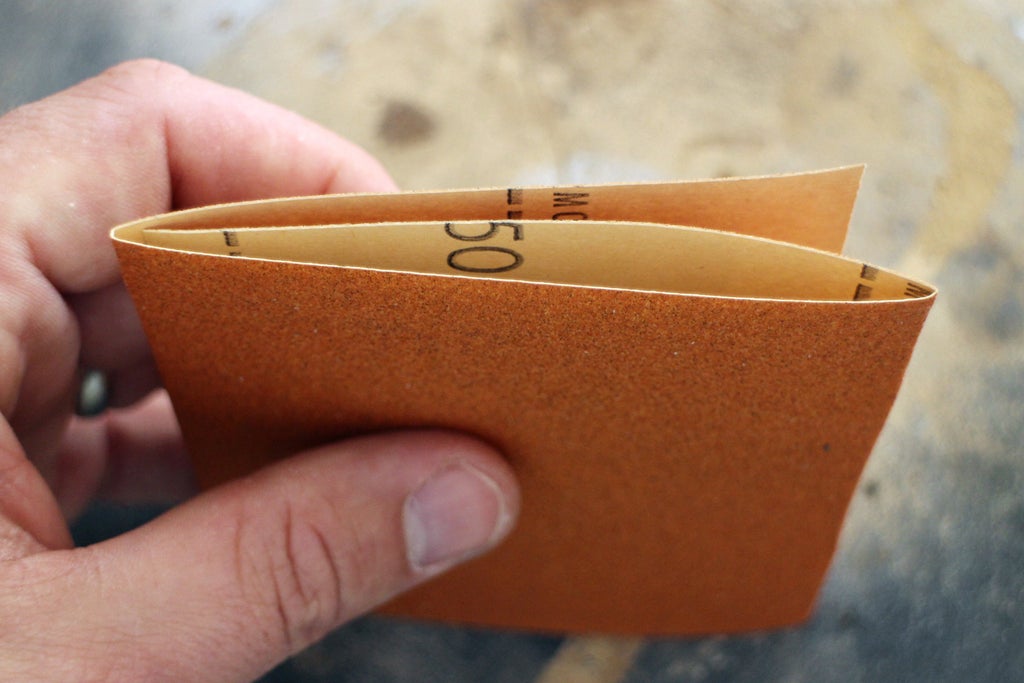
Step 8: Fold Your Sandpaper

The big advantage to folding sandpaper, over ripping or cutting it, is that there's always a firm crisp edge which allows for an easier time getting into all kinds of tight spaces. What you don't want to do is fold the sandpaper so that the grit side faces each other. Imagine a standard 8.5"x11" (A4) sheet of sandpaper, if you folded it lengthwise and then again widthwise, there would be two faces of grit against each other. In this configuration sanding with the grit faces together will result in wearing down those faces without them ever making contact with wood.
Many use the fold in quarters trick with a full sheet of sandpaper. Folding the sheet into quarters, then unfolding and making a small incision from the center outwards along one of the fold lines. Then, refolding so that a grit side is to the backside. However I don't usually need that much sandpaper at once, so I use the fold in thirds method.
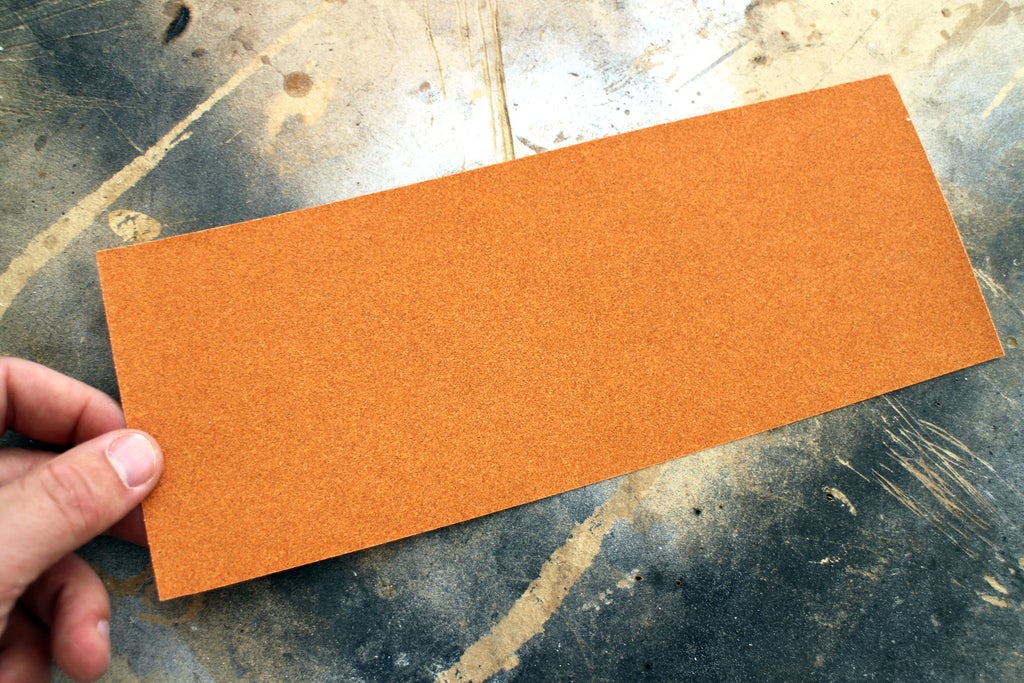
Take your sheet of sandpaper and place it grit-side down. Fold each short end towards the middle, overlapping each other.
Folds are pressed into the sandpaper separating it into equal thirds. The grit face will be facing the backside of the sandpaper and not be worn down prematurely.
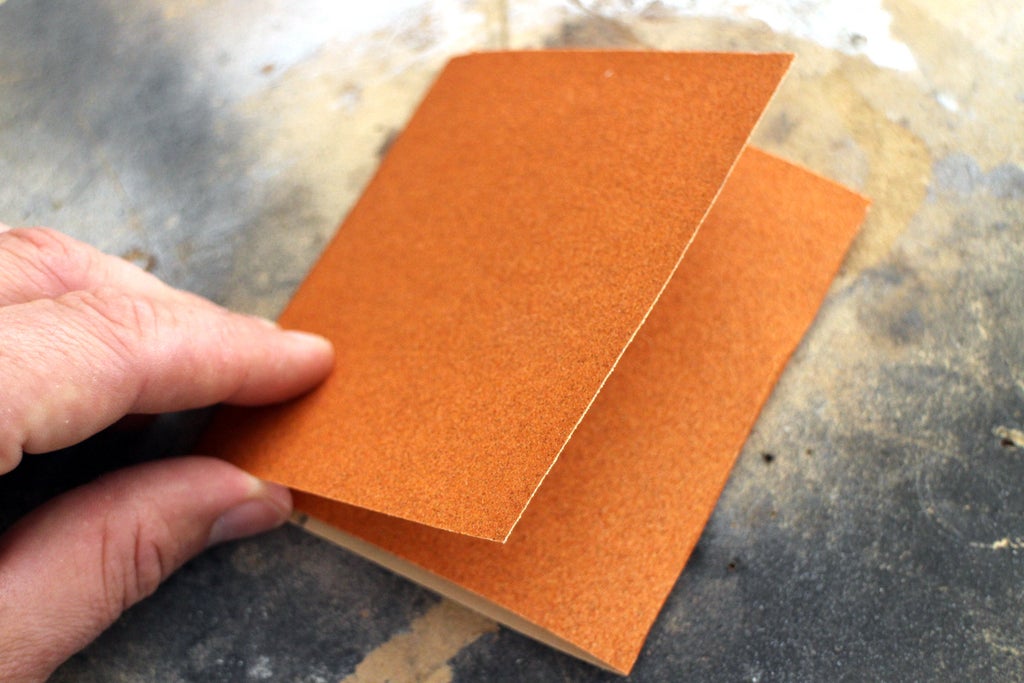
When the front surface has been worn down by sanding, flip it over to the backside. When that side is finished, open up the flap and refold to reveal a fresh face for sanding.
Weather fold-in-quarters, or fold-in-thirds; folding to protect the grit is the answer to sandpaper sizing.
Step 9: Clean Tape Rips

Adhesive tape is one of the most vital (and underappreciated) supporting materials in the shop. It's great for holing pieces together in a pinch, for labeling, and a host of other odd jobs. This handy little trick is a neat way to cut tape from the roll quickly and leave a nice clean tab for the next time you need tape.
If the animation above isn't obvious, here's a breakdown:
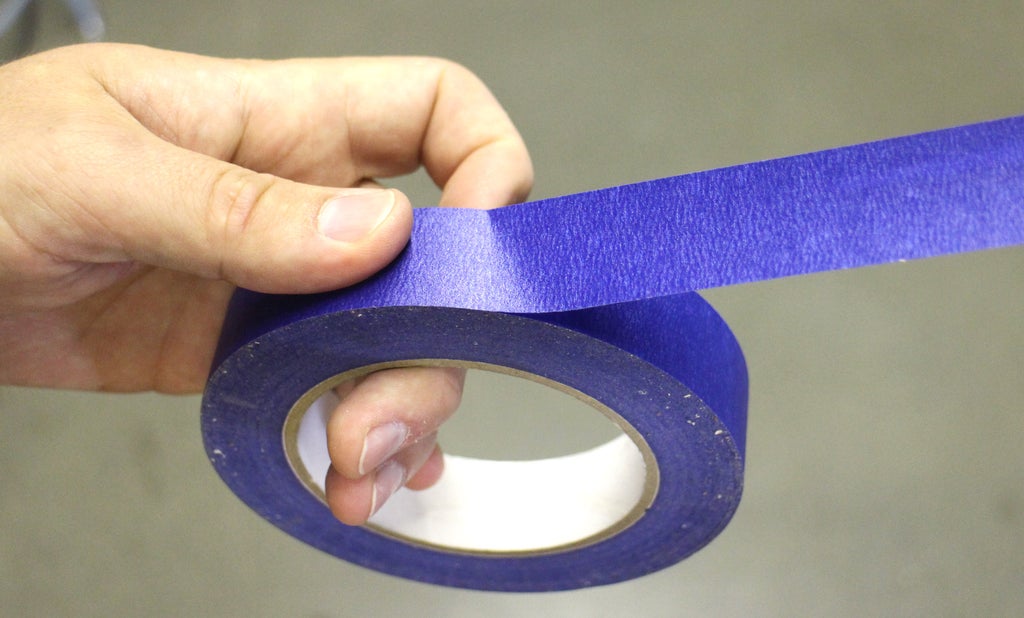
Pull the length of tape you need from the roll.

Twist the tape to fold at a 45° in on itself where the tape meets the roll.
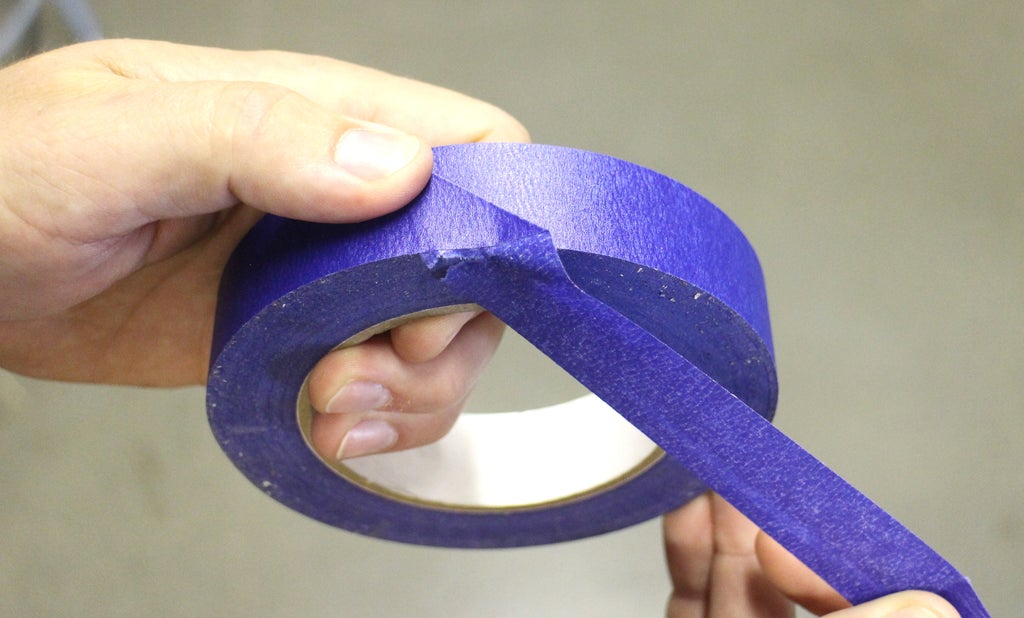
Pull downwards against the roll edge to cut the tape and leave a tab at the end of the roll.
Step 10: Layering Finishes

Applying a finish to your project is one of the most satisfying parts of any woodworking project. But, not every project will need a simple coat of mineral oil to complete. Some woodworking finishes require a few different approaches to how they can be finished.
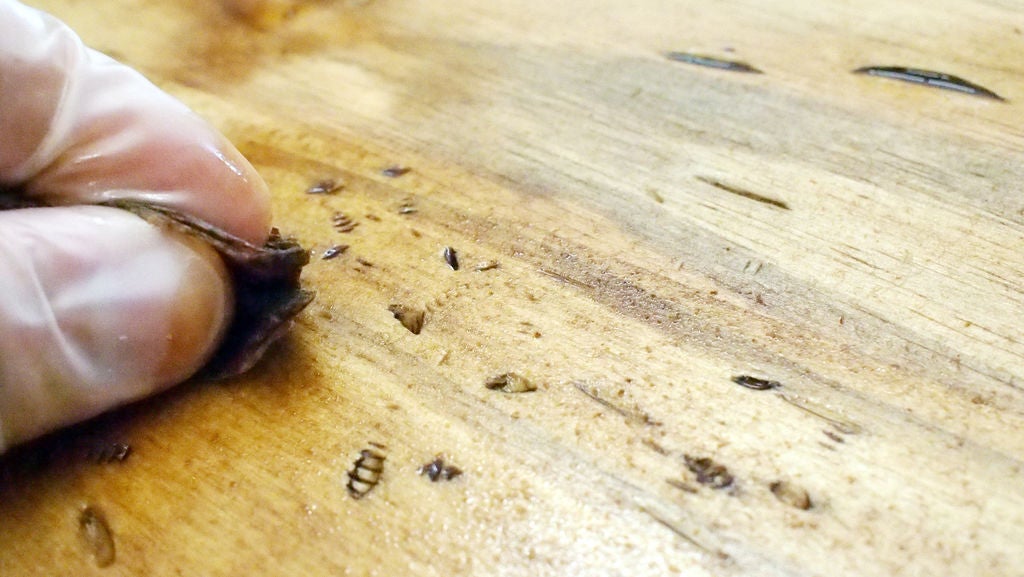
A great option for giving your wood some texture when it doesn't have any is to artificially distress it. I've explored a few methods to distress wood in this Instructable. Adding some fatigue to your woodworking projects is a great way to add depth, especially when combined with a stain or other finish.
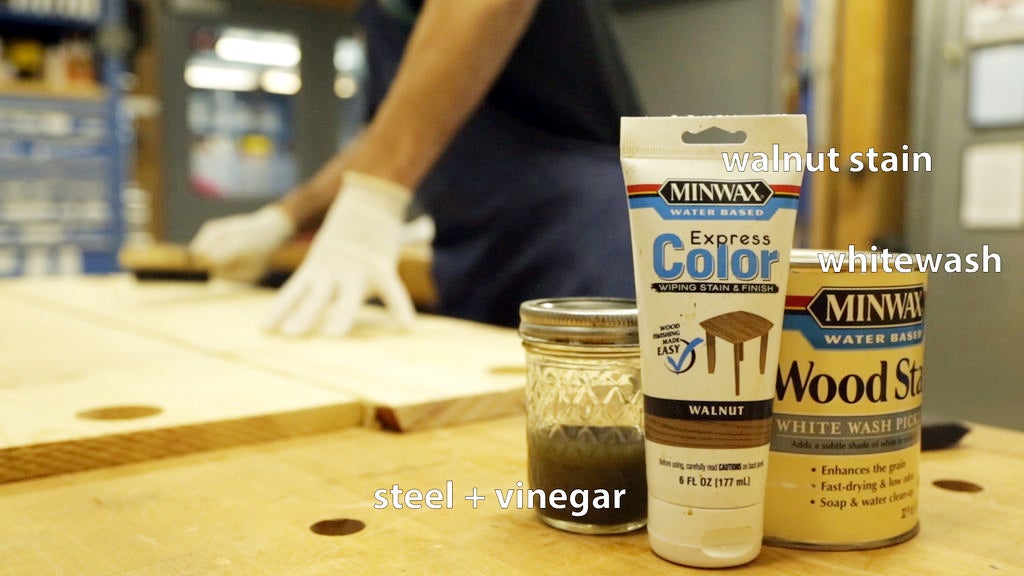
Off-the shelf stains are great, but you can easily make your own tea stain which will chemically tint the wood from the tannin in black tea. Combine this with a store stain, and maybe a whitewash pickling solution, and you've got layered depth that will really make your project standout.

Do you have your own woodworking tips that keeps you productive?I want to see it!
Happy making :)


