

Introduction: Alexa Ruxpin - Arduino & Raspberry Pi Powered Voice Assistant


There are tons of virtual assistants out on the market: Siri, Ok Google, Alexa, etc. As if virtual assistants weren't creepy enough, I had this crazy idea...what if I made the virtual assistant real...kinda. Enter Teddy Ruxpin, an old animatronic teddy bear from the 80's and 90's. These bears were all the rage when I was a kid. Naturally, I decided to take the creepy little bear and hack it so that it ran Amazon Alexa. Now every time you ask it a question, it will move its eyes and mouth to answer your question! Let the nightmares begin ;-)
Step 1: Who's Your Teddy?


As the vessel for our virtual assistant, I chose an old Teddy Ruxpin bear. In its original condition, it had a speaker, tape player, and moving mouth and eyes that would move to the tape player audio. So it's a perfect platform for adding Alexa. I got mine off E-bay, but unfortunately it was completely non-functional, so before we can turn this into the ultimate Alexa-bot, we first need to find out why it's broken and try to get it working again.
Step 2: Diagnosing the Patient

With absolutely zero knowledge of how the Teddy Ruxpin works, I turned to my external brain drive (the internet) for answers on where to start. I found out that there were three versions of the original teddy, so before I could troubleshoot it, I needed to find out which version I had. The chart below shows how you can tell which version of the teddy you have. Version 1 had a metal tape player and a green circuit board, version 2 had a plastic tape player and a green circuit board, and version 3 had a plastic tape player and a beige circuit board.

So unscrewing the tape player on the back of the teddy, it revealed that I had a plastic tape player with a green circuit board i.e. version 2.
With this knowledge, I found schematics online showing how the motors that move the eyes and mouth were connected. Finding that the red and blue wires on each motor were for power, I stripped them and connected them to a 9v battery to see if there was any movement in the motors. Nothing. These servos are dead dead. That means we're going to have to dig deeper and replace the servos all together.


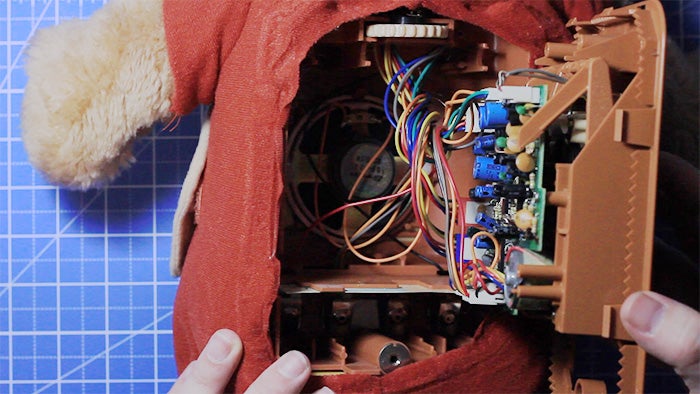
Step 3: Digging Deeper


To get to the servos and replace them, we have to open up the head of the Teddy Ruxpin. Just above the volume knob on the back of the Teddy, there should be a seam on the shirt that you can cut apart. This should allow you to slide the shirt and skin over the head exposing the foam skill. The foam skull is glued to the bear, so you can use a knife to separate it and remove it. At this point, you should now see the servos that make this bear come alive! There should be 3 servos for versions 1 & 2 of the bear and 2 servos for version 3.
Step 4: Upgrading the Servos
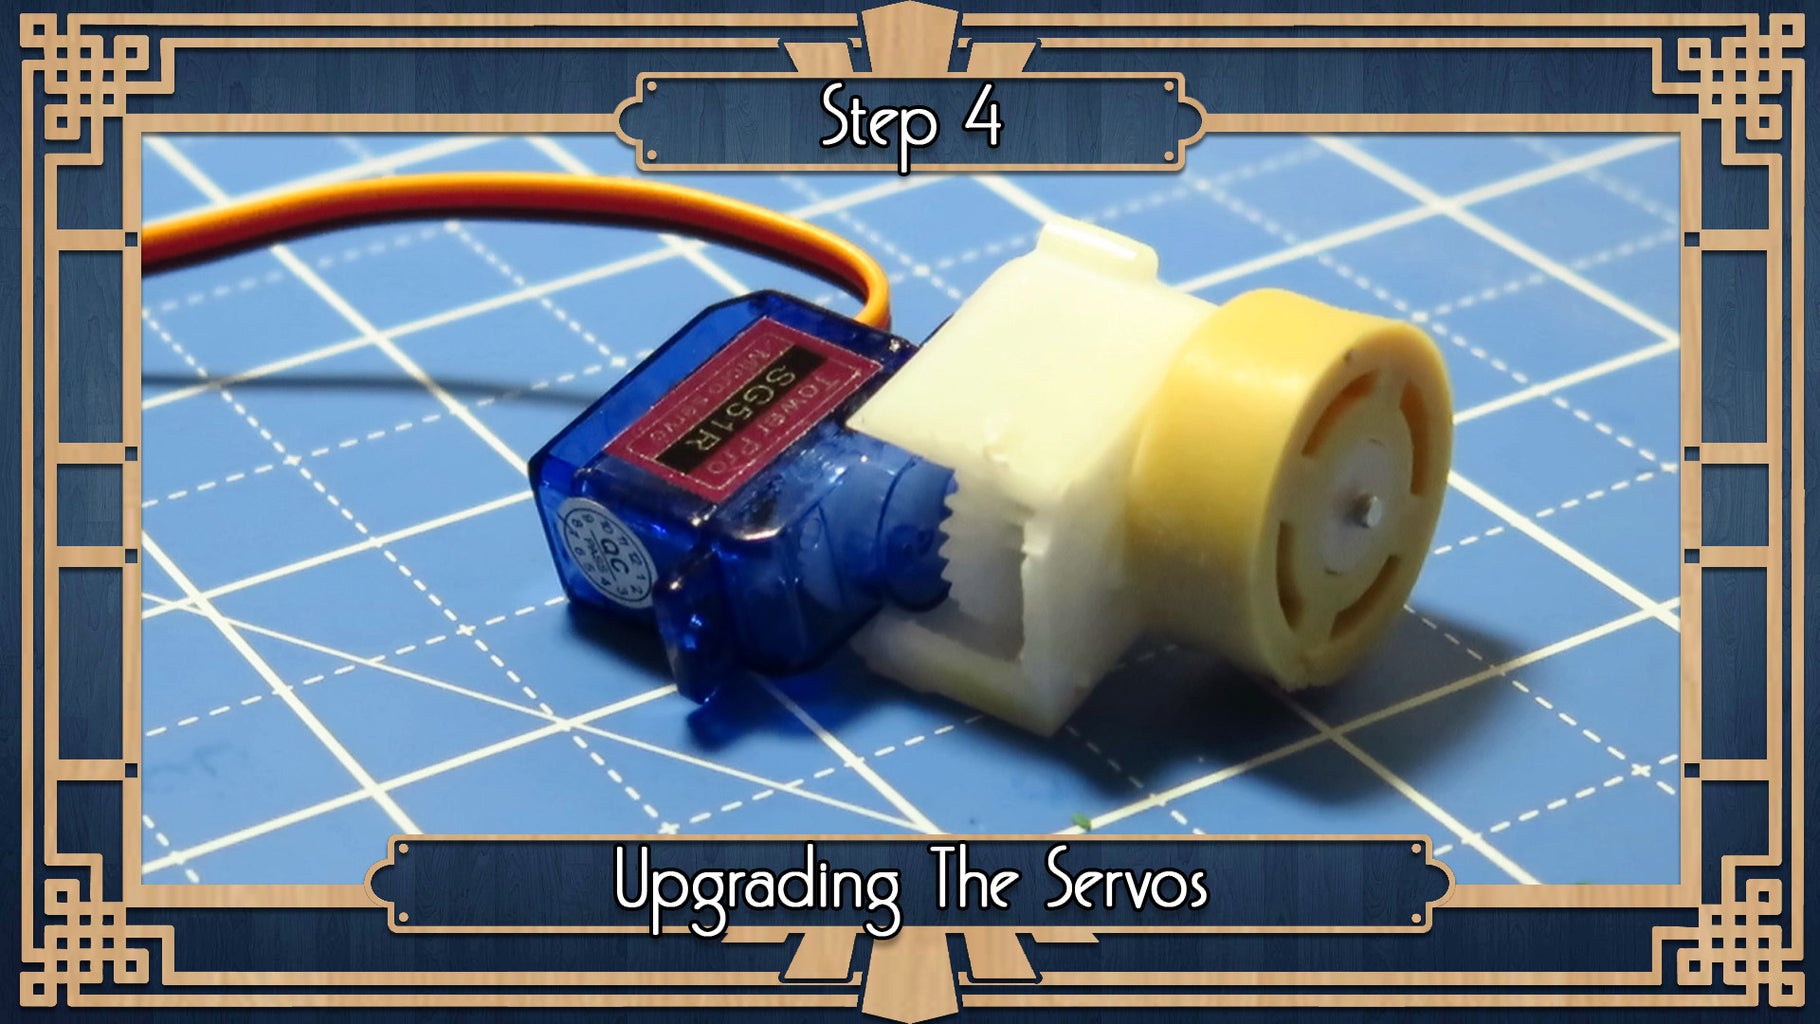


Once I was able to get to the servos, I tested them again and found that they were completely dead. So I decided to just replace them with newer servos. I wanted to retain the rubber wheel and gear fixture, however, because this is what keeps the servo mounted inside the head and turns the facial expressions. What I ended up doing was removing the motor and most of the gears, salvaging the last gear to mount atop a new servo. I then positioned this new servo and gear so that it turned the wheel. Then I used a Dremel to shape the plastic casing so that the new servo would fit. Then I just hot glued everything in place. Before continuing I tested out the servo by connecting it to an Arduino and then loading up the Servo Sweep sample code. It worked perfectly! So after doing the same thing for the remaining servos, I put them all back inside the head.
The wires for the new servos needed to run from the head, through neck into the body, so I had to solder some extra wire to make the wires from each servo longer. Then I ran them through to the body (making sure they were all labeled so that I knew which motor each set of wires controlled), and then I put the Teddy Ruxpin back together.
Step 5: Syncing Audio to Motor Movements


With new servo's, I'm also going to add a new Microcontroller to the Teddy. As previously mentioned, the microcontroller of choice is Arduino. Controlling a single servo with an Arduino is simple. You just connect the ground wire to Arduino ground, power to Arduino power, and the data wire to one of pins 9-13. Controlling three servos requires a bit more planning, however, because the Arduino can't power those servos on its own.
So to wire everything together, I used the diagram below and I used a 9v battery in the demo, and then a 5v external power supply later on to power the servos.
Now for the tricky part...syncing the servos with an audio source. It's tricky because general audio uses analog signals, but the servo movement requires digital signals. Luckily, the Arduino makes this conversion pretty simple. To get an audio signal, I cut the ear buds off some old headphones and stripped the wires. I connected the ground wire (usually blue, black or green) to the Arduino ground pin, and the signal wire (usually red) to the Arduino analog pin A0. I added an LED to pin 13 and ground to help visualize if things were working.
I then soldered everything to a homemade Arduino shield that included an audio input jack and an extra 5v USB jack to power the servo motors separately (see above image). The extra ground wire coming from the shield goes to a Raspberry Pi that we will be covering in the next step.
Then the conversion can be done in code. You can download my Alexa Ruxpin code from this github page. Basically it takes the audio input and says that if it is below a certain value, open the mouth slightly. If it is above a certain value, open the mouth more. So now you can plug in any audio source and the mouth should move in sync to the audio signal, and the eyes should blink every 15 seconds.
Step 6: Connecting the Raspberry Pi


With the bear now moving in response to an audio source, we can work on adding a virtual assistant component. This generally requires some sort of computing mechanism, so what better to use than the small, hacker friendly, Raspberry Pi 3.
What we're wanting to do is use the Pi to activate Alexa (through a push-button) so that we can ask it a question and it gives us a response through the movements and speaker of the Teddy Ruxpin. So obviously there are a few pieces of hardware we need to make this work. First is a USB Microphone to record our audio and second is some wire and a push button.
In order to use the built in speaker to the bear, we first need to solder the wires to a male audio jack so that we can plug it in. So what we can do is use a headphone splitter to plug into the Pi and have one jack going to the speaker and the other going to the Arduino.
After plugging in the USB Microphone, you can connect the button by running one wire to a Raspberry Pi ground pin, and one to the GPIO18 pin. You'll also want to connect a different ground pin to a ground pin on the Arduino. At this point, you can boot the Pi up to the Raspbian OS, connect it to wifi and give it a static IP address.
Step 7: Adding Alexa

Now that the Pi's set up, let's install the A.I. software. The popular options are Siri, Ok Goole and Alexa. I decided to go with Amazon's Alexa service because it can easily be installed on a Raspberry Pi.
To install Alexa on the Pi, you first need to set up an Amazon Developer account for Alexa by following these steps:
- Login to developer.amazon.com with your Amazon account
- Click on the "Alexa" tab at the top and choose the "Alexa Voice Service Get Started" button.
- Under "Register A Product Type" choose "Device".
- Give your new program a type id (any name should do) and a display name and the click "Next".
- Create a new security profile and give it a name.
- Select the "Web Settings" tab and click "Edit".
- Under "Allowed Origins" add these values (if you know them):
- http://localhost:5000
- http://[your Pi's P address]:5000
- Under "Return URL's" add these values (if you know them):
- http://localhost:5000/code
- http://[your Pi's IP address]:5000/code
- Click next and enter details about your device
- Click next again and choose "No" for Amazon music and click "save".
Now you can boot up your Raspberry Pi and install the Amazon Alexa software. You could go with the official software, but I decided to go with an easier python based fork called "Alexa Pi". Here's how you set it up.
- From your Pi's command line, clone the repository
- git clone https://github.com/sammachin/AlexaPi
- Navigate to the folder and edit "creds.py"
- cd AlexaPi
- nano creds.py
- Enter in the ID information that was generated under the "security profile" step from above (step 5). Save and exit the document.
- Run the auth_web python script
- python auth_web.py
- Now in your browser, go to http://[your Pi's IP address]:500 and login to your Amazon account. This will add an authorization token to your creds.py script.
- Open up rc.local and add the main.py script to the bottom of the list
- sudo nano etc/rc.local
- python home/pi/AlexaPi/main.py &
- Lastly, in the applications menu, select Preferences > Raspberry Pi Configuration and choose to boot to CLI instead of Desktop.
- Reboot your pi.
After your Pi reboots, Alexa should automatically start.
Step 8: It's Alive!

For the last steps, I ended up mounting the button in an easily accessible place on the back of the bear, placed all the electronics inside the bear, and powered everything up using USB power banks. Once it's up and running, just press the button, ask Alexa a question, and listen to/watch the response! Check out the demo below!

Second Prize in the
IoT Builders Contest

Participated in the
Arduino Contest 2016

Participated in the
Epilog Contest 8


