

Introduction: Brass Elephant Necklace


In this project, I took 5.56 bullets shells and reclaimed them to a handmade brass necklace, hope you will enjoy the process and the outcome!
Make jewels, not war ;)
Step 1: Design


I decided to go for a necklace as I wanted for a while to create a gift for my wife.
I needed something she loves and which will be easy to make in small dimensions...
I started doodling elephants (she loves them) until I came up with a final design which shapes almost as a circle...
The final design is five elephants pendants which will "follow" one another, something like an "Elephant Convoy" (the picture of my sketch might be more descriptive).
Step 2: Tools & Materials


Tools:
- cutting knife
- black marker
- wire cutter
- rotary tool
- pliers
- nail
- hammer
- copper pipe cutter
- drill + 0.5 drill bit
Materials:
- empty 5.56 bullets
- old necklace
Step 3: Flatten the Brass


Safety Note #1: Never use live ammunition for any kind of project. These bullet shells are expended, meaning they have no primer or powder.
After that said, we will need to transform the bullet from a pipe into a brass sheet,
- with the copper pipe cutter, remove the bullet trigger
- cut the bullet using the wire cutter
- with two sets of pliers open the bullet pipe so it will easy to flatten
- hammer the brass to flat it.
Step 4: Outline Shape of the Elephant


To have the flattened brass sheets in the shape of an elephant, I created a paper elephant, to have the elephant outline and to be able to replicate the elephant shape.
After drawn and cut the paper elephant, I marked the shape on the lower part of the brass (Note: the bullet is thicker on it's lower part), I managed to have two elephants out of each brass sheet (bullet).
In total, I planned to have 5 elephant pendants for the necklace, but I was sure there will be mistakes, so I cut 6... (retrospectively, I was right, one of the elephant's nose was too thin and broke...)
Step 5: Inline Shape of the Elephant


In this step, I used the same tools, but it required much more gentle work.
Once I finished cutting the brass to have the outline of the elephant, I started creating the inline texture and the elephant's details.

I used the rotary tool, on a low speed, to "polish" the brass in horizontal lines, this way I was able to emphasize the elephant's details by polishing it vertically. In this way, I have polished the elephant's ear and nails. This method creates a contrast between the two directions of polish.

For the eye, I gently pounded with a nail to engrave a small dot.
Note: for all of the inline details, I suggest first try on another piece of brass, just to get the hang of it and to practice not on the real thing. it took me some time to get to the above methods with lots of trial and error....

Step 6: Attach Them to the Necklace


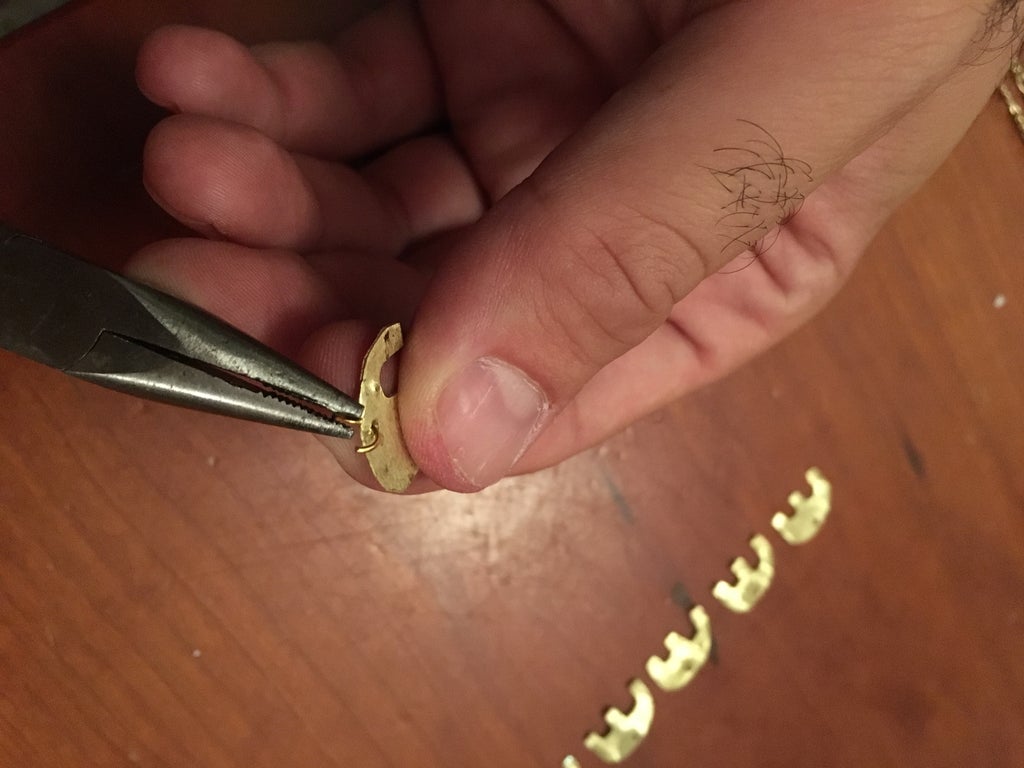
After all elephant pendants were ready, I drilled a small hole for the chain loop.
To do so, I again pounded gently using the nail to create an engraved socket for the drill (see picture), this will ensure a clean hole without damaging the pendant. Then I drilled a hole for each of the pendants.

Since the pendants were handmade and not totally equal to one another and since I had no way to know where exactly to place the hole, I noticed that they needed to be vertically balanced. To fix this, I inserted a thread through its hole, just to see the weight balance and for the ones that were not balanced, I trimmed it with the rotary tool (so it will be thinner), there are some imperfections, but for my opinion, the result is very good!
All there was left to do is to connect the pendants to the chain. I used one of my wife's old and unused necklaces, which had gaps every 2cm.
I connected the elephants to the chain using 5 links from the end of the necklace, the length adjustment links.

Step 7: Done!


I wrapped it in a small box, she absolutely loved it!!!
If you liked it, don't hesitate to leave a comment or even vote ;)
Thanks!
Y.

Participated in the
Metal Contest 2017

Participated in the
Reclaimed Contest 2017


