

Introduction: DIY Arduino Rain Gauge


Today let's see how we can build a rain gauge, to measure the amount of rain falling. Building this rain gauge is not too difficult, and the total cost will be less than 10€. Our rain gauge is connected to an Arduino, which shows the amount of rain on an lcd display.
To see more details about the construction, watch the video on YouTube (it is in Italian but it has English subtitles).
Supplies
To construct the rain gauge, we will need:
- an M4 stainless steel threaded rod
- M4 self-locking nuts
- washers
- a flat aluminum profile
- a piece of plexiglass
- an Arduino (UNO, Nano or other)
- a hall effect sensor
- a magnet
- a few meters of thin 3-wire cable
- an LCD display with an i2c interface
Tools I used:
- tin soldering iron
- 3D printer
- wrenches
- computer with Arduino IDE
Step 1: How It Works

Before we start building, let's see how the rain gauge works. In the base is a piece formed by two kinds of spoons, which is free to rotate. Rain is collected by the funnel and piped to the center. The water then fills part of the center piece first. At some point the piece turns over from the weight of the water, and the other half is filled. This cycle goes on, and each time the piece turns means that a certain amount of water has passed through. A magnetic sensor detects this movement, and each time adds a certain amount to the total.
Step 2: 3D Printing

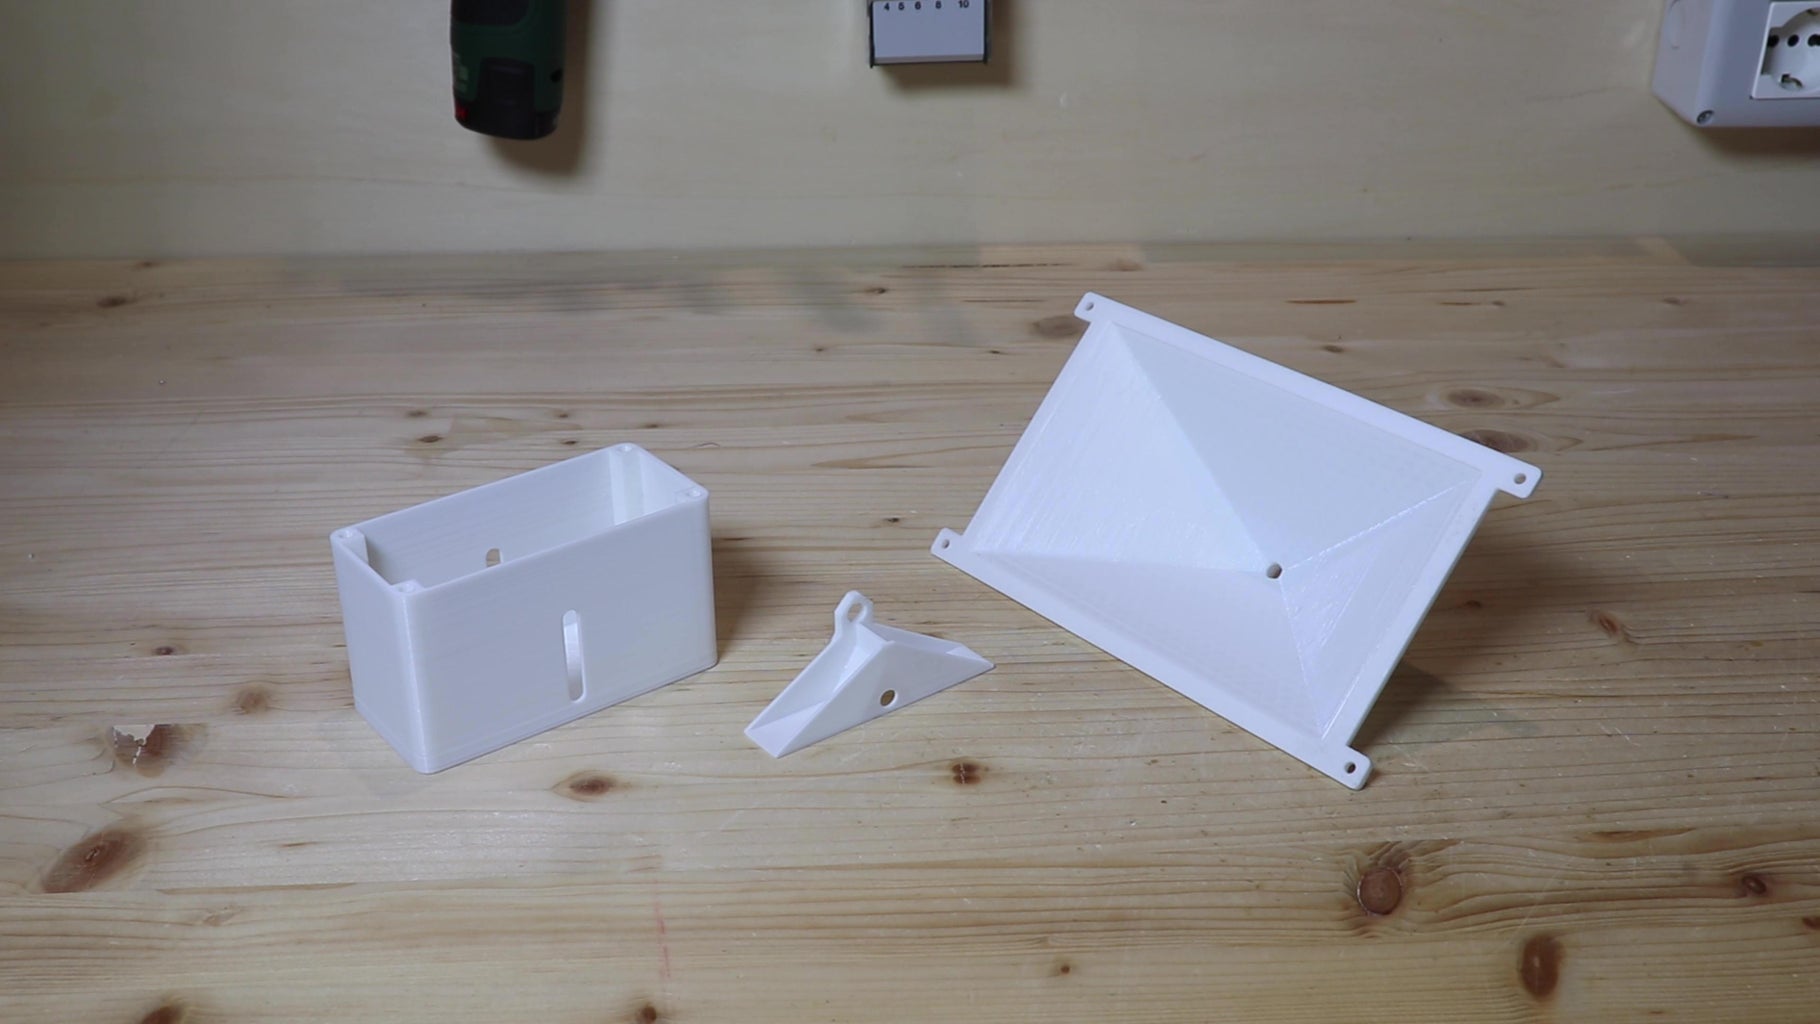
First, I 3d printed the various pieces of which this rain gauge is composed. I used white PLA to print them. PLA is not the optimal material to keep outside, and other materials, such as PETG, are better. However, I have other objects printed in PLA that have been outside for more than 6 months and have never had any problems. Below are the .stl files of the drawings, and the Tinkercad project link where you can edit the drawings.
Pluviometro


Step 3: Assemblying


First, I cut a piece of M5 threaded rod. To file the end well, I spun the threaded bar with the electric screwdriver, holding the file steady. Then I put a self-locking nut on the threaded bar, threaded the center piece and put another nut on it. I fastened the threaded rod to the base as well, in the grooves. In the end, I have the center piece moving freely, stopped by two self-locking nuts and two washers, and the threaded rod secured at the two sides with nuts and washers.
Step 4: Magnetic Sensor
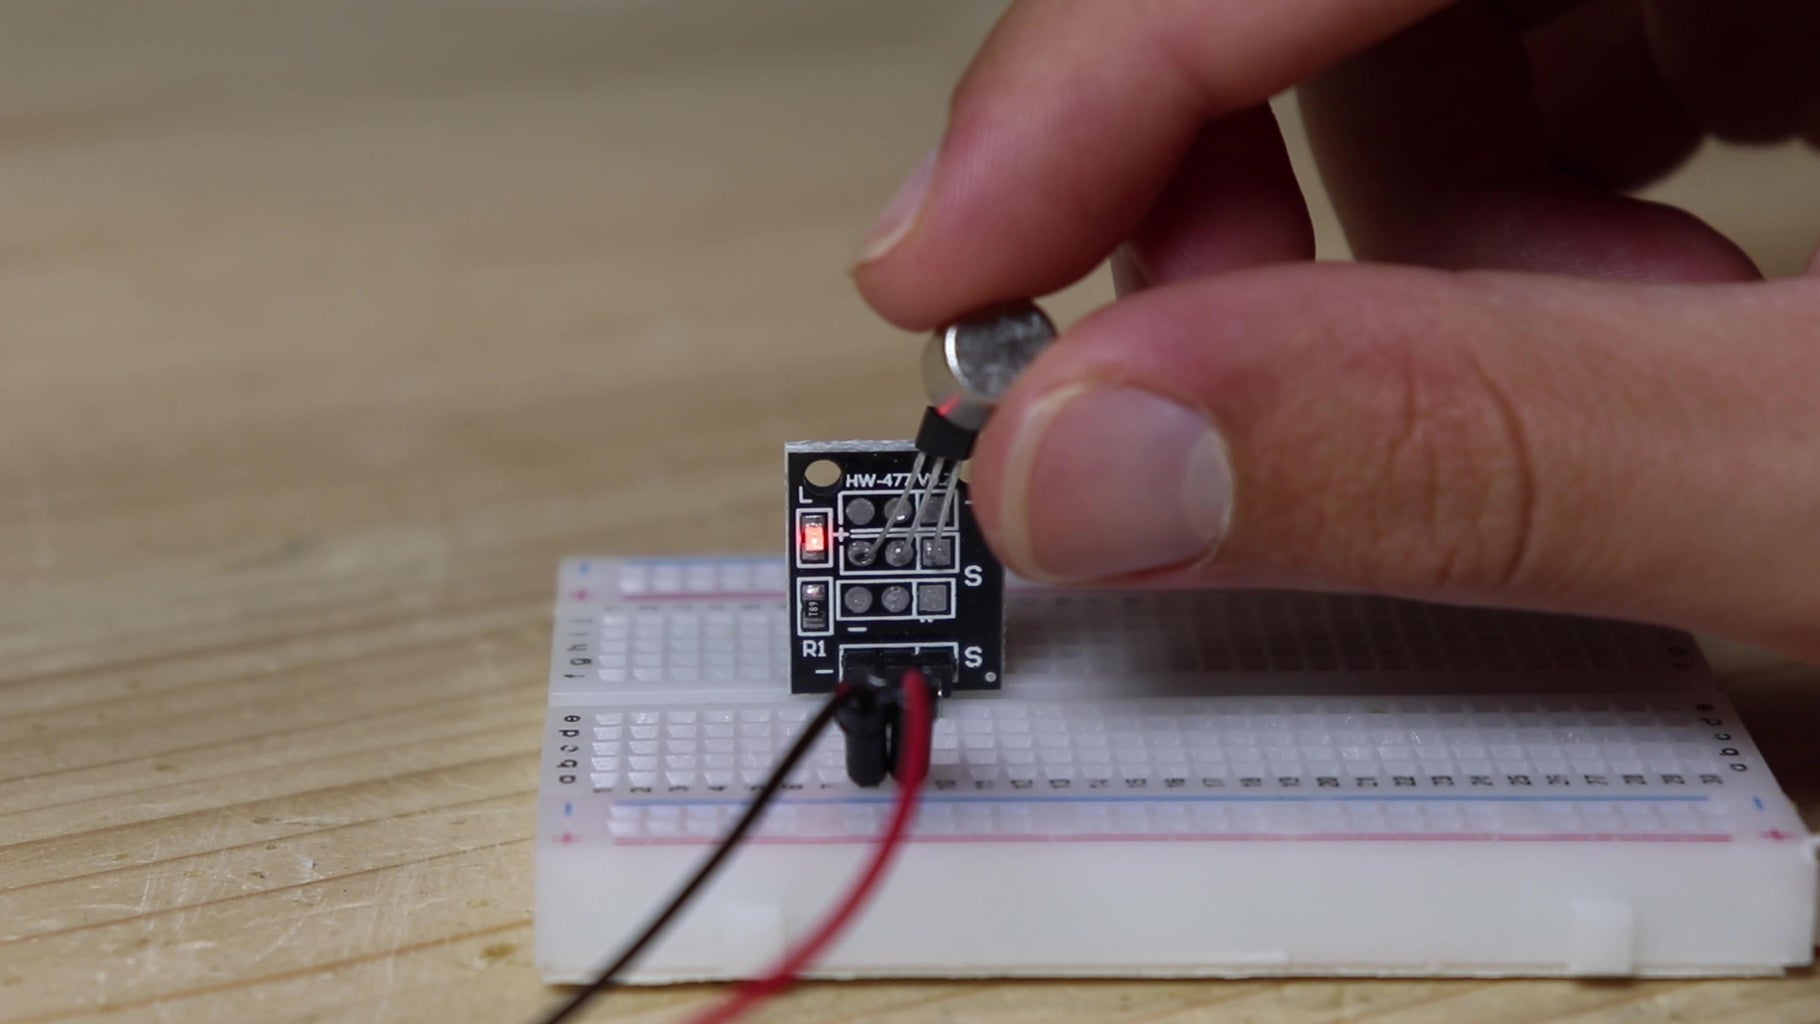


The center piece moves as water passes by, and we will use a hall effect sensor and an Arduino to detect the movement. Hall sensors are magnetic field sensors, in fact when I approach the magnet the LED turns on and when I move it away it turns off. To connect the sensor to the Arduino I will use a telephone wire, which has 4 wires in it. With the tin soldering iron I removed the connector that the sensor board had, and soldered three wires to the contacts for signal, positive and negative. I put the sensor in a clear shrink sleeve to protect it from water. At both ends I put some hot glue on it.
Step 5: Mounting the Sensor


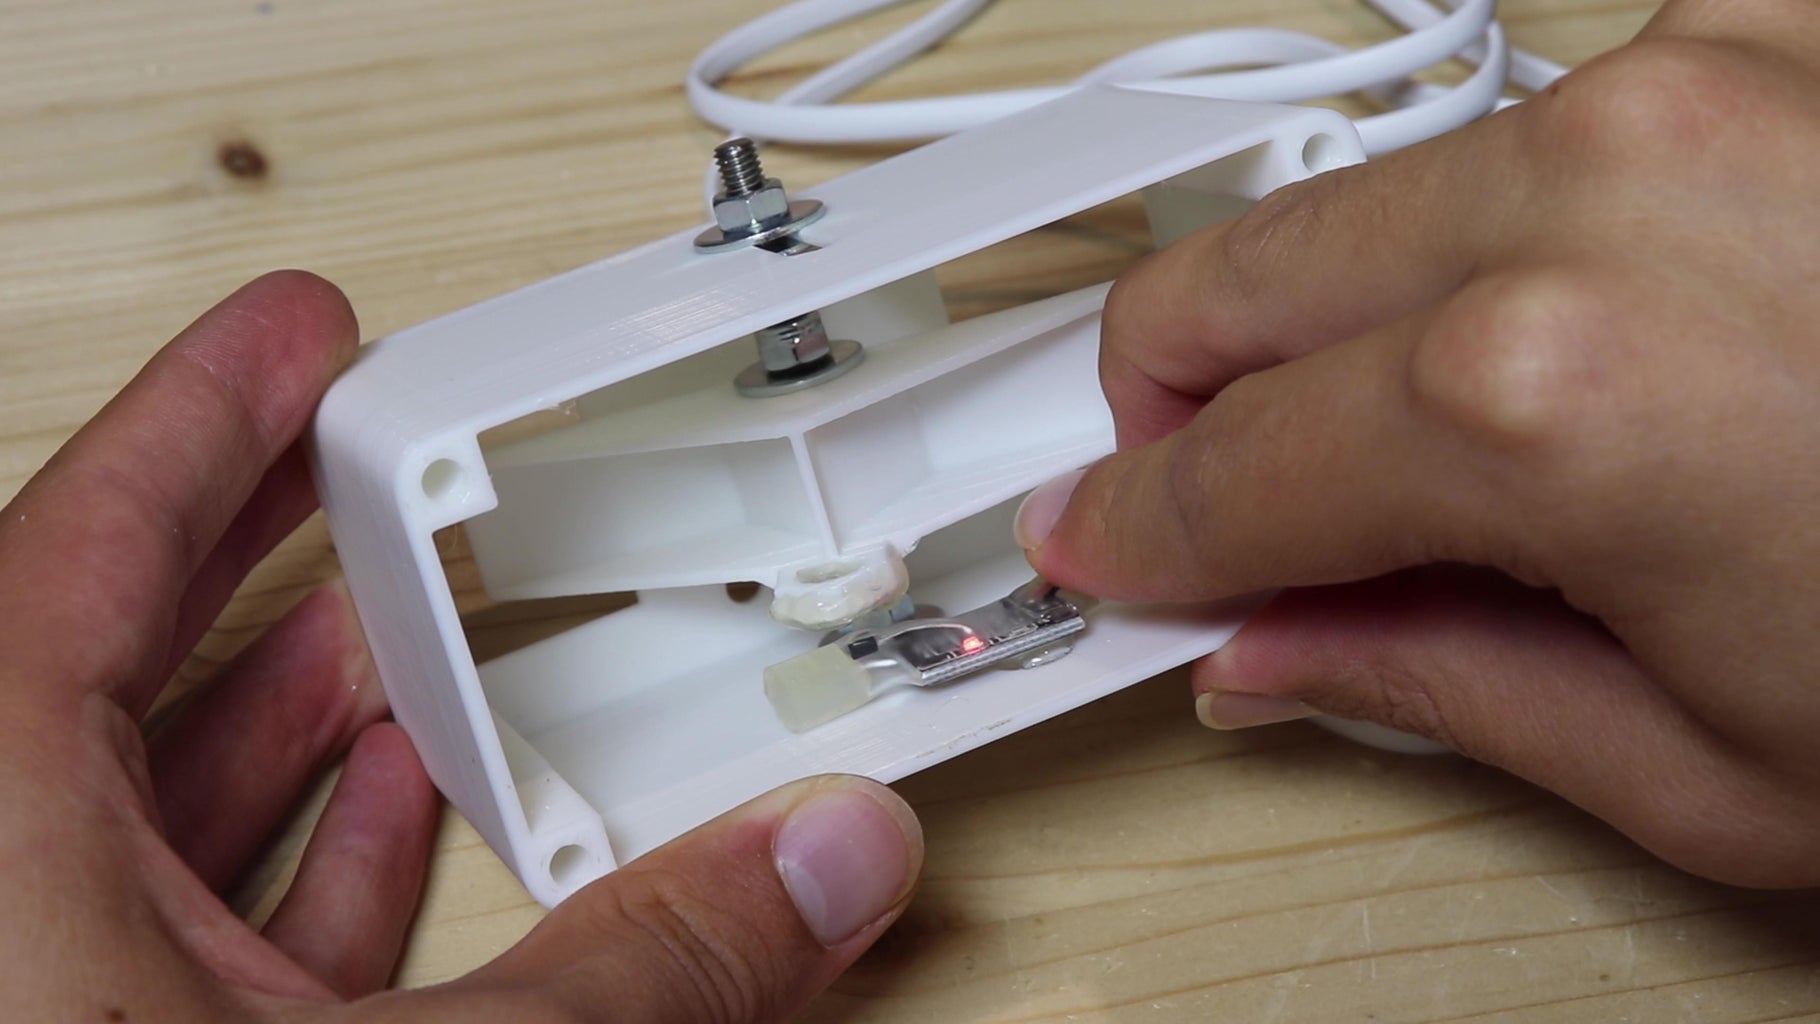

Then I glued a magnet onto the center piece. I glued the sensor to the base, so that the magnet activates it when the center piece is in one of two positions, and I also put a cable tie on it to better secure the sensor.
Step 6: Assemblying Again...


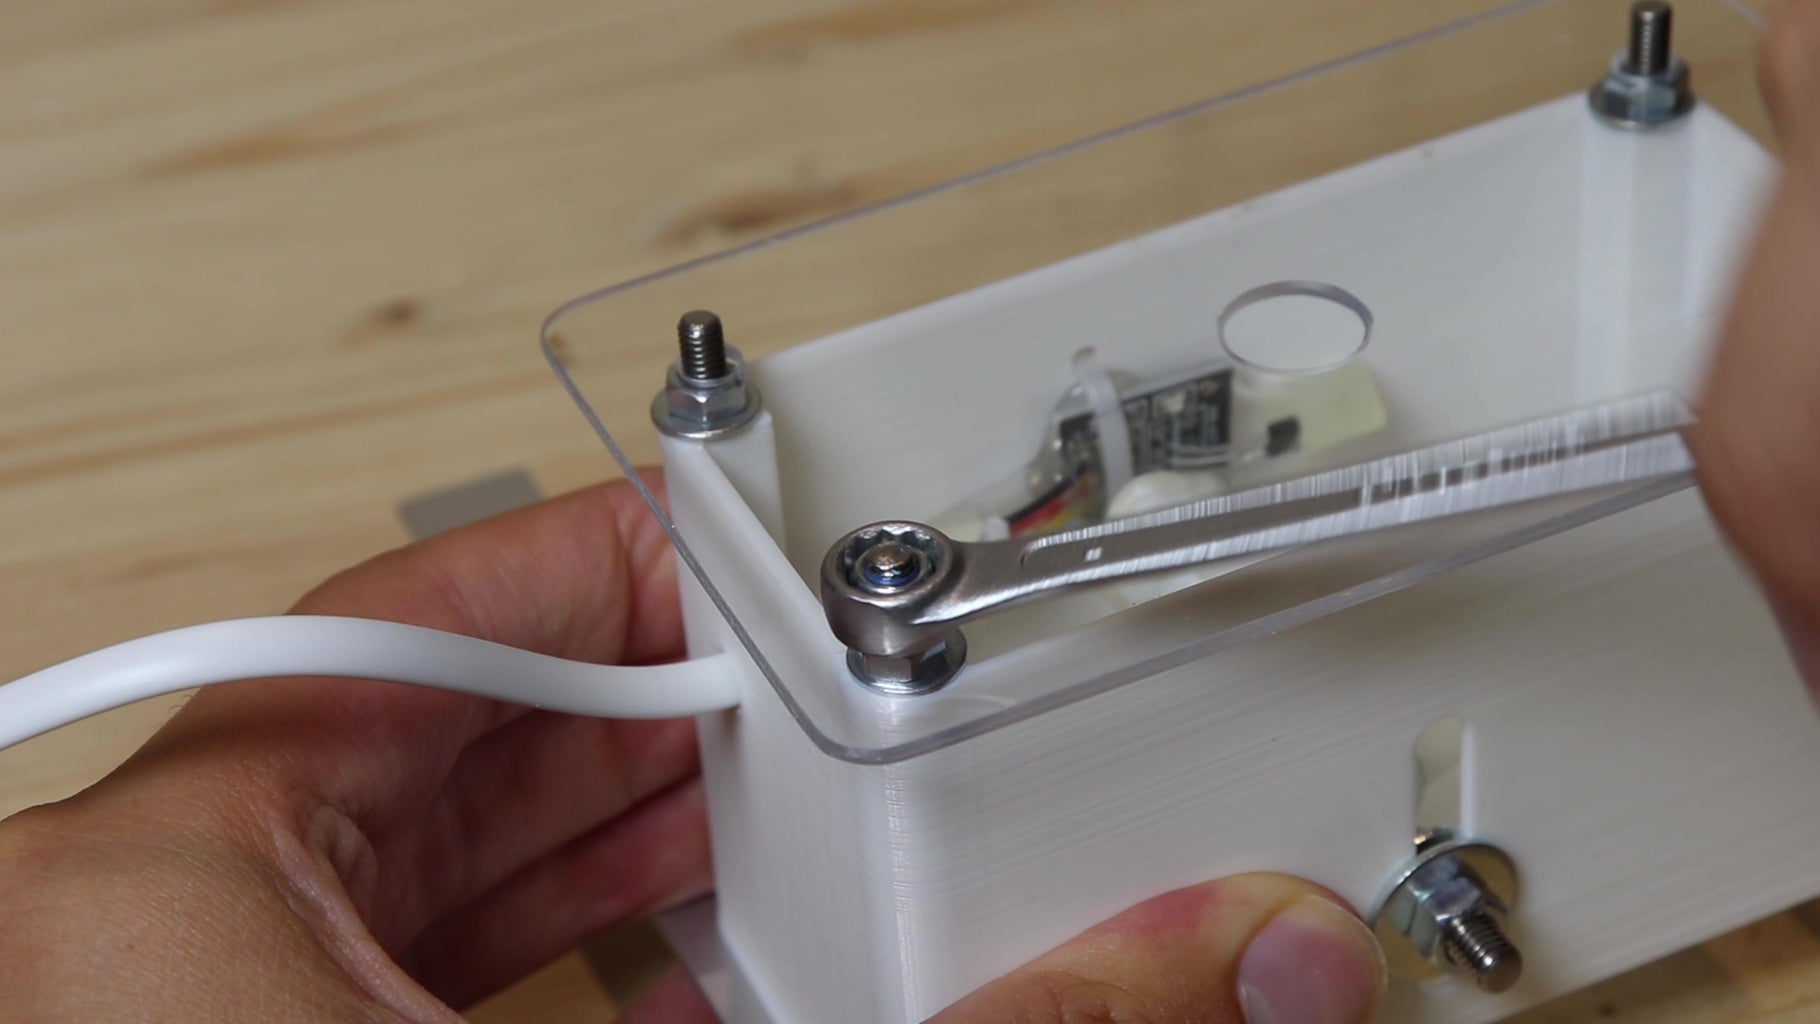
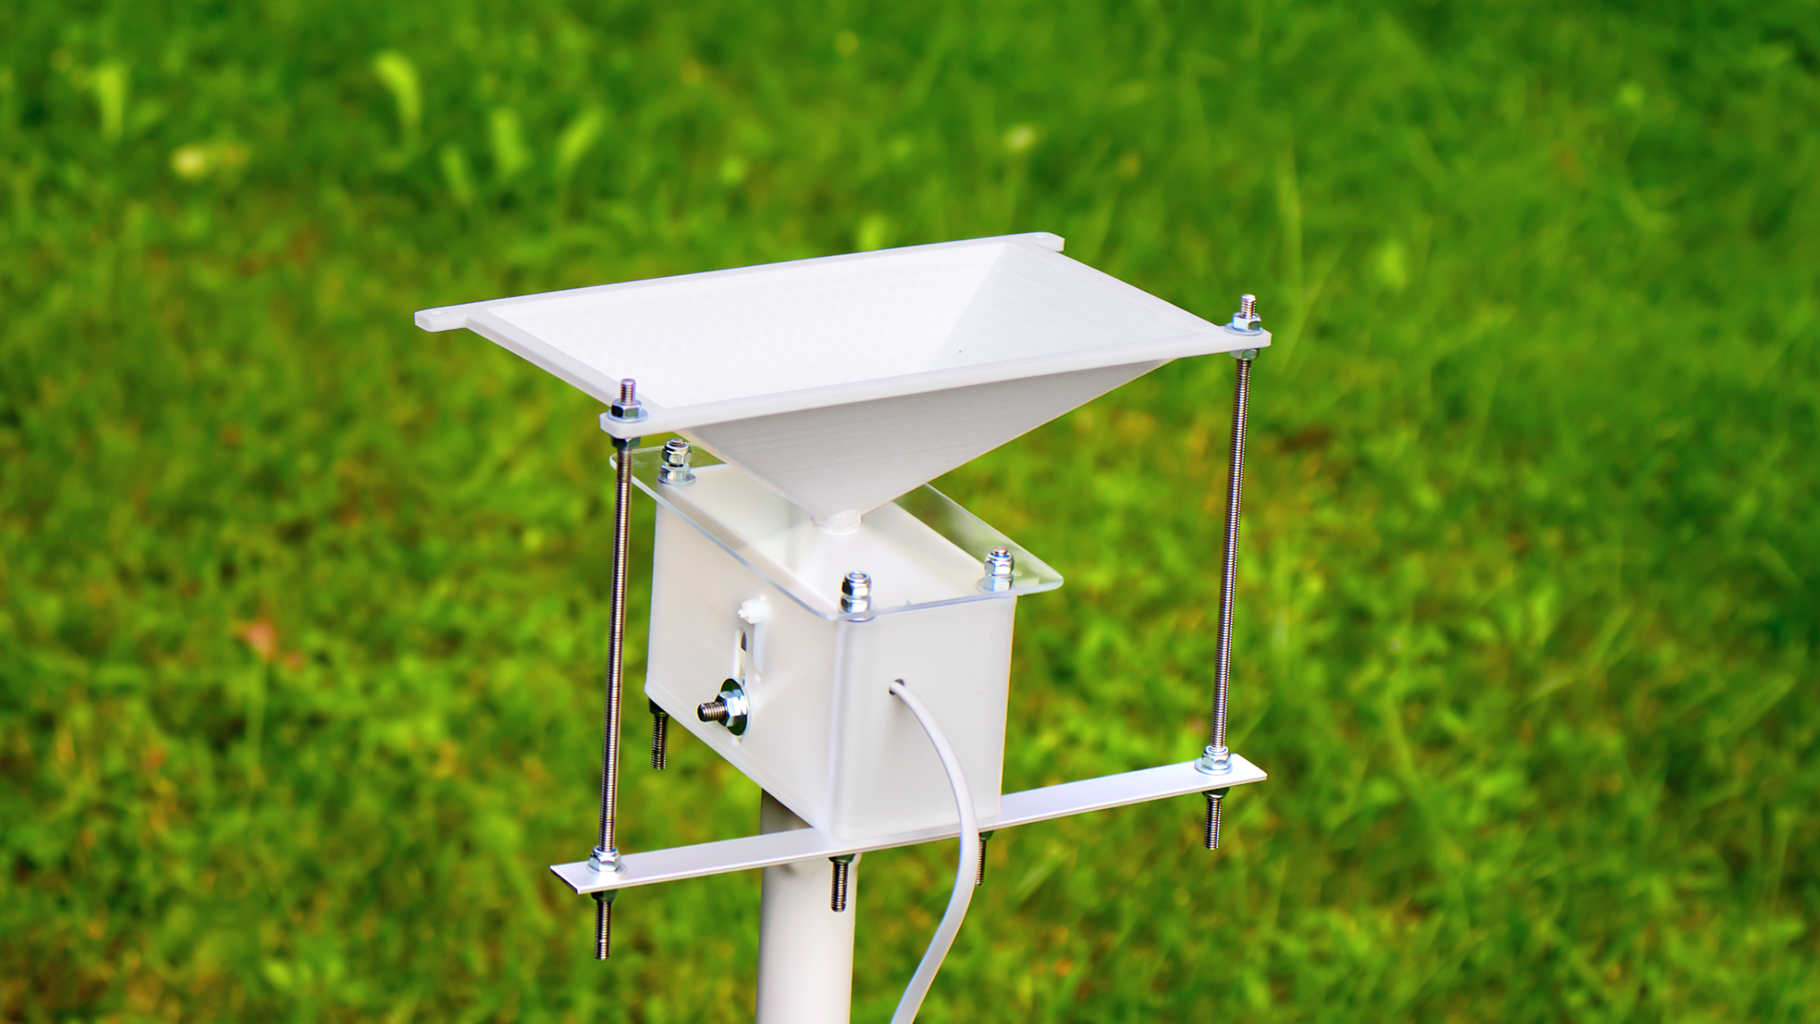
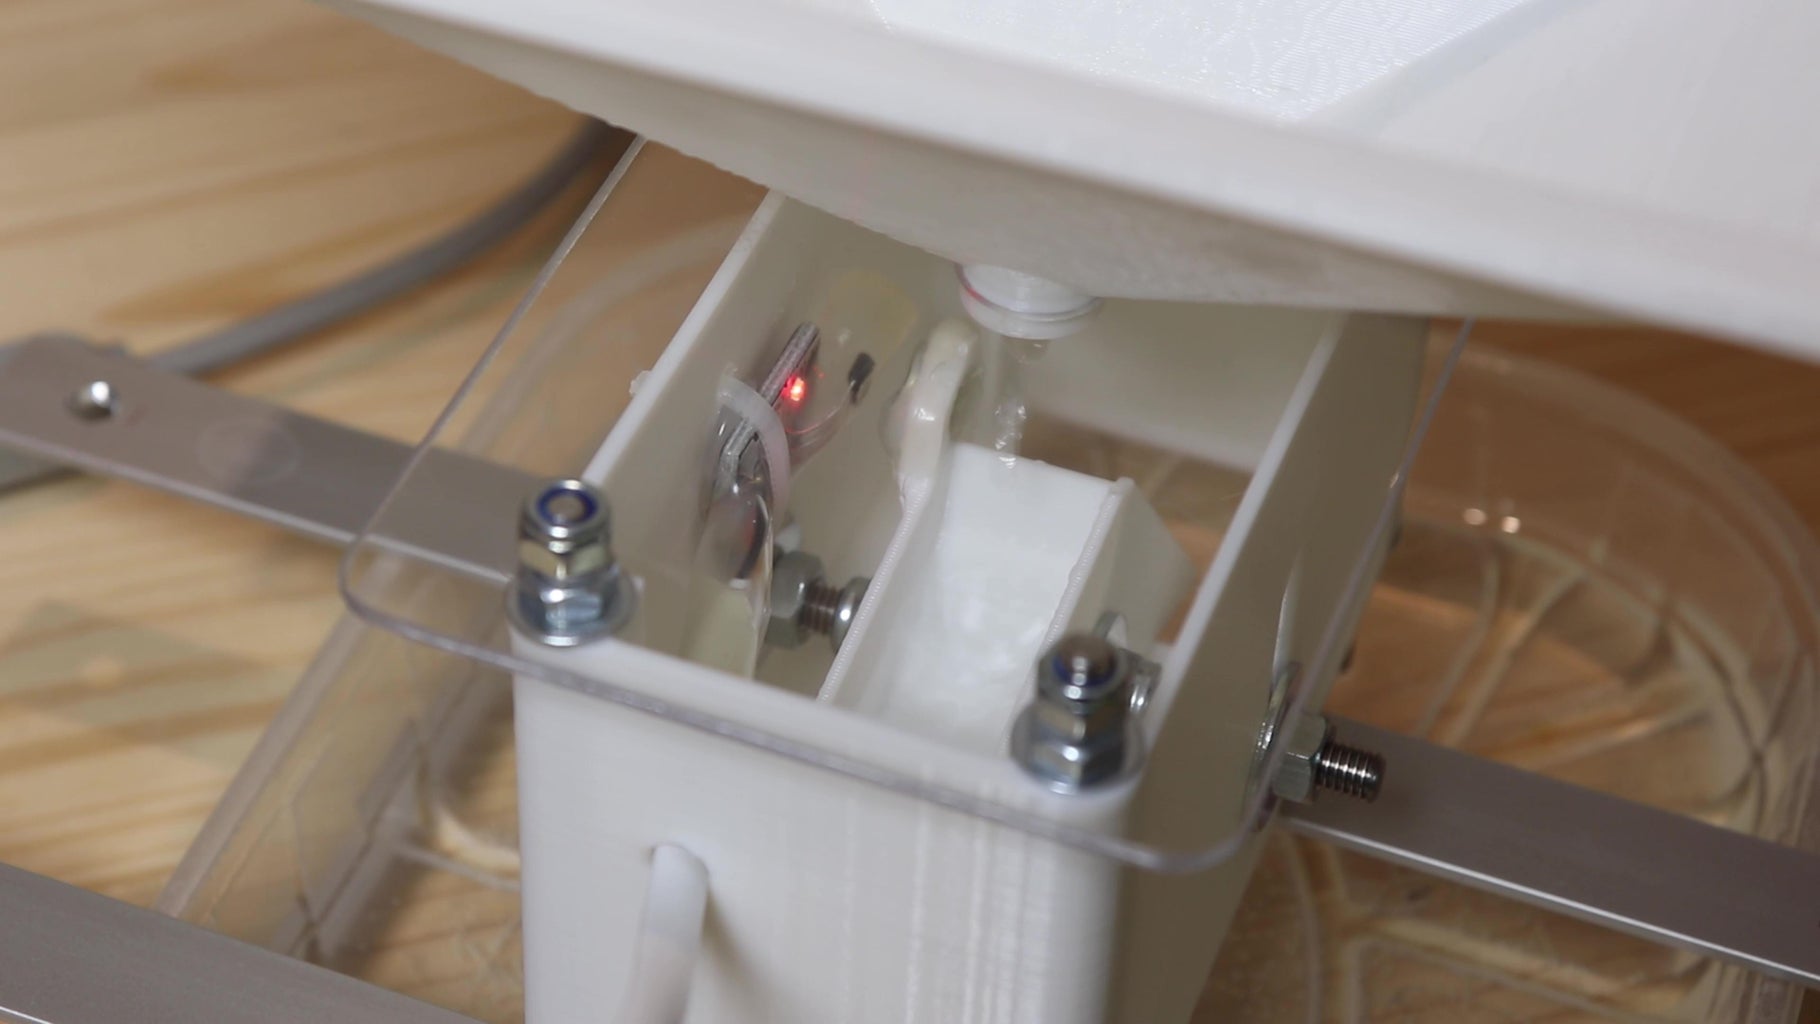
To join the base and the funnel I will use a piece of plexiglass, which allows me to see inside if everything is working. To join these three pieces I used a flat aluminum profile, some pieces of M4 threaded rod, M4 self-locking nuts and washers. In the end it should all come out as shown in the picture.
Step 7: Adding Mesh


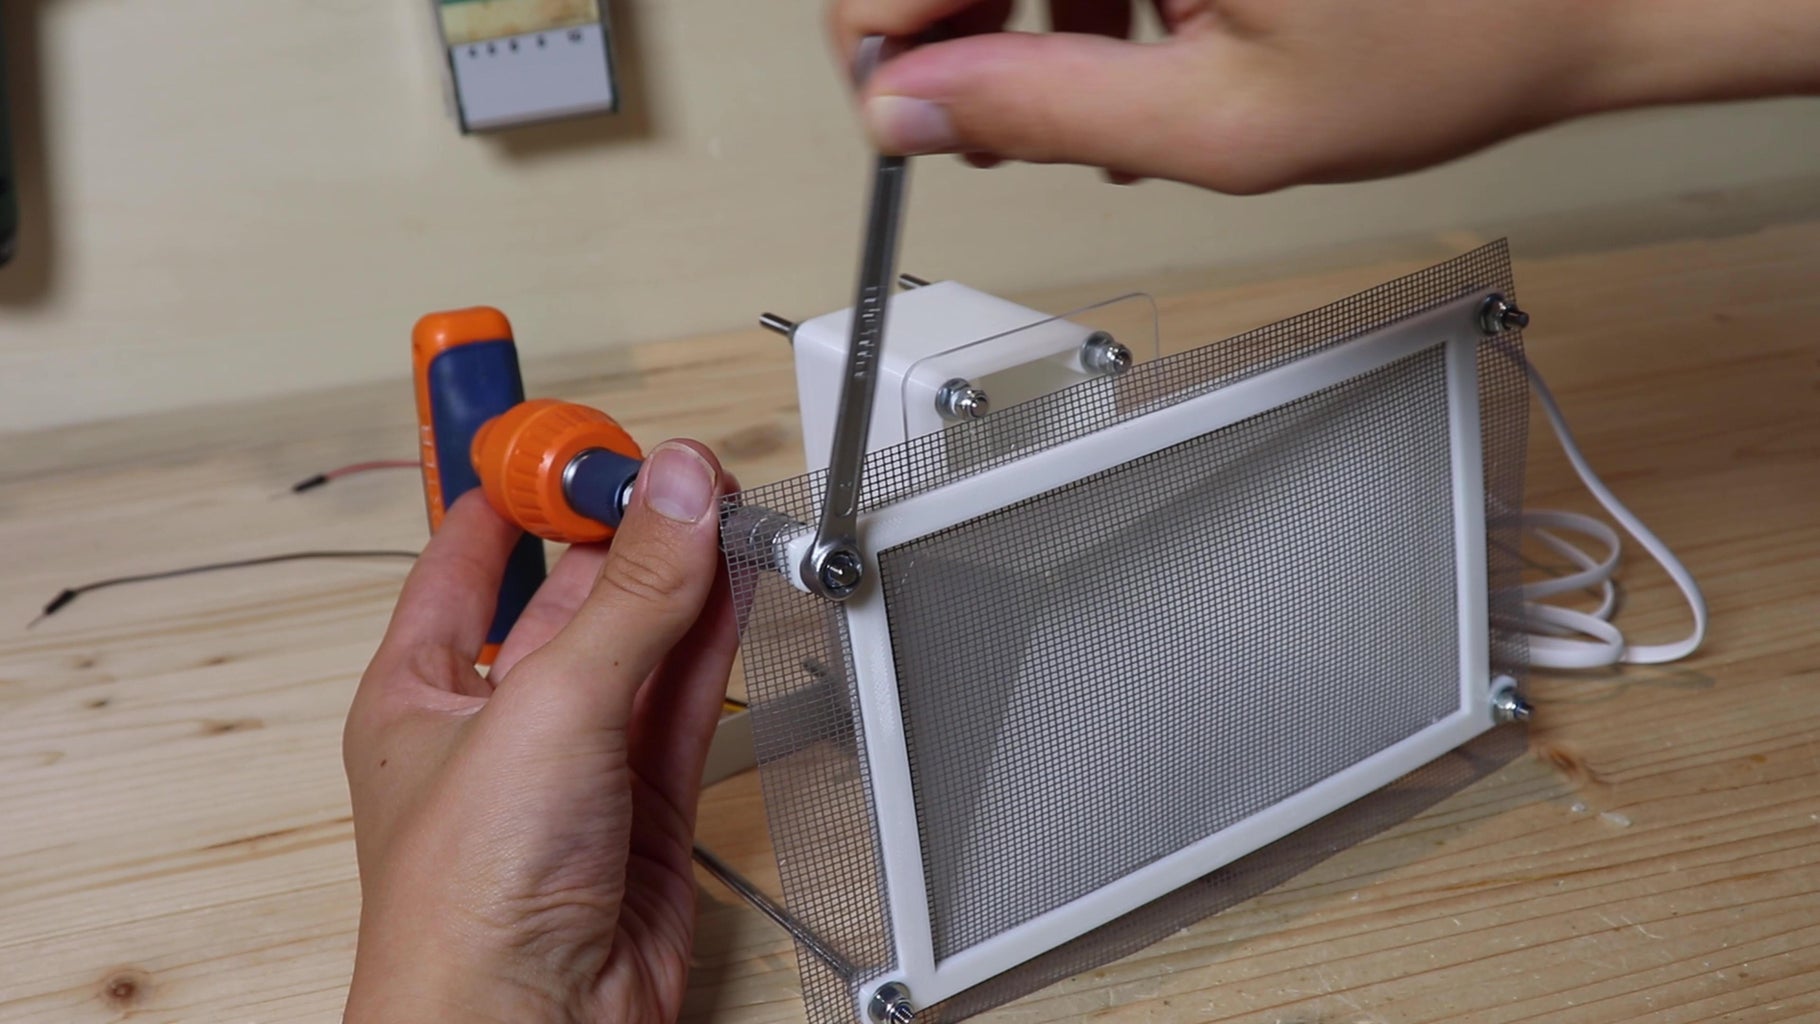
At first I was thinking of putting a mosquito net over the rain gauge to prevent leaves from getting in. However, the net was too fine and retained water, so I won't put it there for the time being.
Step 8: Arduino Test


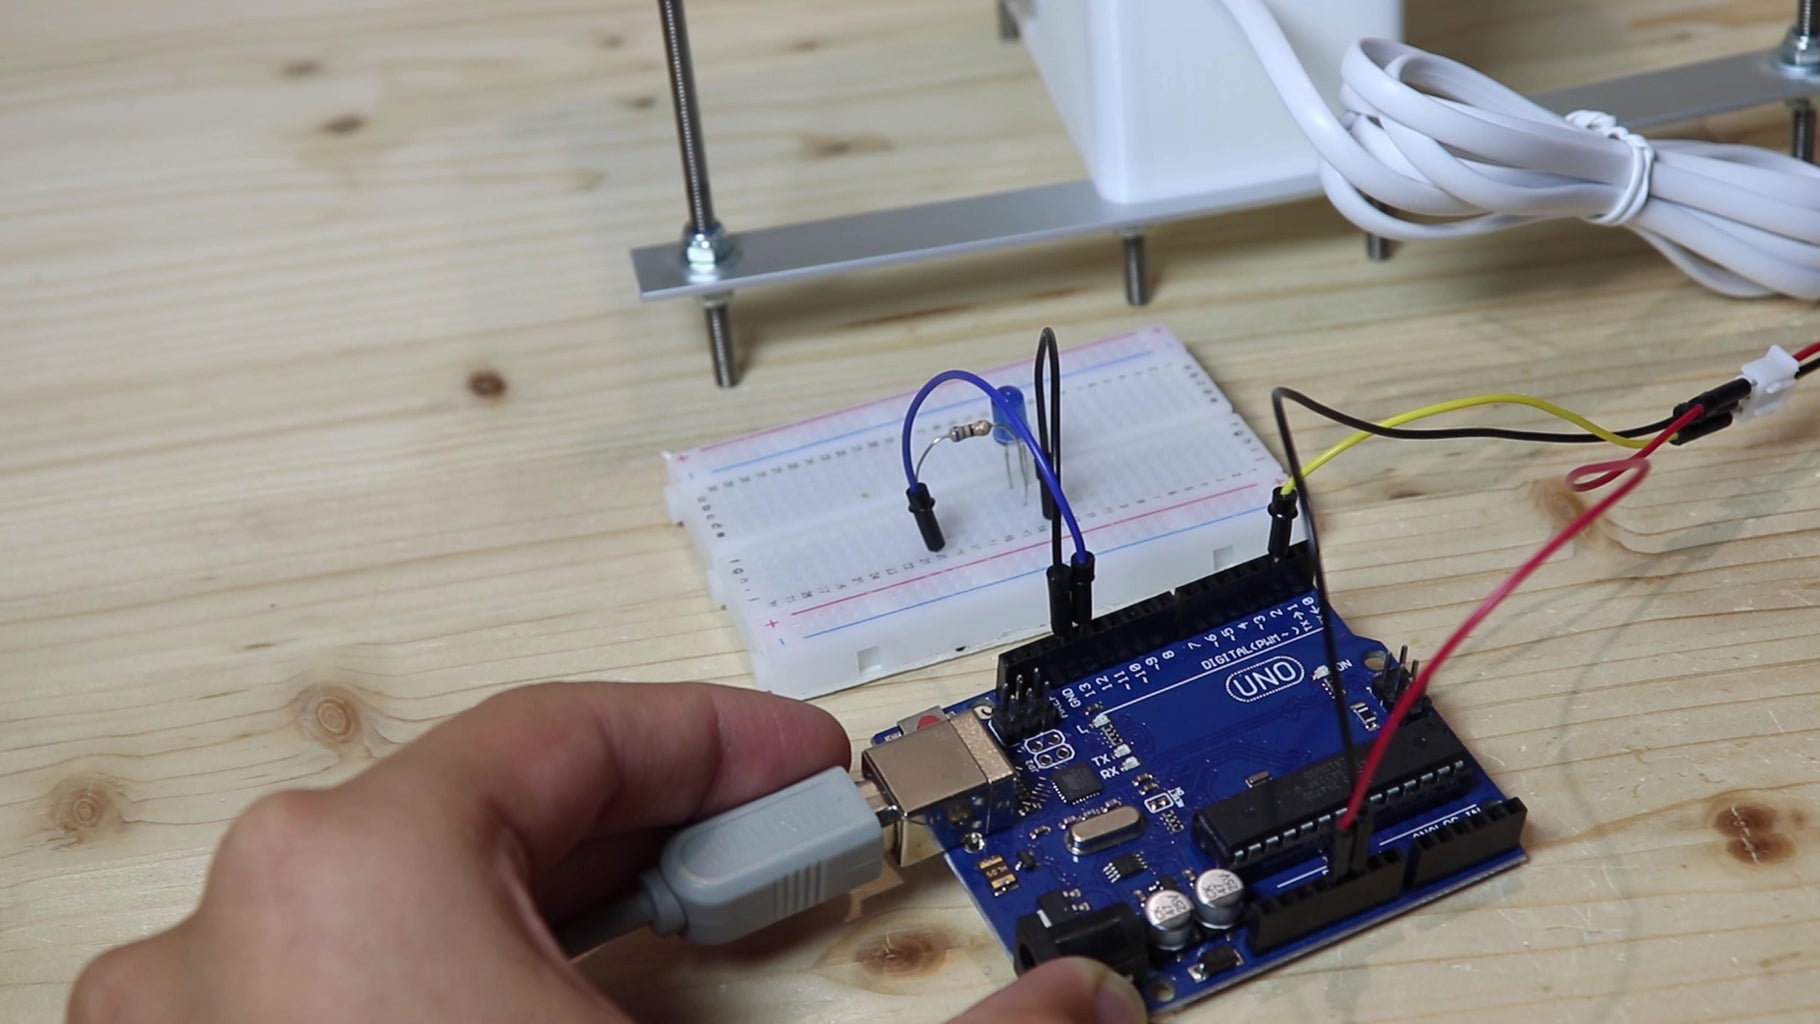
Now I got the Arduino, and I connected it to the computer. On the IDE I went into the examples and loaded the one that turns on an LED when a button is pressed. I connected positive and negative of the sensor to 5v and gnd of the Arduino, and I connected the output of the sensor to pin 2. I also put an led between gnd and pin 13, with a 680 ohm resistor.
Step 9: Calculations

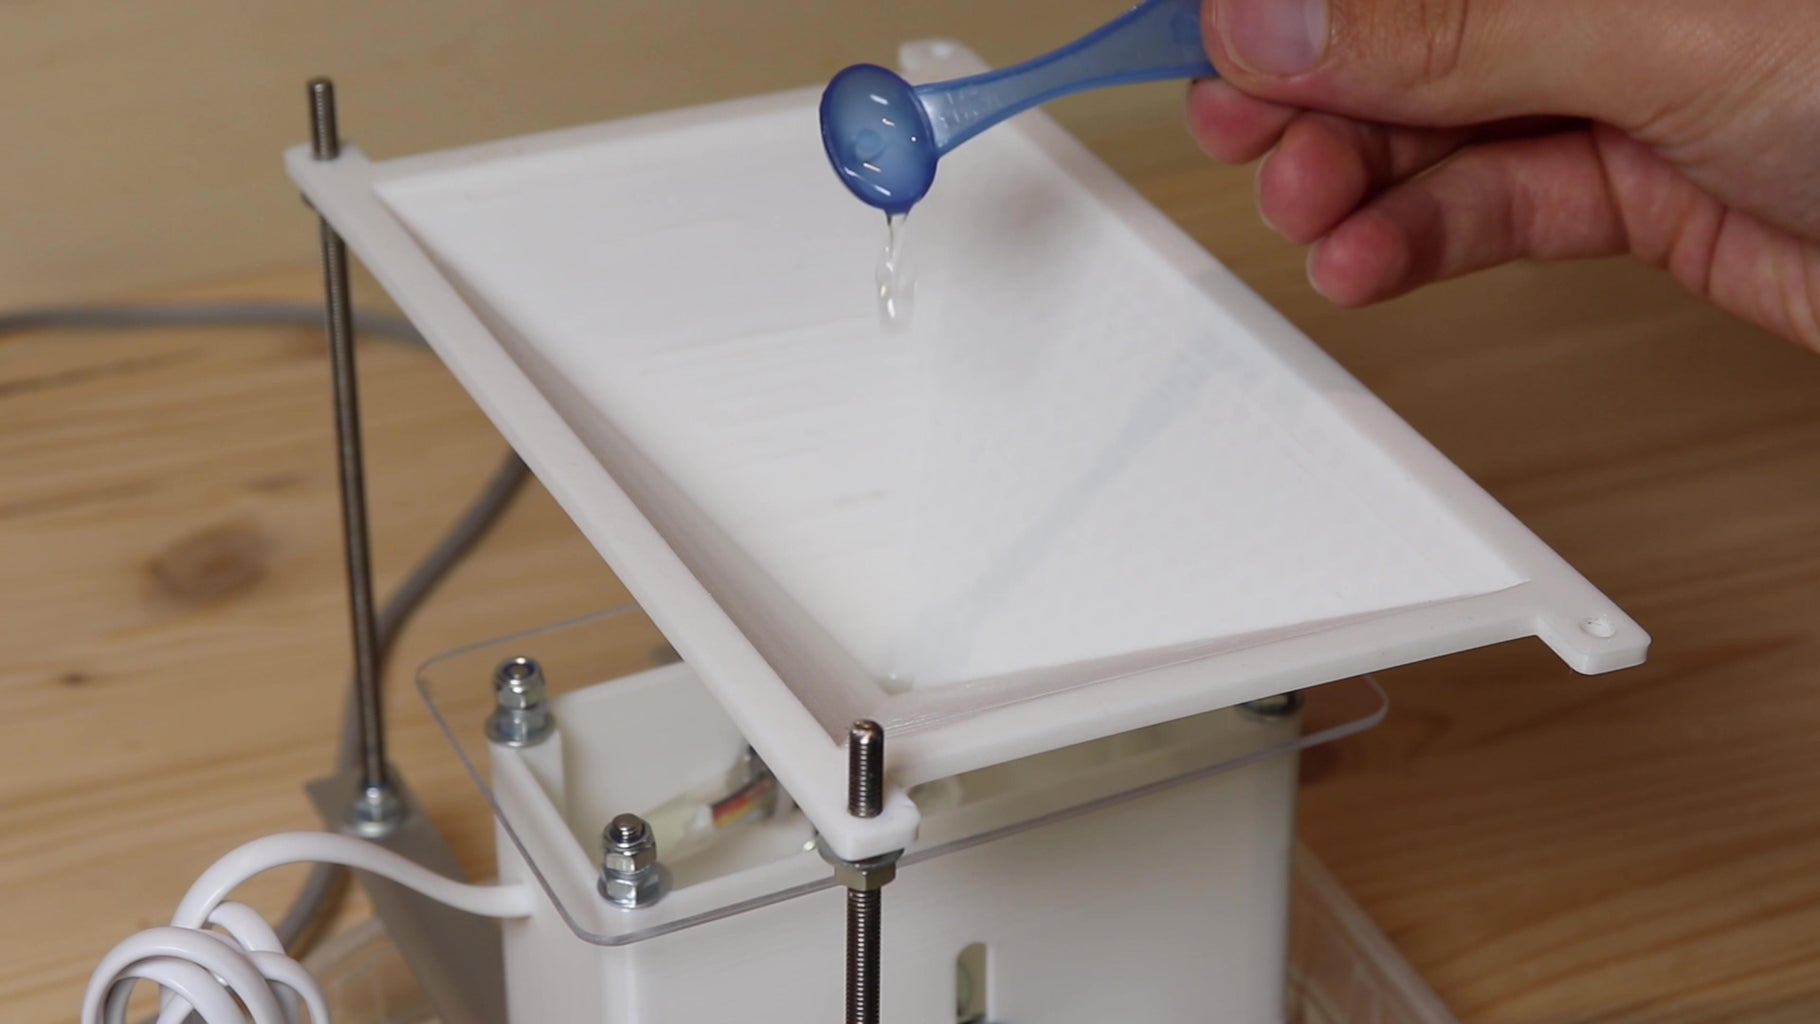

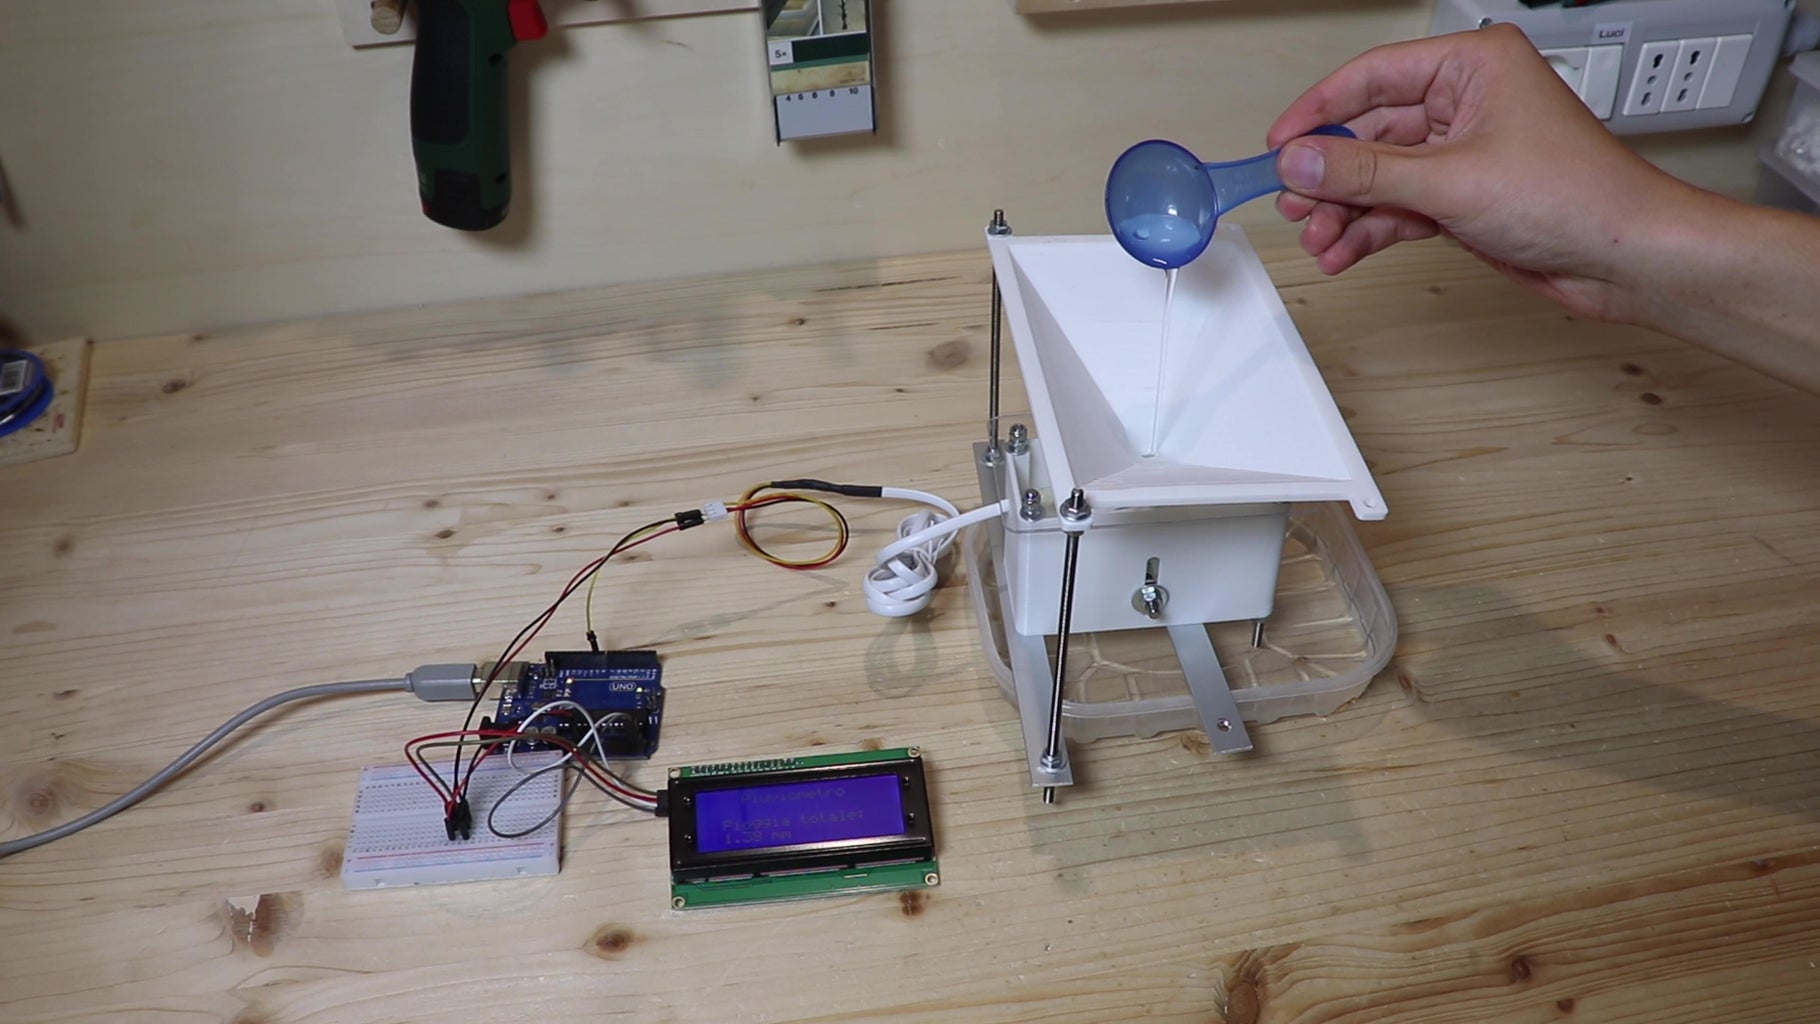
Now we need to figure out how much water it takes to get the center piece from one position to the other. To measure the water I will use this little 1-milliliter teaspoon. I put one milliliter after another until the center piece has moved and the LED lights up. Then I put in more water, and the center piece moved to the other side. To get the most accurate measurement possible, I counted the milliliters needed to move the center piece 50 times. By averaging, I got 2.52 milliliters per displacement. We need to find the rainfall in millimeters in height, though. To do this I measured the size of the funnel and found the area. Using the inverse volume formula I found that each movement of the center piece corresponds to 0.173 mm of rain. The calculations I made can be found in the picture above.
Step 10: Arduino
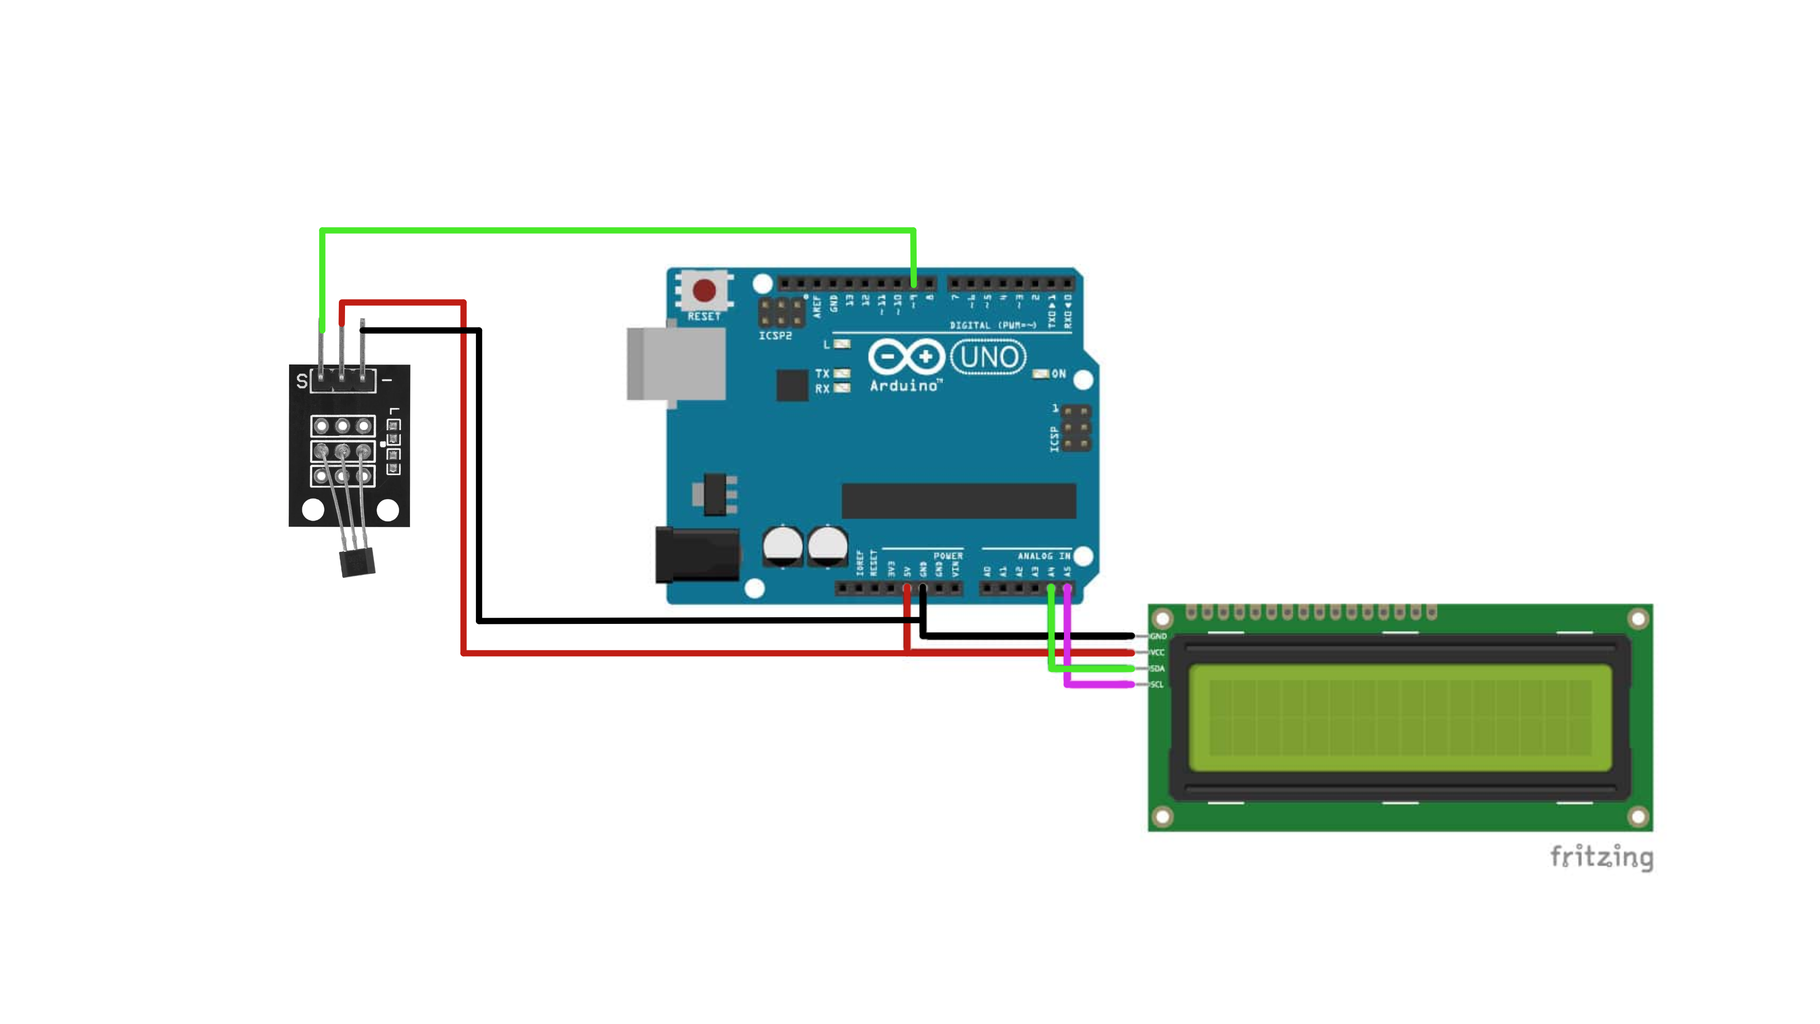

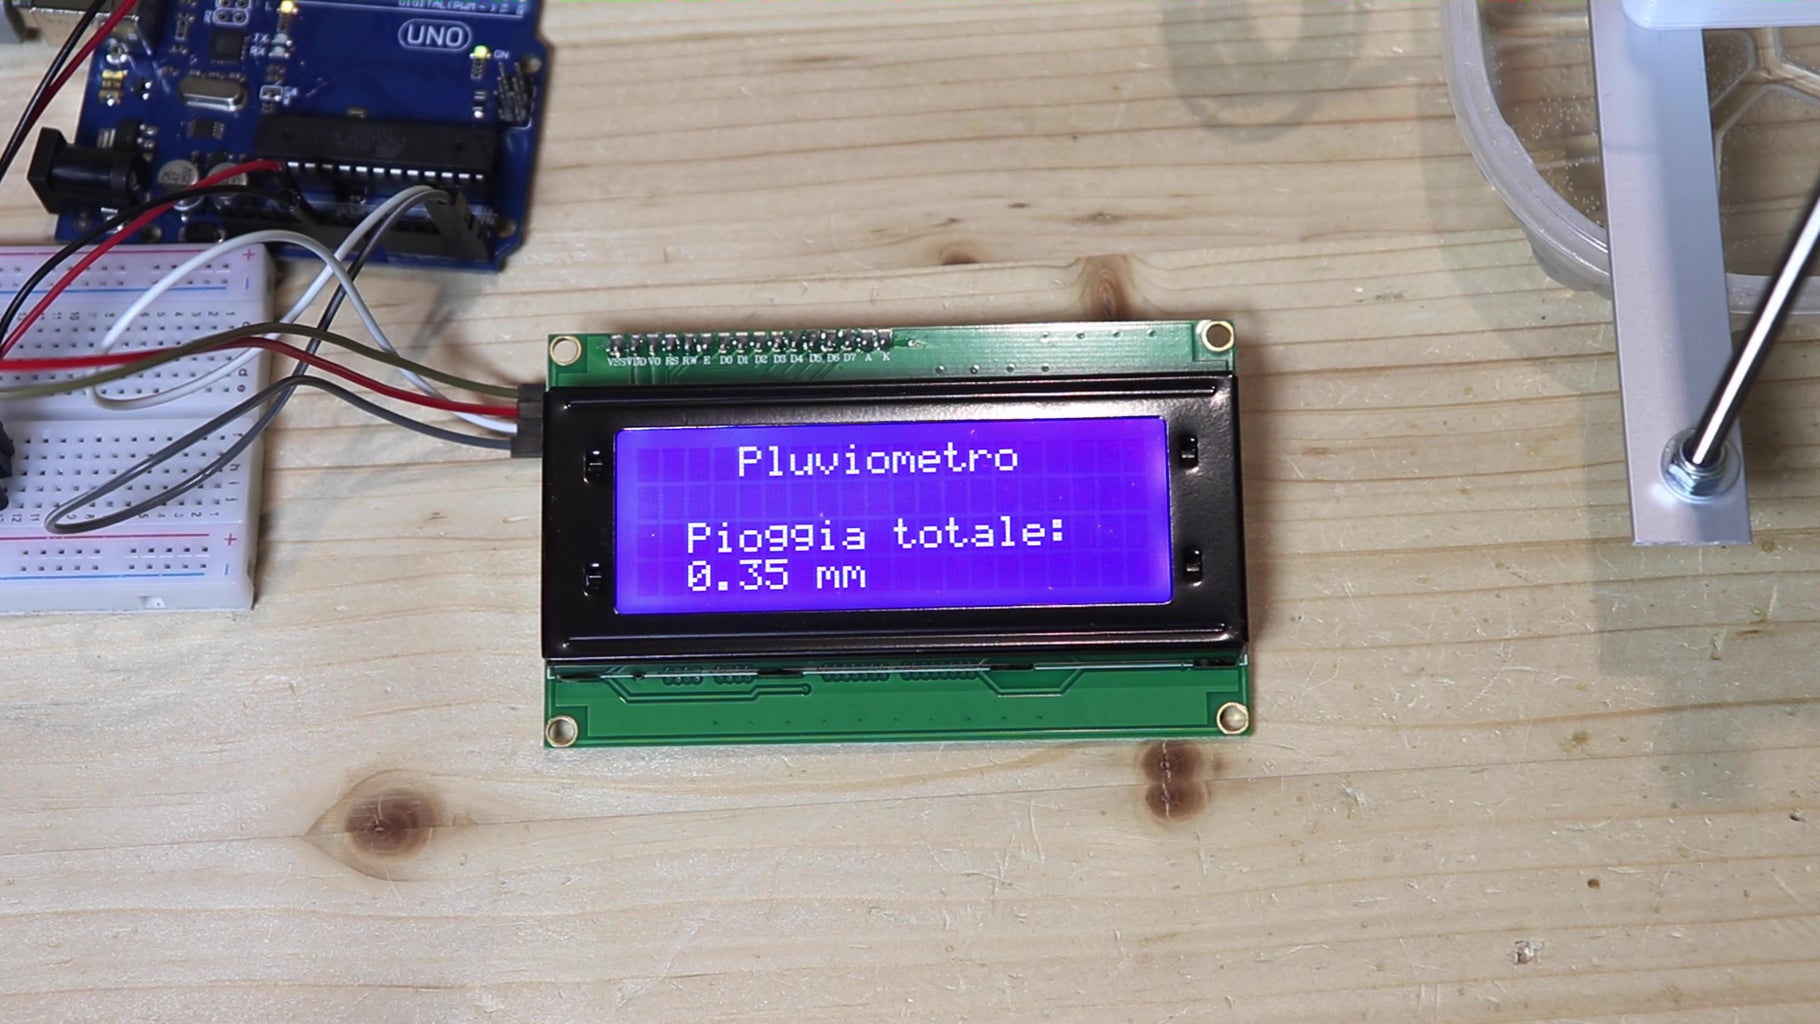
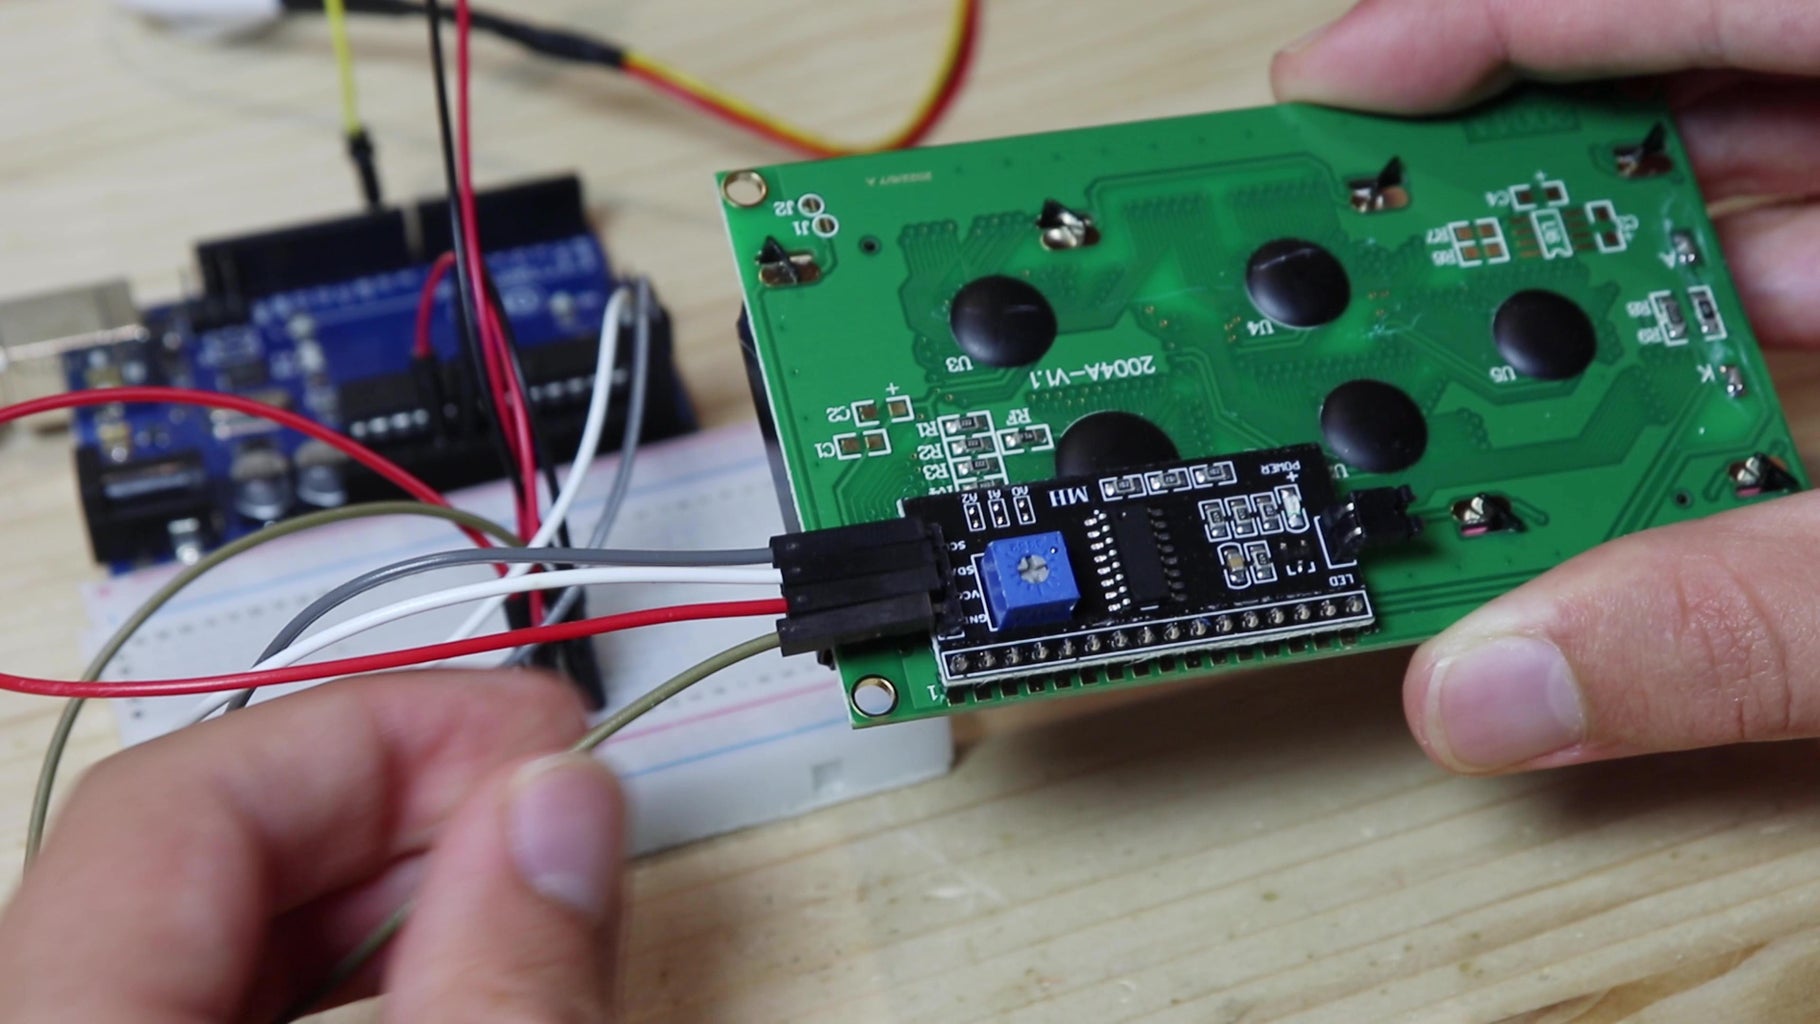
I entered this value into the program for the Arduino, which you will find below. I uploaded the program to the Arduino. To see the data read from the rain gauge I will use an lcd display with the i2c interface. I connected the display to the Arduino with 4 wires. I have powered the Arduino, and everything seems to work fine. If I put water in the rain gauge, the mechanism inside goes back and forth, and with each shot the millimeters of rain increase.
#include <Wire.h>
#include <LiquidCrystal_I2C.h>

LiquidCrystal_I2C lcd(0x27,20,4);

const float mmPerPulse = 0.173;  //put here the value of rain in mm for each movement of the bucket

float mmTotali = 0;
int sensore = 0;
int statoPrecedente = 0;

void setup() {
  pinMode(9, INPUT);

  lcd.init();
  lcd.init();

  lcd.backlight();

  lcd.setCursor(4,0);
  lcd.print("Pluviometro");
  lcd.setCursor(7,2);
  lcd.print("RESET");

  delay(1000);

  lcd.clear();
}

void loop() {
  sensore = digitalRead(9);

  if (sensore != statoPrecedente) {
    mmTotali = mmTotali + mmPerPulse;
  }

  delay(500);

  statoPrecedente = sensore;


  lcd.setCursor(4,0);
  lcd.print("Pluviometro");
  lcd.setCursor(2,2);
  lcd.print("Pioggia totale:");
  lcd.setCursor(2,3);
  lcd.print(mmTotali);
  lcd.setCursor(7,3);
  lcd.print("mm");
}
Step 11: Testing
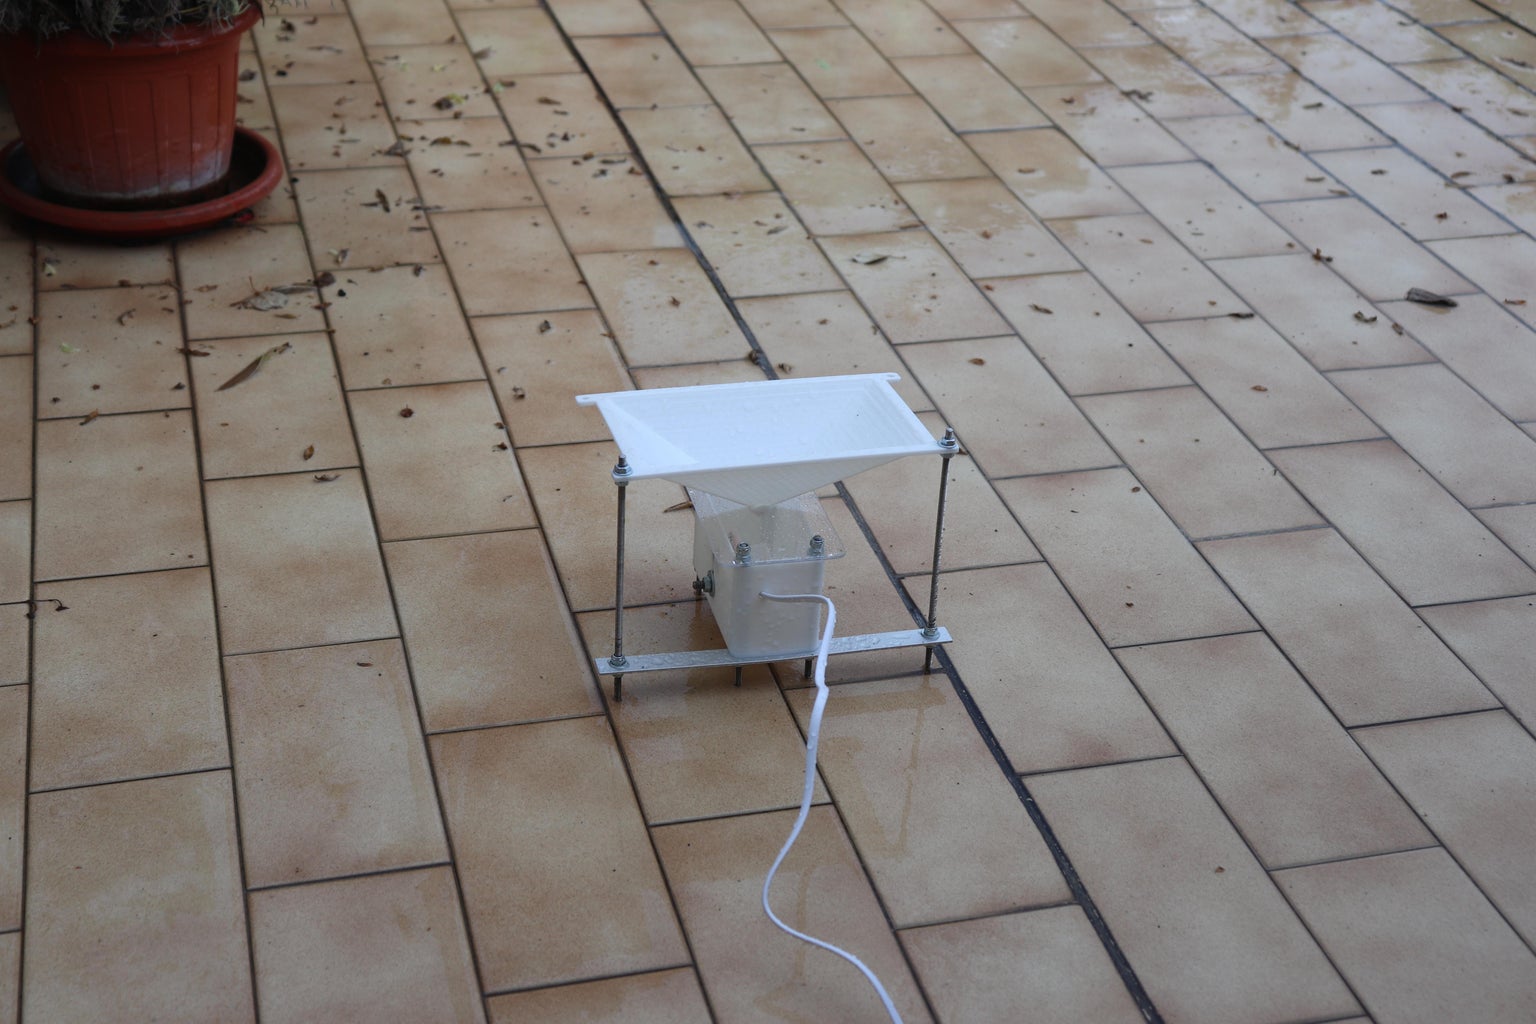

Now we have to test the rain gauge with some real rain. It seems like it worked fine, with about 30 minutes of rain it showed 1 mm.
Step 12: Done!

So, this project is finished. If you want to see more details, please check the video that you can find at the top or here. It is in Italian, but don't worry, it has also english subtitles.
Ciao, and I will see you next time!


![Tim's Mechanical Spider Leg [LU9685-20CU]](https://content.instructables.com/FFB/5R4I/LVKZ6G6R/FFB5R4ILVKZ6G6R.png?auto=webp&crop=1.2%3A1&frame=1&width=306)


