

Introduction: DIY Straight Razor From an Old Saw Blade


I love shaving with a straight razor but with all of my latest projects being old saw blade based, I figured:
I COULD MAKE MY OWN! Let's do it!
Supplies
Old saw blade
Marking tools, scribe and / or Sharpie
Something to cut metal, I used an angle grinder but you could also use a hack saw, band saw, etc.
Clamps and / or Vice
PPE
Something to polish the rough edges, I used a belt grinder but even an angle grinder could work, too, with polishing grinding wheel
Pliers
Torch and water for annealing
Sandpaper / grindstones to polish & sharpen your razor
Strop
Measuring tools, like calipers, ruler, etc.
Wood / Material to make your scales (I used oak and copper)
Drill and bits
Saw to cut your scales
Rods to secure the razor to the scales
Tape
Punch, to drink and to mark your drill holes
Hammer to peen your scales
Something to protect your razor, like wax / oil
Mirror to enjoy that shave!
Step 1: Video of My Process
Here is a video of my build. All work, no talking this time.
Step 2: Cut the Razor
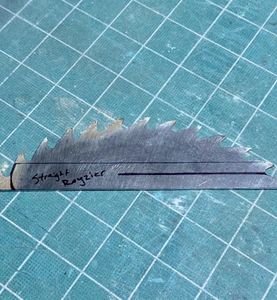


With an old saw blade handy, I marked up where I needed to cut (pics 1-4). Having an actual straight razor (pic 2) made this really easy but you can find photos to trace online.
Time to get to work cutting (I used my angle grinder). These are really inexpensive, especially the rinky dink ones from places like Harbor Freight. Heck, that is what I am using in pics 5-10. If you don't have a HF near you, I have been lucky finding good brands secondhand at garage sales and/or online markets.
If making curved cuts (8-10), give yourself some relief cuts and take your time. You can always clean up the roughness with extra grinding / sanding.
Pic 11 shows the beginnings of our razor and pic 12 proves it is nowhere near sharp enough...yet!
Step 3: Shape the Blade


Having the rough shape of the razor, I went to work with my belt grinder to get a uniform and clean razor. (pics 1-3).
Pic 4 shows a glass of water to keep your metal from getting too hot. This is a saw blade so the composition should be good enough to take and hold an edge when we get to sharpening. Annealing the metal (aka, getting too hot to cause the metal to discolor) is a telltale sign you got too hot. This may make your blade too "soft." Knife enthusiasts, please correct as necessary. I am an amateur after all :)
Pic 5 shows one of my cleaned up edges. I will do the same with all edges and the faces of the blade.
I use a magnet to hold face to belt grinder to help protect my fingers (pic 6-8).
Results of the belt grindage are shown in pic 9-11. Just take your time and you will get there regardless of if you are using power tools or hand tools. I like this stage, personally. Throw on a podcast or your favorite playlist and get to it. I find it strangely calming...Maybe that is why I have been doing so many of these lately.
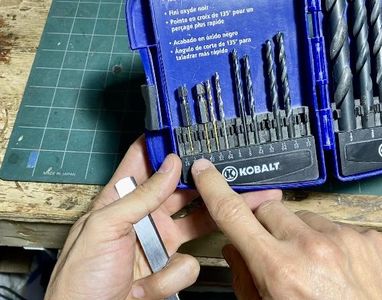
Marking the center of blade can be tough at first thought. You don't want to wind up with a wonky / lopsided blade after all. I use my caliper and mark the center of the blade with a 1/8th-inch drill bit (pic 12-15). As it turns out, this corresponded to my metric reading you see on the caliper pic above, go figure.
Many straight razors have a blade with a hollow grind. My attempt (pic 16-18) was to use my handheld belt grinder on an impromptu stand, since the rolly bit was more pronounced than my previously shown belt grinder. Spoiler alert, It didn't look as refined as the German steel I have seen at fancy shops. But am I happy with this as a literal first attempt, yeah! Yeah I am. Pic 9 was added to show some marks on both sides of my sander to fall back on. I don't have a rest and did not want my blade to go lopsided.
Approaching the edge, you can see that I was starting out off. This is why it is good to check your work often so you don't undershoot or even worse, overshoot. You can take metal off but not the other way around. I got the blade evened out to center after a little more work (pic 19-22)
Afterwards, using some various grits, I got to sanding the blade (pic 23-25). This will help smooth out some of the rough lines from the belt sander.
Pic 26 shows that the rough blade will cut but it is poor.
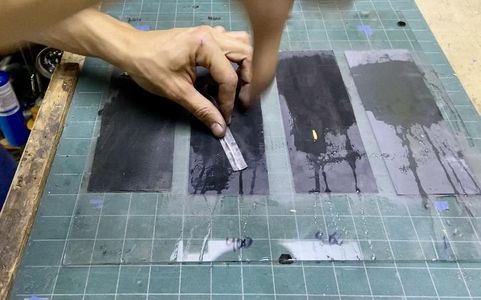
Sharpening the blade further, I used some wet sandpaper from 200 up to 1000 grit (pic 27-30). Notice my hand position in pic 28. I found it harder to control the gliding of my blade in this position but in pic 30 I have better control.
Pics 31 and 32 show the blade becoming more sharp with how clean it is cutting the paper, but there is still work to do.
Using stones and a strop, I got my blade ... razor sharp. (pic 33-37) I went up to 6000 grit with my current set up.
Pic 37 even shows the "wire" burr. If you look hard enough, you can see it.
Pic 38 shows that I finally can pass the arm hair test! That seems to be the quintessential passing grade with any blade-work.
Step 4: Cut the Scales


Now that the hard part is behind us, it is time to get to work on the scales (which are just the protective wooden case the razor blade rests in. I had a scrap piece of oak and traced a rough outline (pics 1-4). Notice that I chose to go with a pointed edge as opposed to the traditional rounded edge of the scales. Just my own personalization but you do you.
Pic 4 & 5 show the point where I want the rods to lock the blade to the scales on the back side.
Using my bandsaw, I cut the scales to a width of 4 millimeters (pic 6-9). This is will give me enough wiggle room for the blade to slide around freely without being too loose.
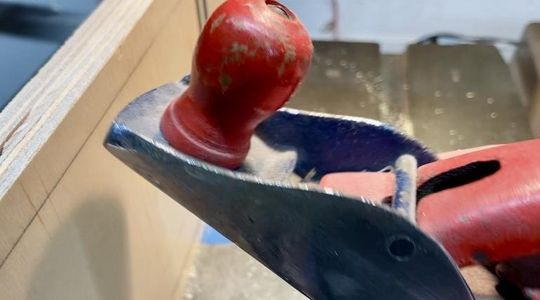
Pic 8 I am showing a hand plane in case you need to some quick smoothing of the roughly sawn edge. A sharp plane will make this way faster than hand sanding.
Pic 10 shows that I taped the two scales together to get ready to cut them to final shape.
Step 5: Shape the Scales


With the pieces taped tightly together, I roughly cut off the excess wood (pics 1-3). Pics 4-9 shows the sanding to smooth them out. Everyone loves sanding...
I purposely annealed the end that I needed to drill a hole for the pivot pin (pic 10) and quenched it quickly (pic 11). This was performed to make it easier for my drill bit to bite into. A super hard blade will make this a nightmare and you risk destroying many many bits. Re-marked, punched, and drilled (pic 12-14), my blade was ready to meet the scales for final assembly. However, I still needed the wedge for the other end of the scales where the point of the razor is located (pic 15).
Having ample scrap copper (pic 16), I got a thicker piece, marked, and cut it to rough shape (pic17-20). I like the contrast of oak and copper. It is sort of like the popular combination of walnut and brass, to me.
No need to shape the copper wedge on the sander just yet. It will look better shaped to the scales as opposed to doing before installing it to the scales. That way, it is harder to overshoot your sanding.
Step 6: Put It All Together


With the copper wedge in place (pic 1), I hammered and peened all of the rods to hold the wedge, blade, and scales together (pic 2-4).
In the interim, I sanded the copper wedge to the edge of the scales (I figure you have seen enough sanding and get the point, lol). You will also notice that I have a yakisugi (shou sugi ban) blazed finished on my oak scales. IMO, it looks awesome.
In pics 5 & 6, you will see that I oiled up the wood on the faces and all the nooks and crannies. Pic 7 shows the final product!
I love my straight razors and the shaving experience, in general. Making and using a custom straight razor that I made...chef's kiss. It is an amazing feeling.
I added it to my straight razor kit that you saw in the intro and I will be on my way. I hope you find this useful/inspiring and hey, if you got old saw blades, I suggest making them into something that provides you or a loved one joy.
See you on the next one! Peace!!

Participated in the
Anything Goes Contest


