

Introduction: Easy Exploded 3D Drawings


Making cool exploded drawings is a breeze in Fusion 360. In just a few easy steps, you can make 3D assembly diagrams of your projects, and even 3D animations in no time.
Fusion 360 is free and it's awesome. I use it for everything I design and fabricate. Click one of the links below to install the program with a free license.
Student / Educator License (renew free every 3 years)
Hobbyist / Startup (renew free yearly)
Follow along with this Instructable to model your own!
Step 1: Prepare Your Model

We're going to use the Animation workspace to position the parts so that they are exploded in the drawing. In order to make this work, each part that will be exploded needs to be a Component. If your design is a bunch of Bodies, right click on them in the Browser and Convert to Component(s).
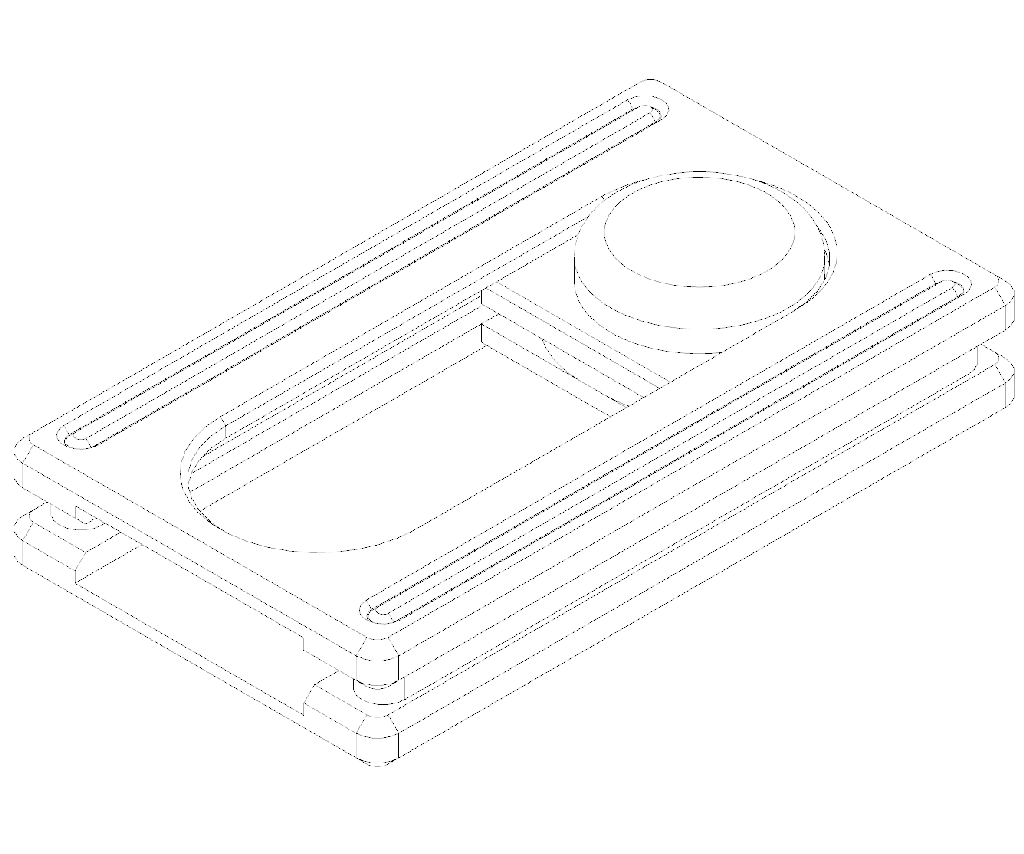
The example I'm using here is my Coin Shuffleboard model from a previous instructable.
Step 2: Switch to the Animation Workspace
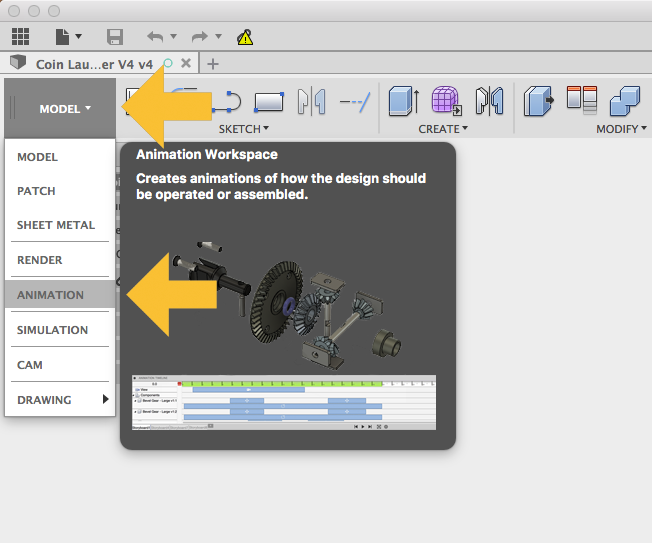
When you have a design open, the Model workspace will be selected by default. Click on MODEL on the left side of the tool bar and select ANIMATION from the list. The toolbar should change and you should see a timeline at the bottom of the canvas.
Step 3: Move the Parts
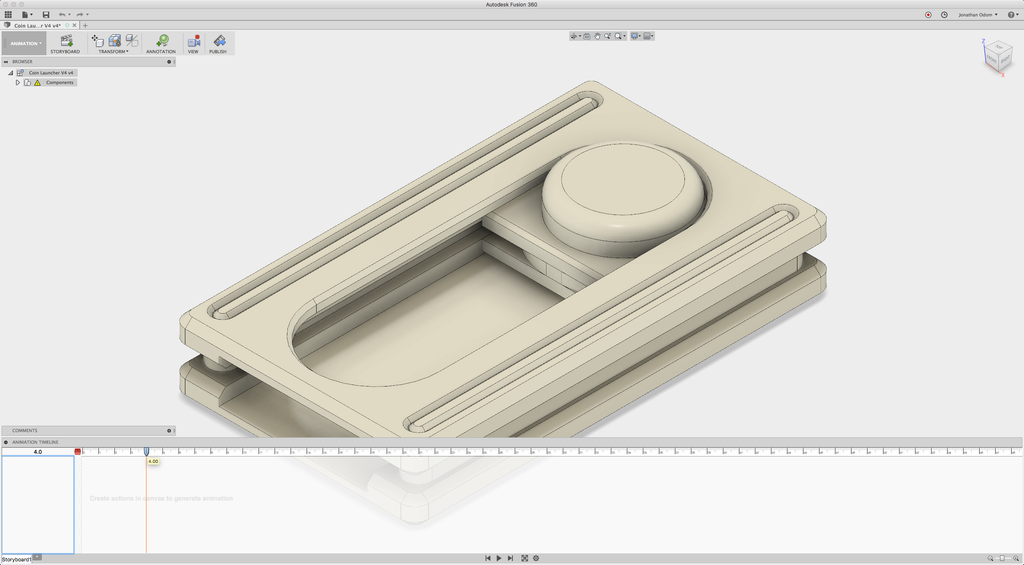
On the timeline at the bottom, move the vertical line to the right by a few seconds. In the screenshot above it's been moved to 4.0.

Click on the upper most (or outer most) component, then select Transform Component from the popup menu. The idea is to move things on the outside to the furthest point in the exploded view, then move the inner parts so that they're closer to the center of the drawing. Imaging you're taking your object apart and letting the parts float in the air in sequence.
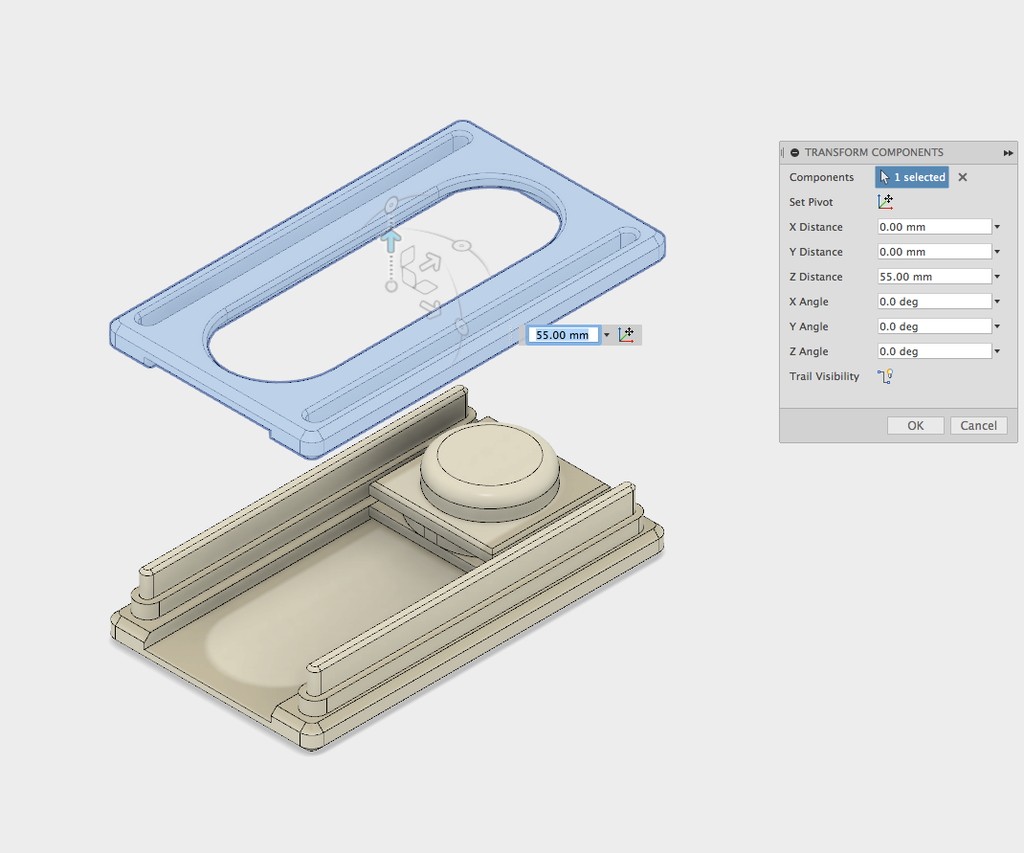
Drag the arrows on the manipulator and move the part so that it's above the next part to be shown below it. In this case, that's the Coin Cup (button shaped object in the picture above).
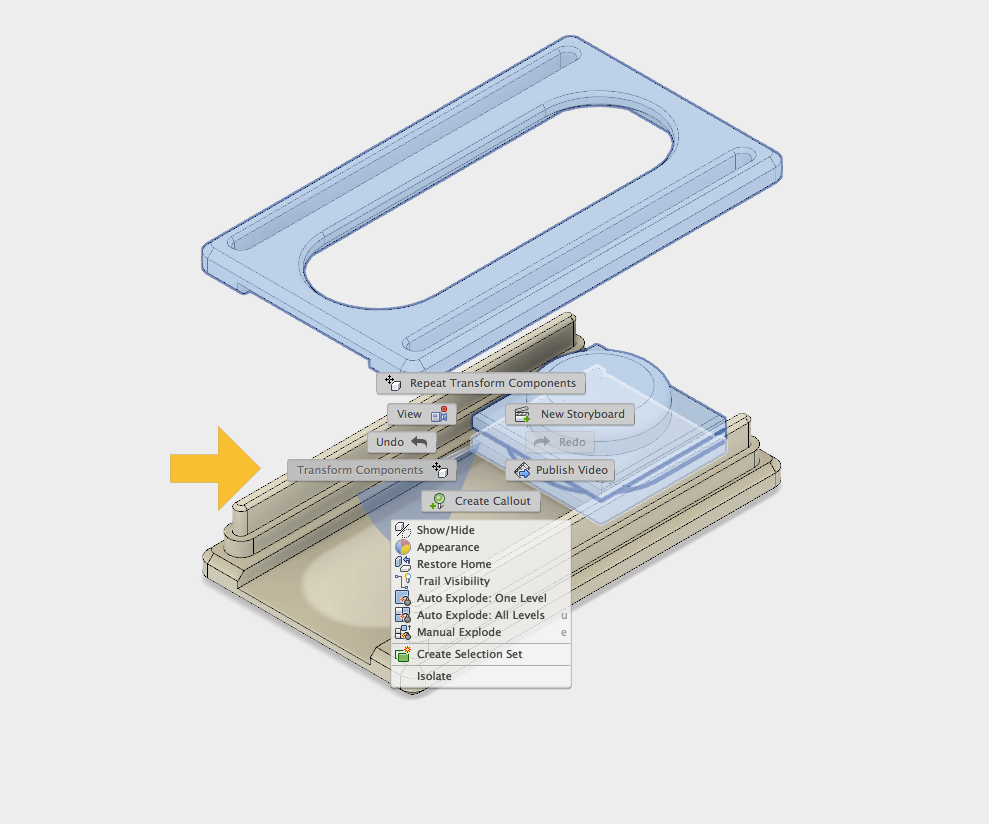
Select the first component you moved, then shift+select the next one you want to move. Right-click and Transform components to move both of them up so that there's space below the second part in the sequence.
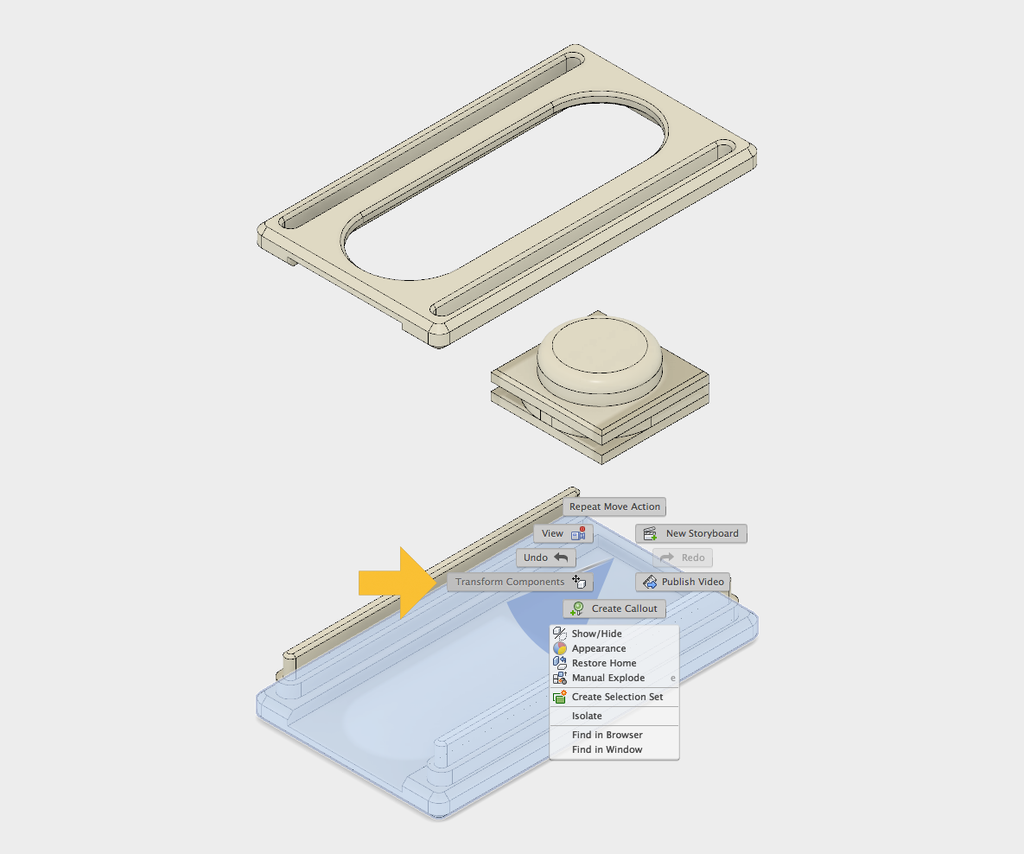
Repeat this step as necessary to create space between the parts the fit together. The two rails in my example are already spaced away from each other in the model, so I just have to select and Transform Components to move the bottom part down.

This gives me a visual spacing that will make for a good 3D drawing.
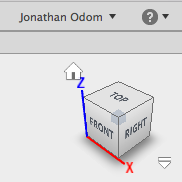
NOTE: make sure to have the view set to one of the corners of the view cube in the upper right corner when you finalize your exploded view. The drawing you're going to create from this will have to use one of these corners or a flat side of the cube. In my example, I have Home selected (the little house icon above the view cube), which is the corner between TOP, FRONT, and RIGHT.

Use the controls at the bottom of the timeline to control the animation so you can see how it moves! You'll probably notice that the camera (view) moves too, you can turn that off if you want, but we'll get into that later.
Step 4: Make a Drawing
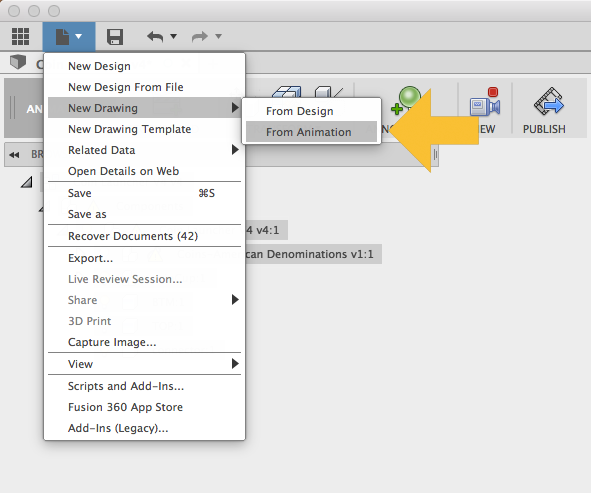
When you're happy with the final position of everything, Click on File > New Drawing > From Animation.

Click OK.

The default settings are fine, but if you want you can change units, sheet size, or apply a template here.
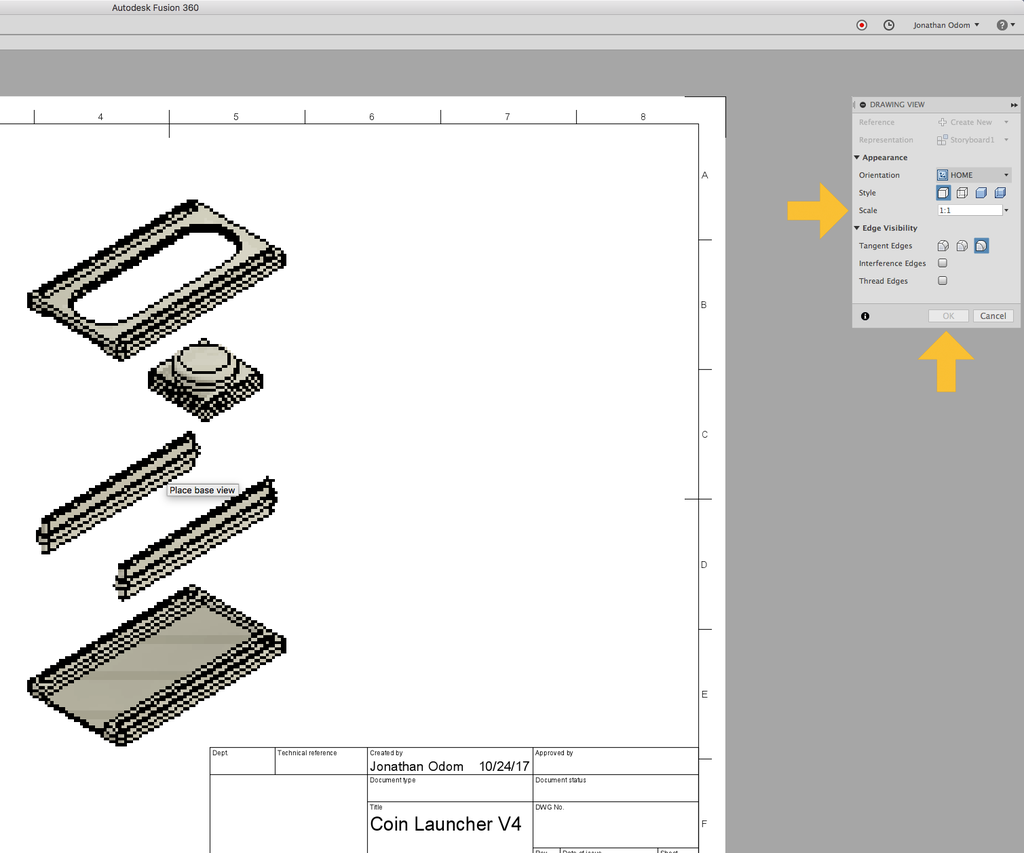
The new drawing will open and you'll be prompted to place the view on the page. You can change the Scale here to something that will fit on the sheet. The Style is Visible Edges by default, which will give you a black and white line drawing with no hidden edges. Make sure the Orientation matches your animation (Home by default), and click OK.
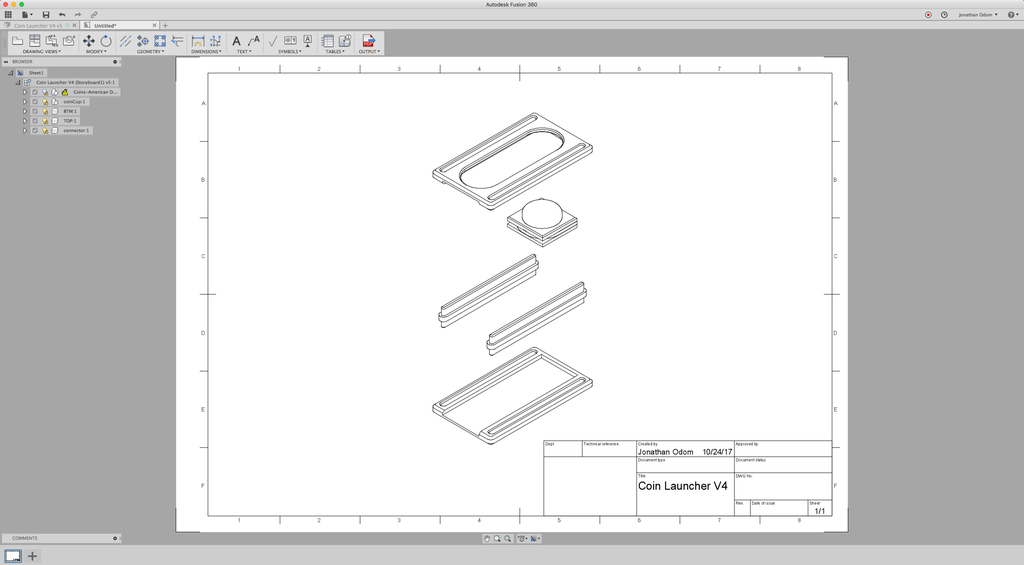
Now you've got a clean line drawing that you can export as a PDF! You can delete the title block if you want, I usually do.
Step 5: Callouts
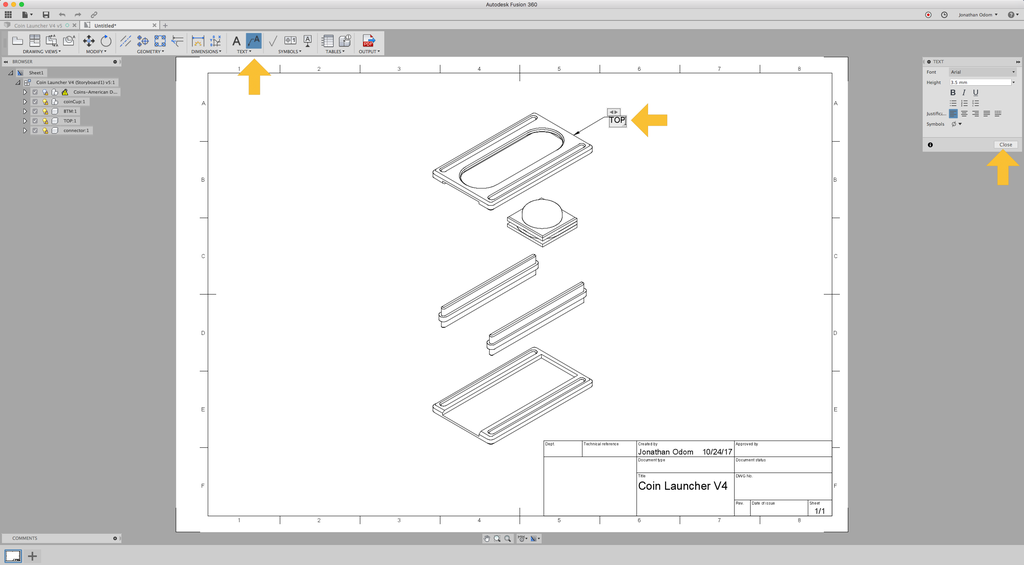
Go to TEXT > Leader in the toolbar, then click on any object line on the drawing to make a callout. You can change the text and text properties, then click Close. You can edits these later by double-clicking them.
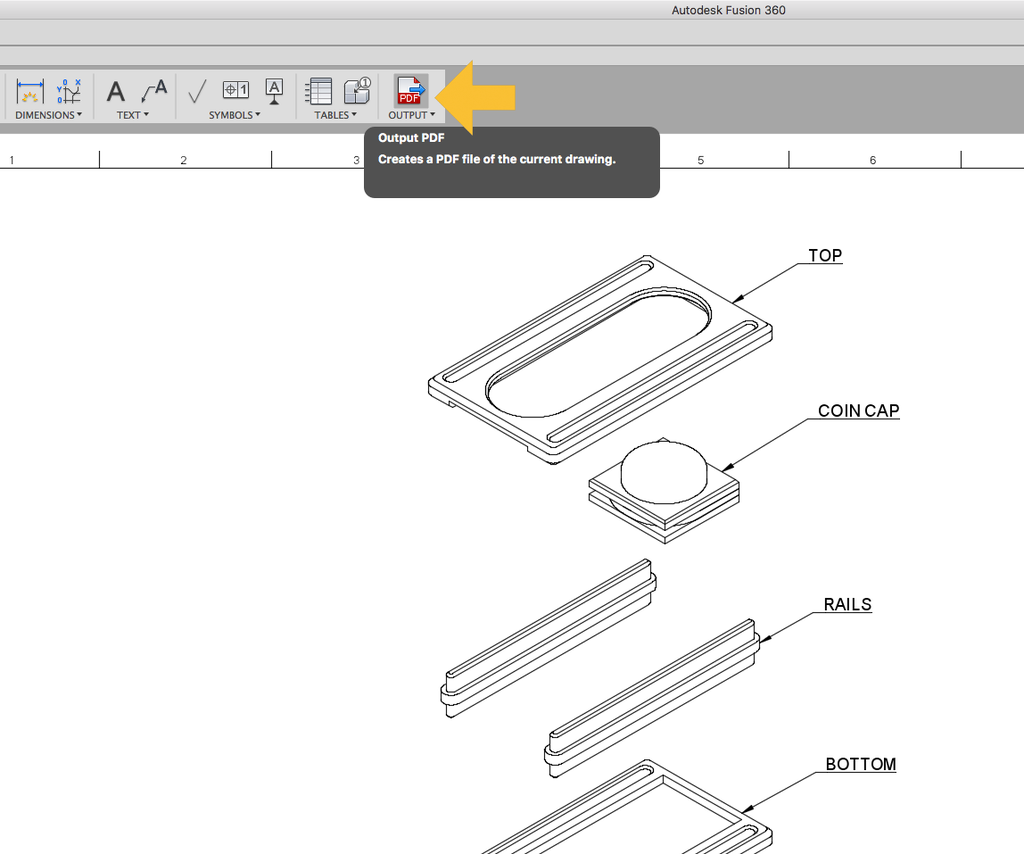
When you're satisfied, click OUTPUT > PDF to export a line drawing.
Step 6: Bonus: Animation!
Since you've already made an animation, why not export a video? I use these for my instructables as animated GIFs to add a little eye candy.
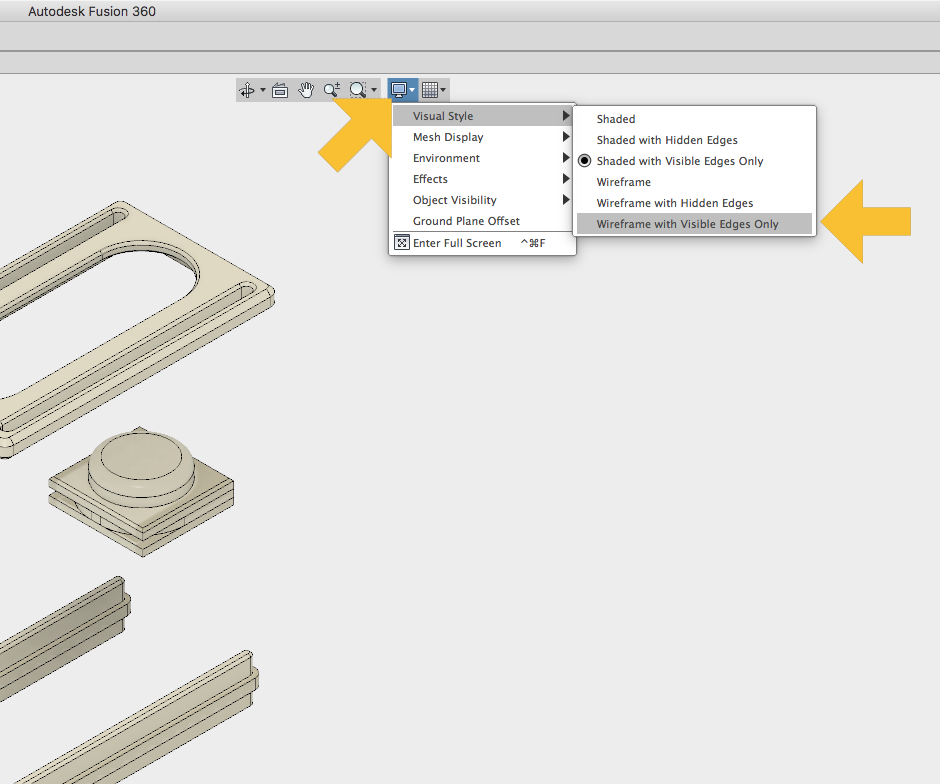
If you want your animation to look like a black and white line drawing, go to View Controls at the top of the Canvas and select Visual Style > Shaded with Visible Edges Only.
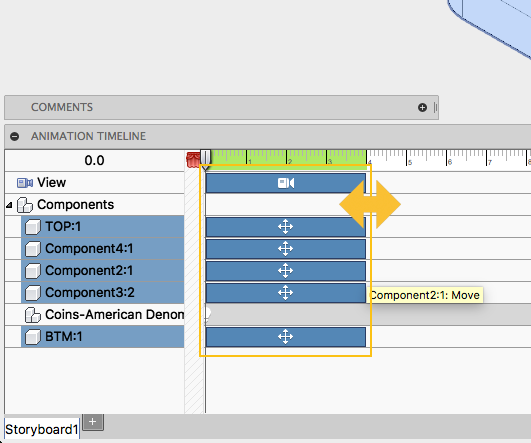
If the animation is too long or too short, select all of the items in the timeline, then shorten our lengthen them with the mouse as shown. If you don't want the camera to move, you can delete the View track at the top of the timeline. Anywhere you place the cursor on the timeline will record the position of the view if you move it. If you don't want the view to be recorded, click the View button in the toolbar at the top of the canvas to turn it off.
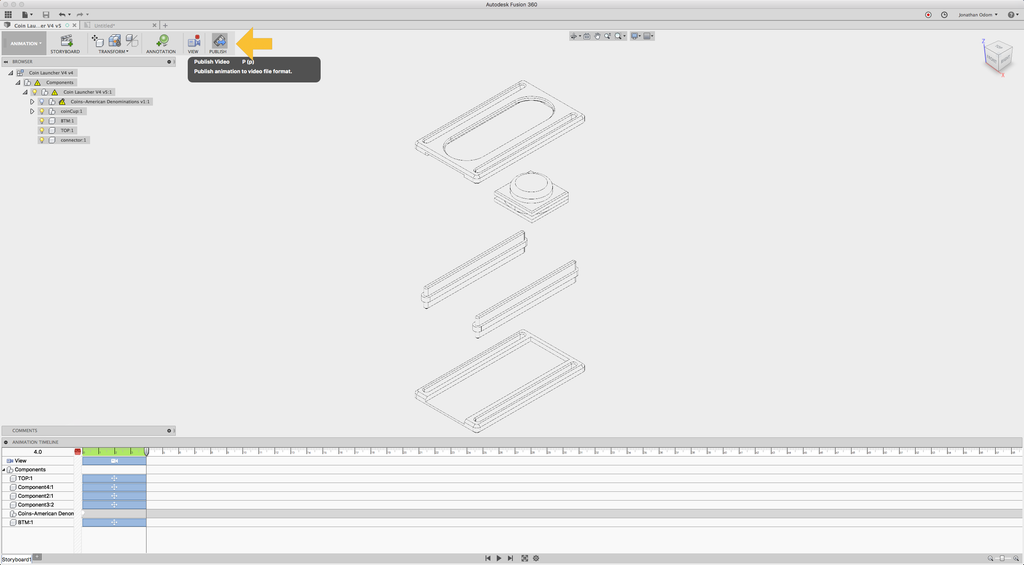
When you're happy with your animation, click Publish in the toolbar.
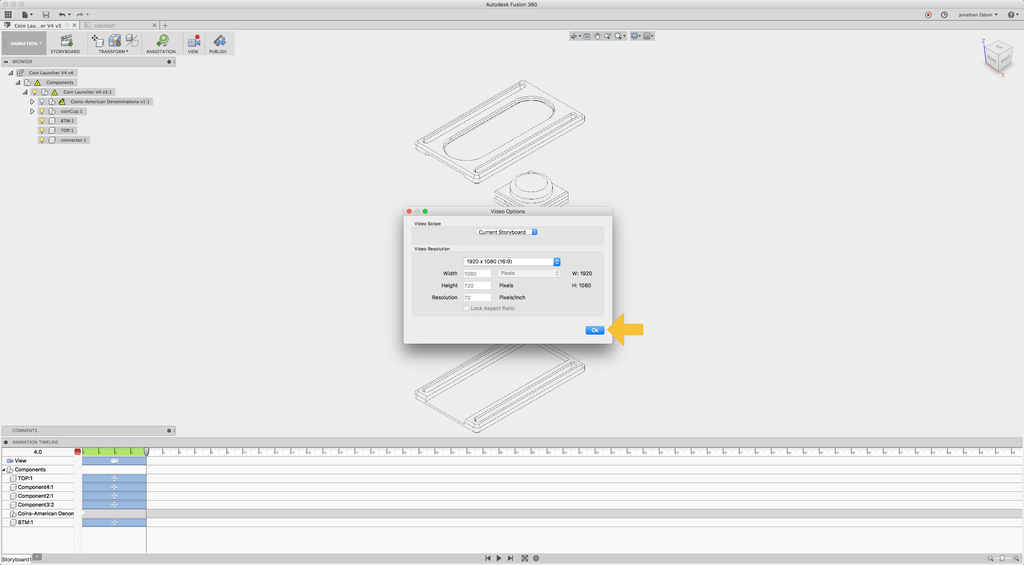
Choose the settings you like in the window that pops up. It's better to go with higher resolution with line drawings because the lines are cleaner and the file size is small since there isn't much color.
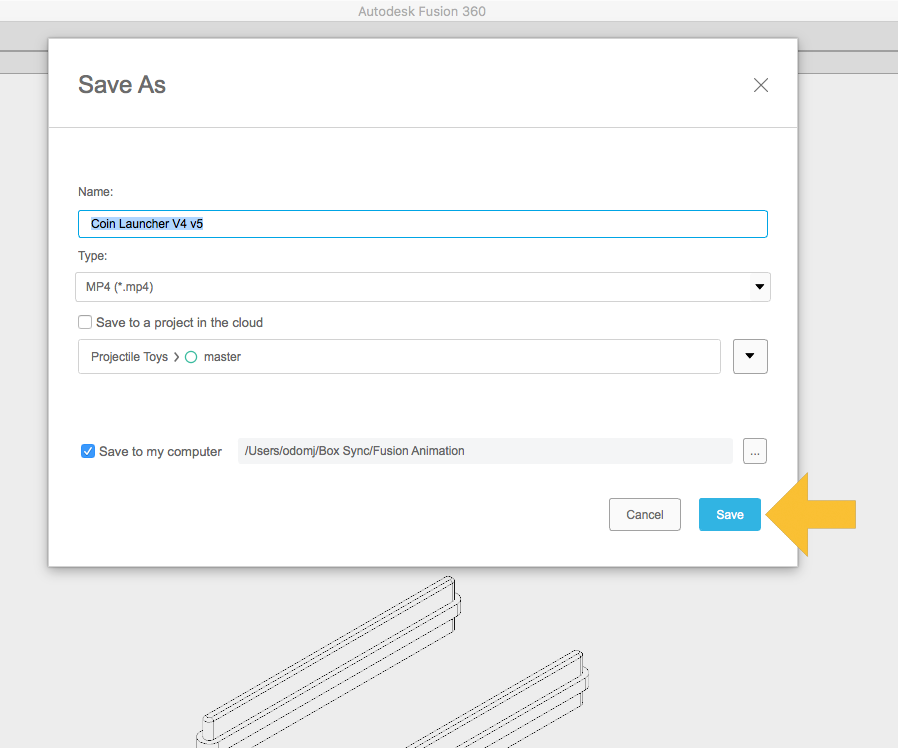
Choose a place to save the animation, and that's it!
Step 7: Explode!
I used a combination of GifRocket, iMovie, and Photoshop to get the endless looping GIF above. The principles are the same no matter how complex the object is, you just might need to move things in different directions instead of all vertically as in the Coin Launcher example.

The drawing above came straight out of Fusion, all I did was make my own callouts and lists in Illustrator (I wanted to make my own cartoonish callouts).
Now it's your turn, show us what you got!

![Tim's Mechanical Spider Leg [LU9685-20CU]](https://content.instructables.com/FFB/5R4I/LVKZ6G6R/FFB5R4ILVKZ6G6R.png?auto=webp&crop=1.2%3A1&frame=1&width=306)


