

Introduction: Easy Yard Dice


Yard dice are a great way to get outside and enjoy a lawn game for all ages. This simple project is easy to make, and can be customized in all kinds of ways to make it yours - like different types of wood, using inlays for the pips, or making them any size you like!
These yard dice are made wood cut from a long fence post with the edges shaved off. Making consistent and clean cuts in wood is a topic I covered in my freeIntroduction To Woodworking Class.
Tools + Supplies:
- Circular saw, or hand saw
- Speed square
- Sandpaper
- 4"x4" wood post (6' long is plenty)
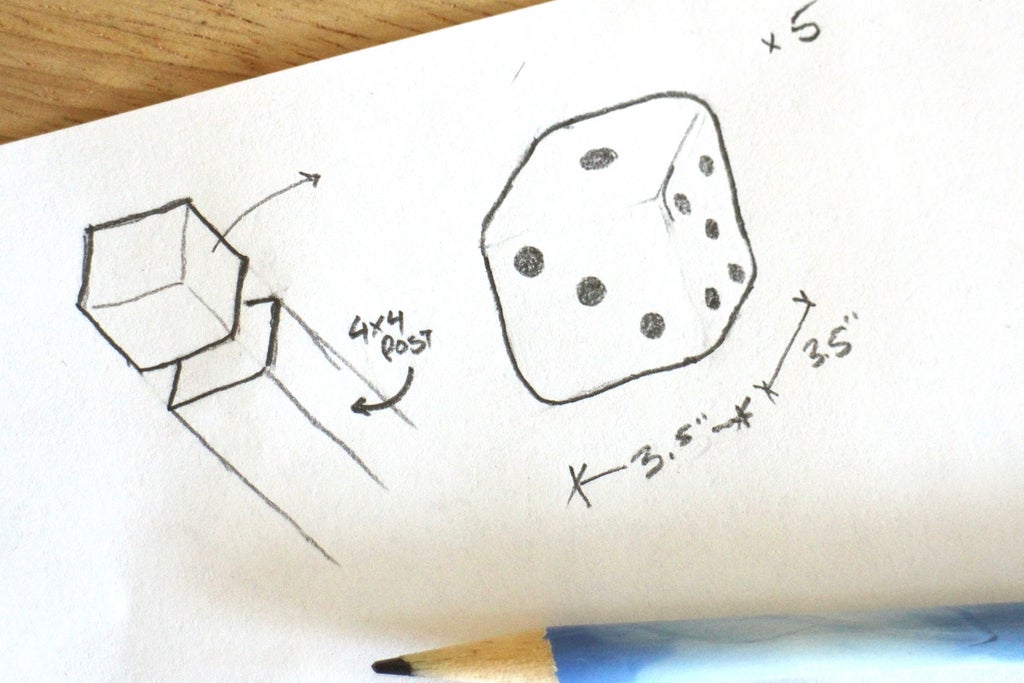
Before we start we'll sketch and plan out the project. We already know that a 4"x4" post is the nominal measurement with the actual dimension is 3-½"x3-½", so we can sketch out our plan of attack before committing to any cuts.
Step 1: Cut Post

Knowing that 4"x4" nominal dimensions for posts are actually 3½"x3½", I measured 3½" along the length of a 4"x4" post and marking with our square we know where our cut line is, this is followed by making matching marks along the sides and bottom of the post and adding a check to pencil line to indicate which side to cut on to allow for the kerf.
With the post securely clamped to a work surface a pass was made with the circular saw, and remember to cut so that the wood can easily separate and fall away after the cut.
The beefy 4"x4" posts were too deep for my circular saw to cut in one pass, so the post was flipped around after the first cut. If you sawed on the check marked side of the post your cuts should line up and a cube of wood should fall away. We'll need 5 dice for this project, so measure up another 3-½" from your cut and repeat sawing until all 5 dice are cut from your post.
Note the tearout at the bottom of the video where the blade exited the cut.
Step 2: Shaping

After all 5 cubes have been cut the sharp edges and corners can be filed off using a hand rasp.


Gently clamp the cube to a solid work surface so it doesn't move around, but not too hard so that you damage the wood. Using the flat side of the rasp knock down the edges to give these cubes more of a dice shape. You can learn more about hand shaping wood in the Introduction To Woodworking Class, but for this project we're looking to smooth out the edges with the rasp. Make a diagonal motion with the coarse side of the rasp to remove the sharp edges on all sides of each dice. It's alright if there's some rough patches form using the rasp, we'll smooth those down with sanding after.
Step 3: Sanding Smooth


We can now smooth down the dice and make them feel better to hold. Start by using an 80 grit on the random orbital sander and go over all surfaces and edges to smooth out the dice shapes.

Sometimes it can be easier to bring the work to the tool instead of the other way around. If you have a bench vise you can try securing your random orbital upside down in your vise and tighten until snug, then you can easily rotate the cubes around on the sander until smooth.

Repeat for all dice until they are of uniform smoothness and shape.
Step 4: Sketch Dice Pips

Grab a die for reference so you'll know which order to draw the numbers on. The dots on die are called pips. I used a large washer to trace around to create pips for these dice.


Using a ruler I drew a line between the corners on one of the die faces, where the lines crossed is the center part of that face. With this as a guide I could place the pips accurately and repeatably for each die face, and for each die.
Step 5: Paint

After marking where the pips were I painted in each pip with black paint and erased any remaining pencil marks.
Step 6: Finishing

To protect the dice I applied a polyurethane coating which will keep them from getting stained with grass or going dull from too much wear.


We'll be covering finishes like polyurethane in more detail as part of a later lesson, for now you're looking for any clear polyurethane. To allow all sides of your dice to dry you can upturn screws and use them as standoffs.
Wearing protective gloves wipe on a coat of polyurethane and set on the upturned screws to dry overnight.
Step 7: Play!

Your first woodworking project is complete. Congratulations! Take your yard dice to the park and play a game of Yahtzee, or a whole bunch of other dice games.
Something I find really great about making something simple like Yard Dice is that you just made something that actually costs money if you were to buy it.
Happy making! :)
Have you made your own Yard Dice? I want to see it!
Happy making :)


