

Introduction: From Battery-powered to USB Christmas Lights


Battery-operated Christmas lights have become very popular in recent years, probably due to the fact that since they do not have a power supply they are cheaper than lights that run on mains power. The fact that they don't require to be plugged into a socket can seem a good thing, but the problem is that after a few hours that the lights are on, the batteries run out and we have to change them. Disposable batteries are expensive, and they are also bad for the environment, since they can rarely be recycled. Besides, we often have an electrical outlet close to where we put the lights, so why use batteries if we can use mains power at a much lower price? So today we're going to look at how to convert some battery-powered lights that we may already have to run on a usb power supply (like phone charger), and so run them attached to an electrical outlet.
To see more details about the construction, watch the video on YouTube (it is in Italian but it has English subtitles).
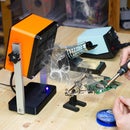
Supplies


To convert some old battery-operated Christmas light to work with a USB power supply we need:
- The Christmas lights
- An old USB cable with an USB-A end
- A mobile phone charger
- A DC voltage regulator (like the LM2596)
- An 1N4001 diode
Tools:
- Soldering iron
- Wire stripper
- Multimeter
- Screwdriver
Step 1: Individuating Battery Contacts


Battery-powered lights are pretty much all made the same way: they have a little box where there is space for the batteries and a circuit with the switch, and from this little box the wire with the lights starts. Generally 2 or 3 batteries should be put in the battery holder.
Let's start with a light string that works with 2 batteries. Later we will also look at one with 3 batteries. The batteries produce about 1.5v, and in the battery holder they are connected in series. So if I measure the voltage with the multimeter we have a total of 3v.
To connect a power supply to the lights we need to see which contacts in the battery holder are electrically connected to the lights. In the case of a 2 battery light string thay are these two at the top, which are soldered to the circuit board. The one with the spring is the negative, and the flat one is the positive. We do not need the two contacts at the bottom, because they are the ones that were used to connect the batteries in series.
In the case of a 3 battery light string, the two contacts connected to the lights are the top-left one and the bottom-right one. Since we have 3 batteries in series, the multimeter will show 4,5v.
The contacts are positioed like shown in most of the cases. However always look which contacts are connected where to individuate the right ones, as their order may vary.
Step 2: Voltage Regulator


To connect the lights to a USB power supply, such as that of a phone, we need an old USB cable. To this cable I have cut off one end, leaving the one that connects to the power supply, which generally is an USB type A. Inside the cable we have four wires. The white and green wires are for data and we can cut them, while the power is carried by black and red. There is 5v on these wires, so we cannot connect them directly to the battery holder, because the lights need 3v. To lower the voltage we can use a voltage regulator board like an LM2596, which costs about 1€. I soldered the two red and black wires to the positive and negative input of the voltage regulator. Then I soldered two more wires to the output of the voltage regulator.
Now I connected the USB cable to the power supply, and plugged it in. I set the multimeter to measure the voltage, and connected the test leads to the two output wires. With a small screwdriver, I turned the voltage regulator potentiometer until I saw the voltage needed by the light string on the display. If we have a 2 battery light string the voltage will be 3 volts, while if we have a 3 battery light string the voltage will be 4,5 volts.
Step 3: Soldering


Now I opened the lid of the battery holder and soldered the positive and negative wires to the two battery contacts we identified earlier, being careful to respect positive and negative. I closed the battery holder again, making the wires come out of a hole I had made earlier. By using one voltage regulator we can also power multiple light strings running with the same voltage by connecting them in parallel, so - with - and + with +.
When I plug in the power supply and turn on the light switch we can see that the lights work as before.
Step 4: Alternative Solution Using a Diode


Now let's see how to transform to work with USB lights that run on 3 batteries. Here again we could connect the voltage regulator from before to the two battery contacts we identified earlier and set it to 4.5v. However, one of my followers suggested an alternative solution, which is to use a diode. In this case we will use a 1N4001, which has a voltage drop of 0.7v. The diode has an input and an output, and the output is marked with the white line. I soldered the output of the diode to the positive of the battery holder. Now I connect the negative of the usb to the negative battery contact (the one with the spirng that we identified earlier), and the positive to the input of the diode. When I plug the usb charger into the socket, we see that the lights come on. Good!
If I measure the voltage before the diode we have 5v, while if I measure it after the diode we see about 4.5v, so the diode correctly lowers the voltage, so we avoid burning out the lights. The only problem with this solution is that the diode gets very hot, so it is only good for lights that consume very little power.
Step 5: Making a More Compact Circuit


In any case it is important to keep the board or at any rate the electronics that are inside the battery holder, because if we connect the wire of the lights directly to 5v we will definitely burn them.
However, these lights only had a resistor in the battery holder, so keeping that big box was useless. So I disconnected the resistor from the switch, and pulled the wires out of the battery holder. I had this micro-USB breakout board, which essentially is a micro-USB port soldered onto a pcb. I soldered on the positive the diode and resistor in series, and on the negative I soldered the negative of the lights directly, like shown in the picture. I protected the connection with hot glue and put heat shrink tubing over it. So now I can power the lights with a micro-USB cable and a 5v charger, and the circuit is much more compact.
Step 6: Finished!

Here's my guide for converting battery-operated Christmas lights to be powered with an USB power supply. I hope it was useful or at least interesting for you.
If you have to run the Christmas lights with batteries because you don't have a socket near, you can use rechargeable batteries, which are definitely less harmful to the environment since they can be charge up for a lot of times.
If you need more information, please click here to watch the video on my YouTube channel.


![Tim's Mechanical Spider Leg [LU9685-20CU]](https://content.instructables.com/FFB/5R4I/LVKZ6G6R/FFB5R4ILVKZ6G6R.png?auto=webp&crop=1.2%3A1&frame=1&width=306)


