

Introduction: Garage Wall Storage Rack for Multiple Bikes, Scooters, and Assorted Items


After struggling with a messy garage for several years, I built a storage rack that includes space for:
- 5 bikes
- 3 scooters
- Tennis and Pickleball rackets
- Shelves for balls, sporting equipment, and other garage stuff
In theory I can now park a car in the space formerly occupied by said stuff, but as seen in the video, it's a bit of a dicey proposition.
Supplies
This project can be modified to suit your needs, but my implementation requires:
- (10) 2x6 uprights, 46.5 inch length
- (10) 2x4 spacers, 2 1/8 in
- (1) 2x3 bottom horizontal support, 96 inch length
- 3/4 in dia PVC pipe ~30 inches
- (~5) 3/4 in PVC pipe tees
- (2) 2x12 top storage section, 10 foot length
- (2) 2x10 top storage support, 12 in
- (2 for each shelf) 2x2, 5 in length
- Cut to suit for each shelf: chipboard etc
- Optional: 3D-printed supports
Step 1: Mount Bottom 2x4 Support

Cut bottom 2x3 if needed, finish as desired, mount to wall horizontally using studs with bottom of 2x3 23 inches from floor.
While you could probably leave this off, it helps support the uprights during installation and looks good.
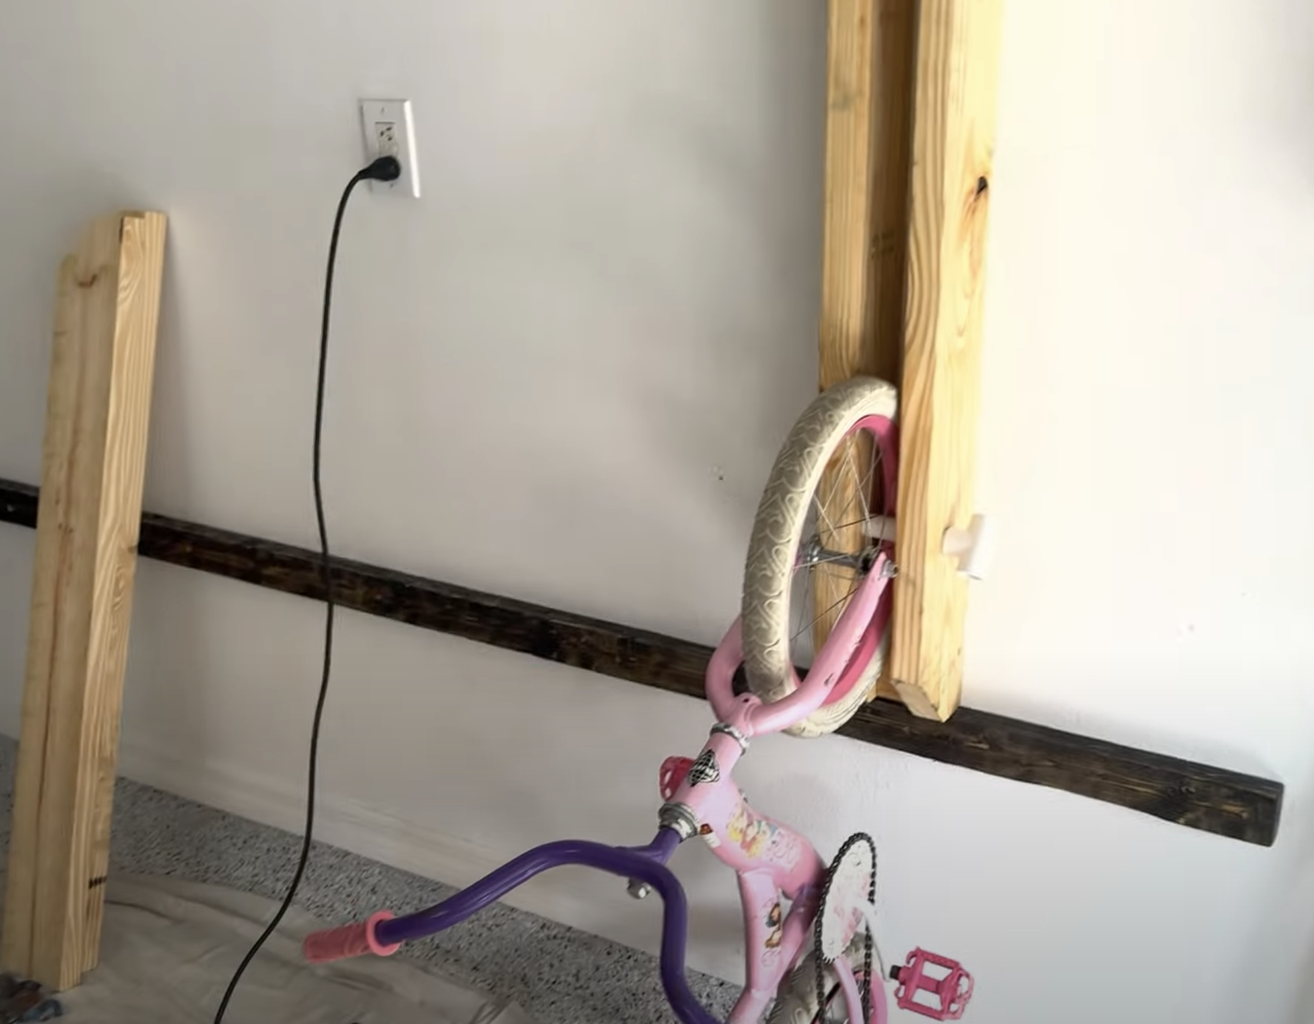
Step 2: Cut Uprights, Add Holes


Cut uprights as shown. Chamfer the bottom if desired, but leave top as-is to accommodate top storage section.
Measure distance from floor to central axis of front wheel of bike when fully vertical as stored.
For each set of two uprights, drill holes 1 in diameter 3 in from the surface that will attach to wall, and with a distance from the bottom to match the floor-front-wheel-axis distance, minus 25 1/2 inches for the top of the 2x3 when mounted.
If bikes of multiple heights are to be stored in one berth at different times, drill holes corresponding to each one. Cut upright spacers to 2 1/8 in length. Mount inside top and inside bottom of uprights to make subassembly.
Ideally, different length bikes should be staggered to allow for efficient storage.
Step 3: Mount Uprights

Set each upright on the horizontal bottom support, align the middle spacers with a stud, and drill with wood screws to attach. Note the top may be slightly offset due to tolerances/wood horizontal support warping.
3D-printed spacers are provided here on Printables, which may be useful. Other largely optional accessories for this design are also found there.
Step 4: PVC Plunge Handles, Hang Bikes
Cut 3/4 in PVC to roughly 5 1/2 in sections and attach 3/4 in tee as handle. Raise your bike's front wheel up, insert into upright assembly, and insert PVC plunger between spokes just on the inside of wheel to lock bicycle in place.
You could technically stop here (or even just mount one set of uprights by itself for single-bike usage), but you would be leaving a lot of storage on the table. Continue on to get the most out of this assembly.
Step 5: Top Storage, Optional Lighting

If you have room on top of the uprights, attach the first 2x10 storage shelf to the top of the uprights as shown in the video. Add a second level for even more stuff-off-your-floor capability. Spacers between the two are cut to 12 in here, but can be made to suit.
Step 6: Middle Shelves


Attach 2x2 supports and install shelves on top with hot glue or other method of your choosing. Here small waste pieces of acrylic were put on the front to angle the shelves slightly backwards in order to help hold "rolly" stuff.
After some use, I would recommend using screws or nails here, as hot glue can eventually come unattached.
Step 7: Scooter Storage


As seen around 7:40 in the project video, I was able to cut out a piece of lumber to accommodate up to 3 scooters in the central section. The end of the slots were drilled first with a hole saw etc. Installation was assisted with a 3D-printed angle bracket, which raises it to an angle in order better hold balls and other assorted toys.
Step 8: Racket Storage


Print and install from aforementioned repository as needed.
Step 9: Lots Storage!
I'm quite happy with how this has turned out, and the concepts here can be adapted for a wide range of storage/garage situations. The project 3D files repository linked earlier includes a draft model of the overall setup, so you can open it in Fusion 360 to get additional measurements and modify as needed.
Have fun, and if you do make a storage solution based on this, I would love to see how it turned out. While the results are quite good, I'll just put out a warning that it took me a lot longer to build this than I originally anticipated, and spent a non-negligible amount of money on supplies.
If you enjoyed this project, you can check out my other stuff here on YouTube.
-Jeremy


