

Introduction: Getting Started With ESP32-C3 XIAO

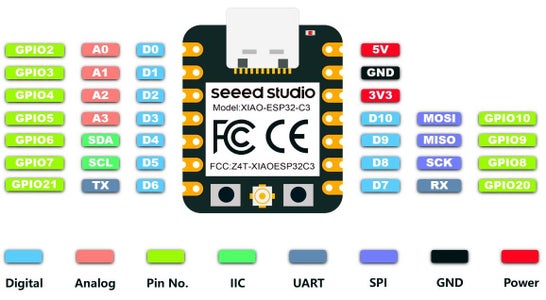


The ESP32-C3 is the latest development from seeed studio. It is extremely small (2.2x1.8 mm), has WiFi and Bluetooth BLE on board, a connector for an external antenna, 4 analogue and 10 digital pins, as well as connectors for I2C, UART and SPI. The chip has 400 KB SRAM and 4 MB flash.
The ESP32-C3 needs very little energy (~44 μA) in deep sleep and a built-in IC even supports battery charging.
For further product details, please visit the seeed studio website.
Handling it is sometimes a bit tricky, maybe this tutorial will help you.
Supplies

ESP32-C3 XIAO
Step 1: First Steps: Software Setups


It is required that you have downloaded and installed the Arduino IDE.
- start the Arduino IDE
- got to File > Preferences, and klick at the windows symbol behind "Additional Boards Manager URLs", a window will appear, insert this url there:
- https://raw.githubusercontent.com/espressif/arduino-esp32/gh-pages/package_esp32_dev_index.json
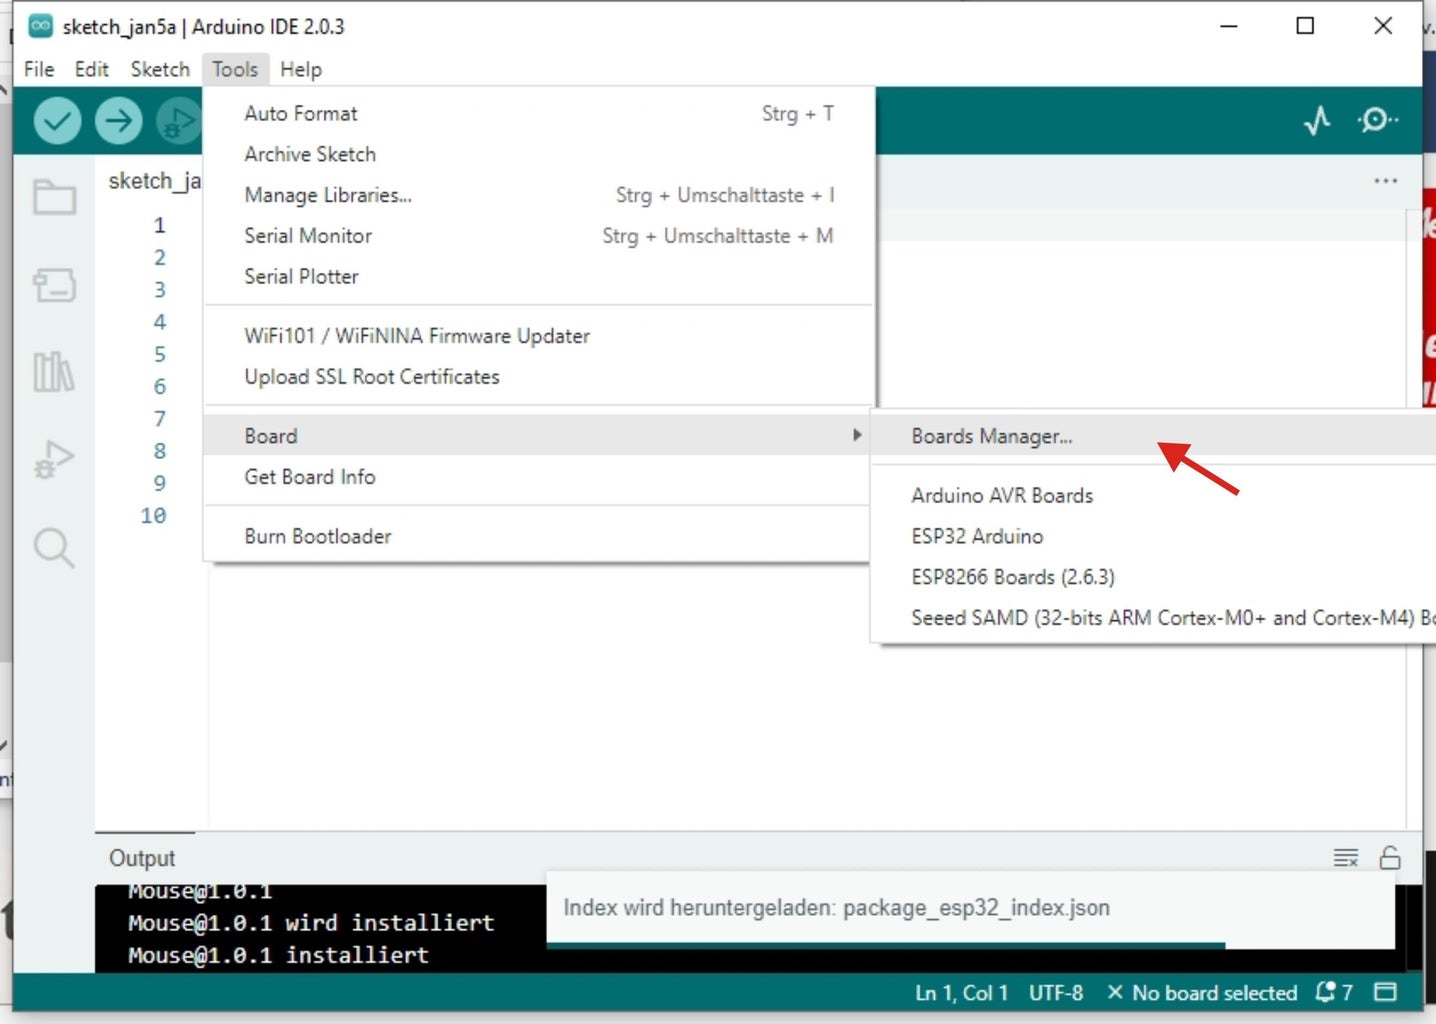
- got to Tools > Board > Boards Manager, type "esp32" into the search box, select the latest version of "esp32" and press "install".
Step 2: Select Board and Port

Select your board:
- go to Tools > Board > ESP32 Arduino and select "XIAO_ESP32C3". (This entry is quite at the end of this long list).
Select your port:
- plugin your ESP32-C3 to a free USB port of your computer
- go to Tools > Port and select the serial port name of your connected ESP32-C3. Usually it is NOT COM1 or COM2, it's a higher number.
Step 3: Software Tipps
Please use Arduino software developed for ESP32, not for Arduino UNO or ESP8266. This is especially important for some libraries.
(If you want to use Wifi and/or BLE, you have to carefully plug in the antenna first.)
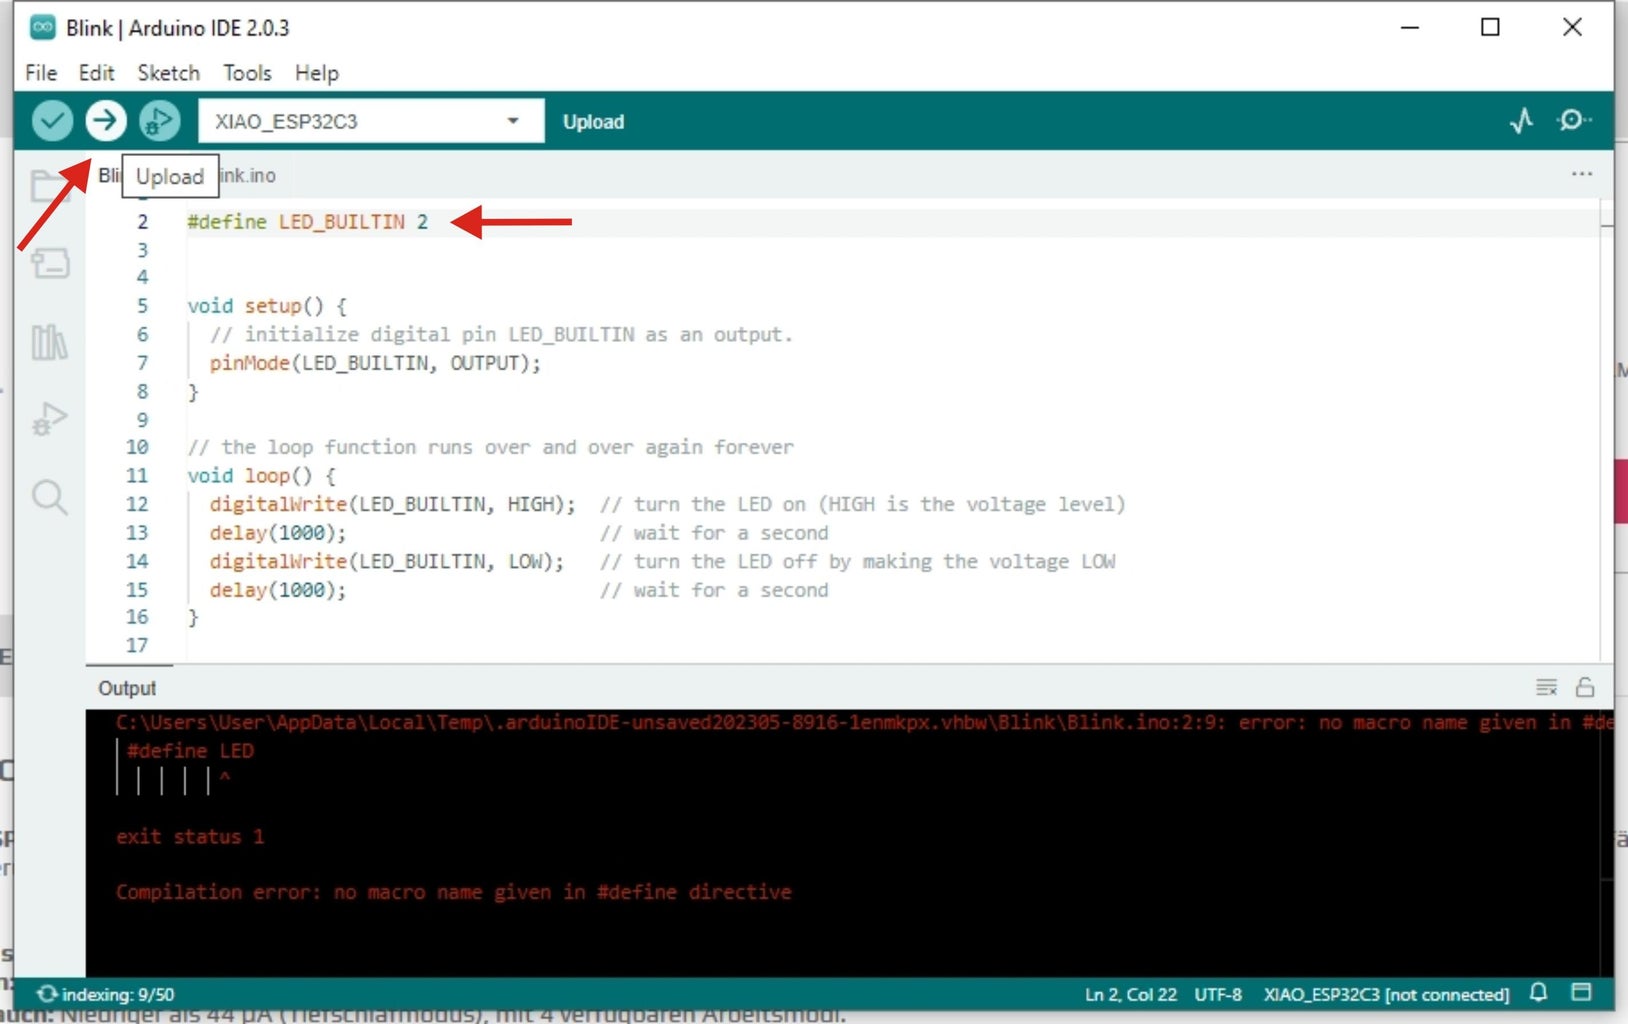
For a start, you can make an LED blink:
- File > Examples > Basics > Blink For this sketch you need an LED and a resistor and you should insert "#define LED_BUILTIN 2" before "void setup();
If you want to use the pins as inputs or outputs, you have to specify the GPIO numbers, not the a(nalog) or d(igital) numbers!
Step 4: Upload


This part can be a bit tricky and frustrating. (Here I spent a lot of time trying things out).
- disconnect the ESP32-C3 from USB
- press the boot button on your ESP32-C3 and hold it.
- plug in the USB
- press the upload button in Arduino IDE
- wait a few seconds
- than release the boot button
- (Sometimes it is also useful to change upload speed from 921600 to 512000 baud.)
- Compared to an Arduino nano, the upload takes quite a long time anyway!
Step 5: A Curious Detail
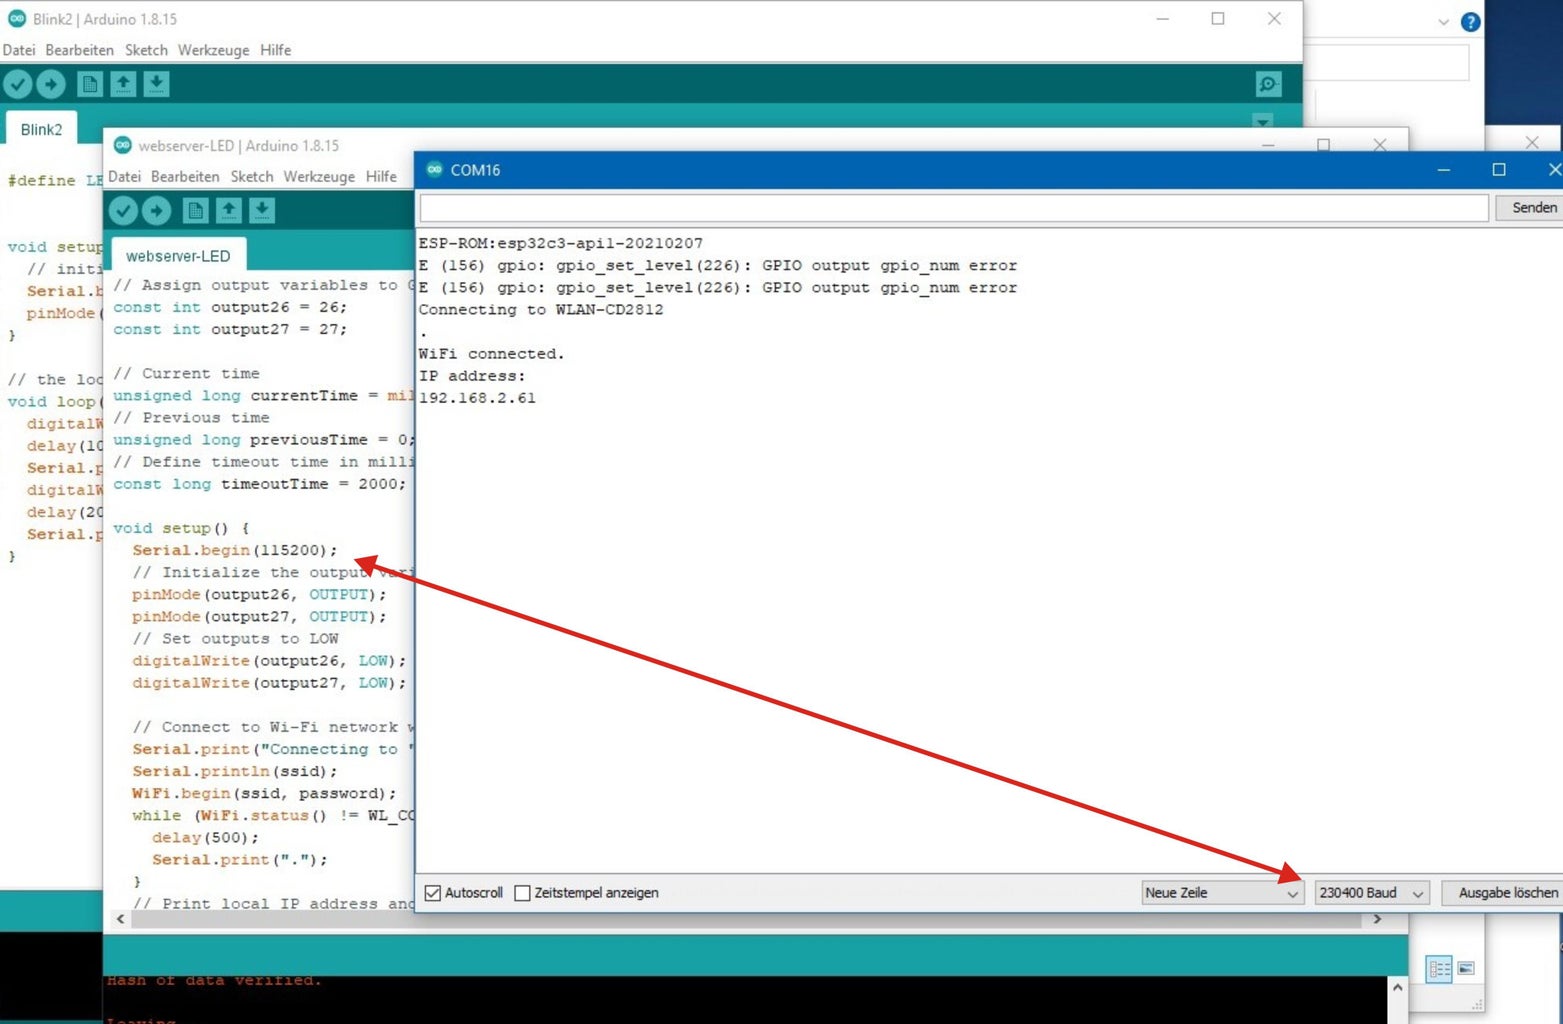
I have tried several sketches that use the Serial Monitor. For this you have to specify the Baud rate in the setup, e.g. Serial.begin(115200);
But I didn't find the output in the Serial Monitor window, it ran here under 57600 or 230400 Baud!
I do not know the cause, but this tip will save you a lot of time.
Have fun, feel free to inform me about your successes.

Participated in the
Anything Goes Contest


