

Introduction: Glowing Solar Balloons


3D printed and solar-powered Ballons :)
Supplies
- 3D Printer
- Fusion 360
- Slicer (i'm using simplify3D)
- "Solar Fairy lights" for bottles
- Hot Glue
Step 1: Fusion 360


Get the File here:
https://gallery.autodesk.com/projects/167207/hot-air-ballon
To make Ballons with other letters you just have to edit the Text "A".
After that, let Fusion run to the end and inspect the balloon.
There are probably some holes to close. This needs some work.
Step 2: 3D Printing

This part is a little bit strange, because it depends all on your slicer.
To get a good result in simplify, i have added an example file.
You have to delete the *.pdf extension to get the Simplify3D-Factory-File!
You have to resize the balloon to your needs. The top won't get closed.
You have to measure your solar-panel and estimate the printing size.
Those balloons can be printed very quickly. Some tries and you'll have your perfect size.
No supports, but a raft. Hollow spaghetti print.
Attachments

Step 3: Solar/LED Part


The hole on/in top should be a little bit smaller. Your solar cell a little big wider.
Prepare the "cork" with hot glue. And add a string.
Add some hot-glue to your Ballon and pressfit the "solar-cork" into your Ballon.
That's it. Quite simple... if you didn't forget to power it ON before :)
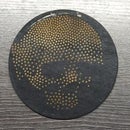
Step 4: Coloring


I've used fine acrylic Airbrush paint. Applied with a brush.
This was all in all quite easy to make. At least with Simplify3D.
I couldn't find a way to slice it correctly wih Cura.
But i'm no expert with cura.
Thank you for reading :)
If you liked this instructable, please vote for me :)

Participated in the
Make it Glow Contest


