

Introduction: How to Build a PHOTO LIGHT BOX


Lightboxes are a great way to capture top-notch photos. These can be made from just about any material. You can even create one with cardboard. For me, I need something sturdy and durable. Although It would be great to break it down, I don't have any plans to travel with it. I also didn't want to compromise and make it too small. The overall size of it is 32.5 inches (L) X 21 inches (D) X 18.75i nches (H). Being that I'm a maker, my goal is to capture the best images so I can display my work. I put together a quick cut list for those of you that would like to build this yourself.
Get the free PDF Cutlist herehttps://gumro ad.com/diycreators
Materials I used
(7) 1 x 2 x 8 feet select pine
Diffusion fabric https://amzn.to/2ILH5ra
Wood Filler https://amzn.to/2rLk SzU
Wood Glue https://amzn.to/2rNQ tkc
Tools Used
Miter Saw https://amzn.to/2L7C6 zB
Pocket hole jig https://amz n.to/2rSv9KL
Drill and Driver https://amzn.to/2IqS Y2a
Jawhorse https://amzn.to/2Im5 iot
Orbital sander https://a mzn.to/2IsiVi2
Bandy Clamp https://amzn.to/2rLB VBF
Bar clamp https://amzn.to/2GtdsW A
Staple Gun https://amzn.to/2KydX 3I
My Gear
Camera - Nikon D5500 - http://amzn.to/2qTajaY
Lighting http://amzn.to/2ozoNxR
Mic to record to computer - http://amzn.to/2qTtAZO
Connect With Me Here
YouTube: https://www.youtube.com/diycreators
Instagram: https://www.instagram.com/Morediycreators/
Step 1: Making the Cuts


You can find a free downloadable cut list here: LINK
With all the parts cut down to size, it's time to assemble. To keep things simple, I use pocket-holes screws. I wanted to keep the build simple so I built a bunch of frames and joined them. Since I will be repeating this process, I made a quick jig to speed things up. It's really awesome because this helped me keep everything aligned while I focused on installing the screws!
I didn't have time to create a complete set of plans. However, you can look at the cut list. All the parts are labeled and that should help you put this together.
Step 2: Building the Box


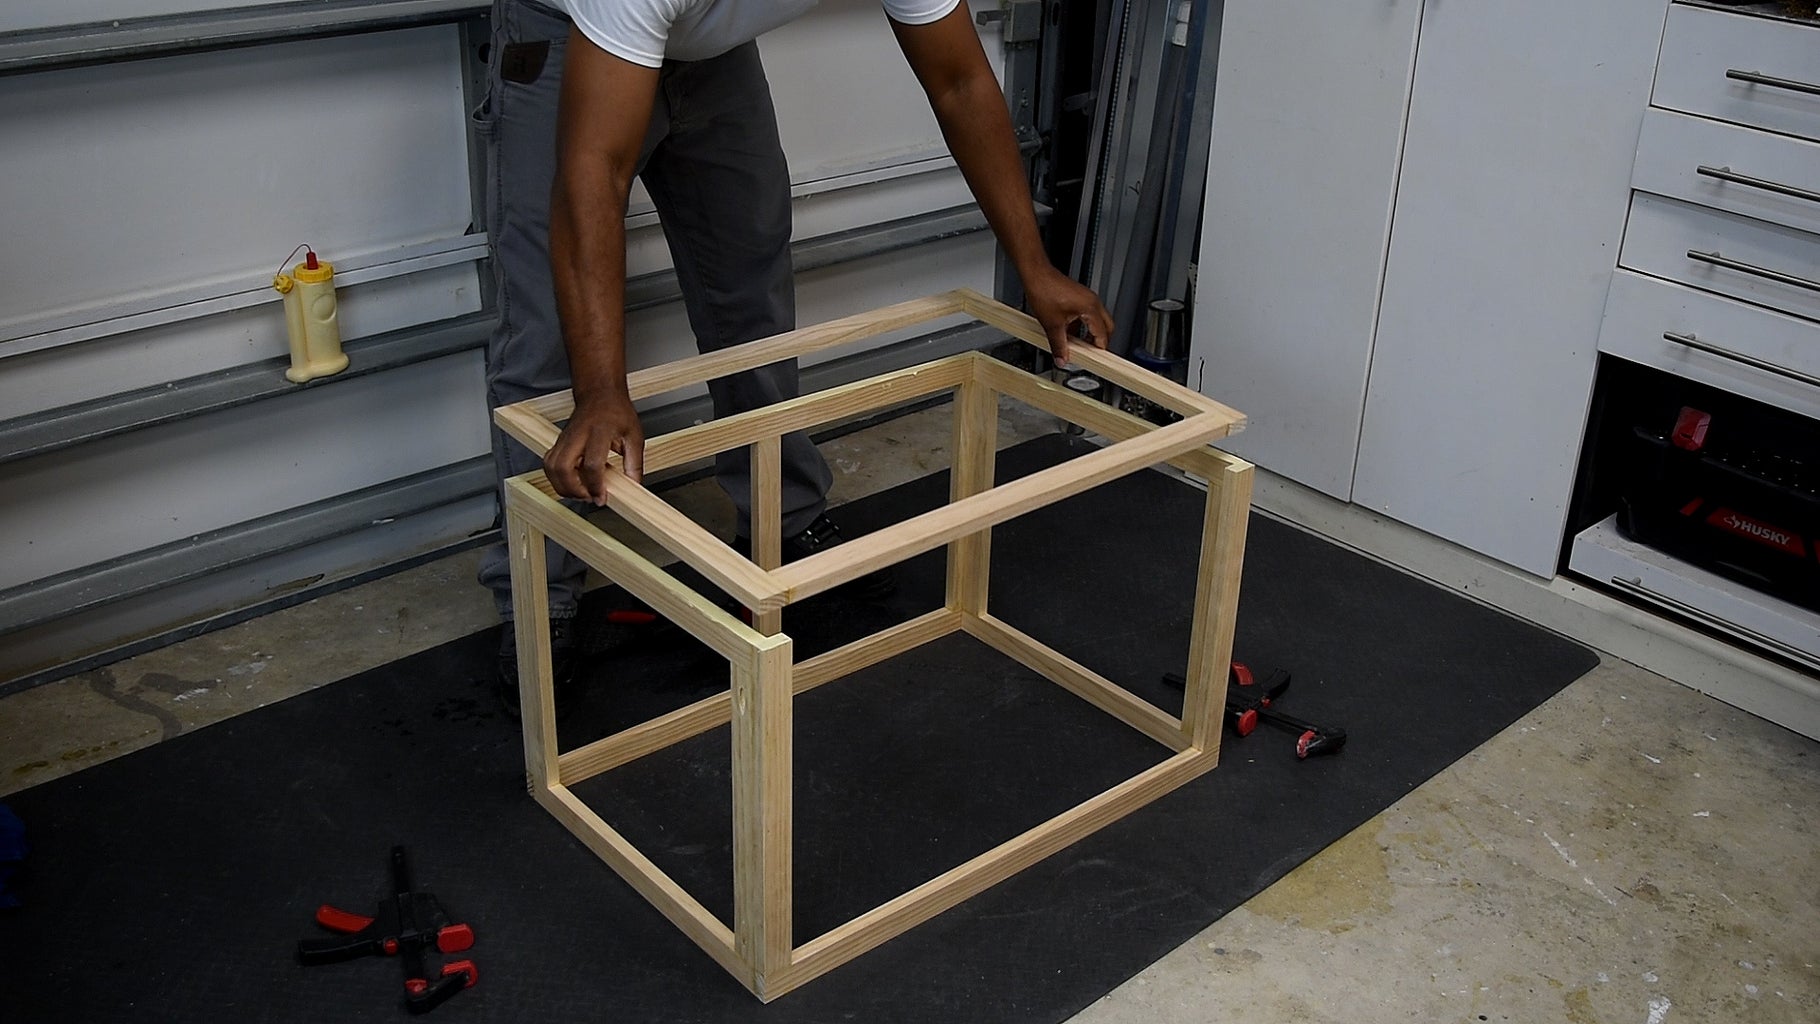


After all the frames are made up you should now have 6 frames and one opening frame along with two loose pieces of lumber. The small loose piece of lumber will be added to the back for structural support. The other will be used to cover the loose ends of fabric along the front. This will be covered in a later step.
Now it's time to assemble all of the frames together. Pay close attention to the cut list, the backside of the size should but up against the back. When securing the sides to the back, make sure the pocket holes are facing out. Apply wood glue in between the joints. You can use a nail gun or you can use screws to secure these.
Now install the front, and make sure to pocket holes are facing in. Next, secure the top.
One thing I noticed was the pocket holes actually landed on the inside of the trim that will be added later. You can use plugs to close this up or wood filler. This is so the holes don't show through the fabric.
I sanded down the entire frame and then gave the corners of slight round over with the orbital sander.
Step 3: Adding Fabric


I'm no expert with the fabric, but here's what I did. I figured out a quick guess on how much fabric I would actually need to wrap the entire box. Since I'm only doing this side in the top, I started with the smaller sides first. I cut the material so that it was slightly bigger than the opening. Then I stapled it down and stretched the fabric in all different directions until I was able to get it flat. I flipped it over and did the same thing on the opposite side, then I made my way to the top. The top was more challenging than the side, however, I was able to get through that and tighten up everything.
As a way to hide the loose ends of the fabric, I attached the final piece of the lumber. This piece was not glued, it was only nailed in place. Finally, I attached the trim on the sides. Again, these were also not glued in the occasion that needs to be pulled back off to replace the fabric if an accident happens.
To wrap this up, I used wood filler to fill in the gaps and also the nail heads.
Step 4: Building a Backdrop


At some point in the future, I'll create some customized backgrounds. The goal is to make them interchangeable so that I can have more options when it comes to taking photos.
So in this step, I put together a really quick and simple temporary background. This was made from a few pieces of scrap and also some recycled pallets.
Step 5: Adding a Back


I didn't have plans to add a back. However, I did go back and add a piece of white hardboard 1/4-inch thick. This allows me to use it as a backdrop and I could also flip the lightbox on the back in the occasion I need an overhead shot.
Step 6: Setting Up


The lights I'm using are studio lights and can be used alone to take photos. However, I don't want to lug these around every time I need to shoot a photo. So making this lightbox will make it easy for me to grab a few shop lights and bean them right inside. This way I don't have to worry about a softbox. At some point, I'll probably make some LED panels to stick to the side, where I can permanently have lights built on to the box.
Beside the pallets, you could use paper poster boards -- you name it as long as it fits you can switch up your backdrop at any point!
Step 7: Shooting


Here are a few shots I took using the lightbox. They're not edited, but this will give you a good perspective on what you can get with a lit area.
This also gives an example of how you can make the background look extremely different by adding a few pieces in the area of your subject.
I hope you guys enjoyed this.
I try to put out a project video every week, so please SUBSCRIBE to my YouTube channel to get the latest.
If you like to see what I'm working on next, follow me on INSTAGRAM .

Participated in the
Woodworking Contest


![Tim's Mechanical Spider Leg [LU9685-20CU]](https://content.instructables.com/FFB/5R4I/LVKZ6G6R/FFB5R4ILVKZ6G6R.png?auto=webp&crop=1.2%3A1&frame=1&width=306)


