

Introduction: How to Make a Track Saw Guide for a Circular Saw


In this Instructable, I will be making a track saw guide. This guide is very stable, and extremely accurate. You too can have the same experience, if done right. Hopefully my instructions are clear and easy-to-follow. Enjoy :)
Check out the video for a more in-depth take.
Check out my social media sites:
Instagram www.instagram.com/diycreators2015/
Facebook https://www.facebook.com/diycreators
Youtube: www.youtube.com/c/DIYCreators
Step 1: Getting Started


Tools I used:
- Router
- Tape Measurer
- Drill
- Combination Square
- Circular Saw
First, line the saw up on the plywood. Then, mark a line along the base of the saw, on the end that's the farthest from the blade. Measure the line from the edge of the plywood to the mark that was just made. Carry that same measurement the entire distance of the plywood.
Take a straight object to make a straight line. In my case, I used an aluminum tubing.
Now, trace the line from the end (I am still referring to the very first line from the edge of the saw base.)
Next, move your straight object (i.e. aluminum tubing). Now measure from the router bit to the end of the router base. That's the distance you want to set your straight object from (the line that I drew out first).
Since I'm working with 8-feet section, I placed a piece of wood in the center of the tubing to resist flexing.
Step 2: Routing the First Track


Set the router bit to take approximately a 1/8-inch at each pass. Do this several time to achieve the depth of the bar you are using for the track.
Step 3: Marking the Second Track


Find a location on your saw for the placement of the second track. Then, transfer that to the plywood.
Step 4: Routing the Second Track


Just like the first track, use your straight object to help guide the router to make the second router cut.
Now, the two bars should move freely in the track. If there is any tension, use sandpaper to lightly sand the track out.
Also, add some wax to help with the friction.
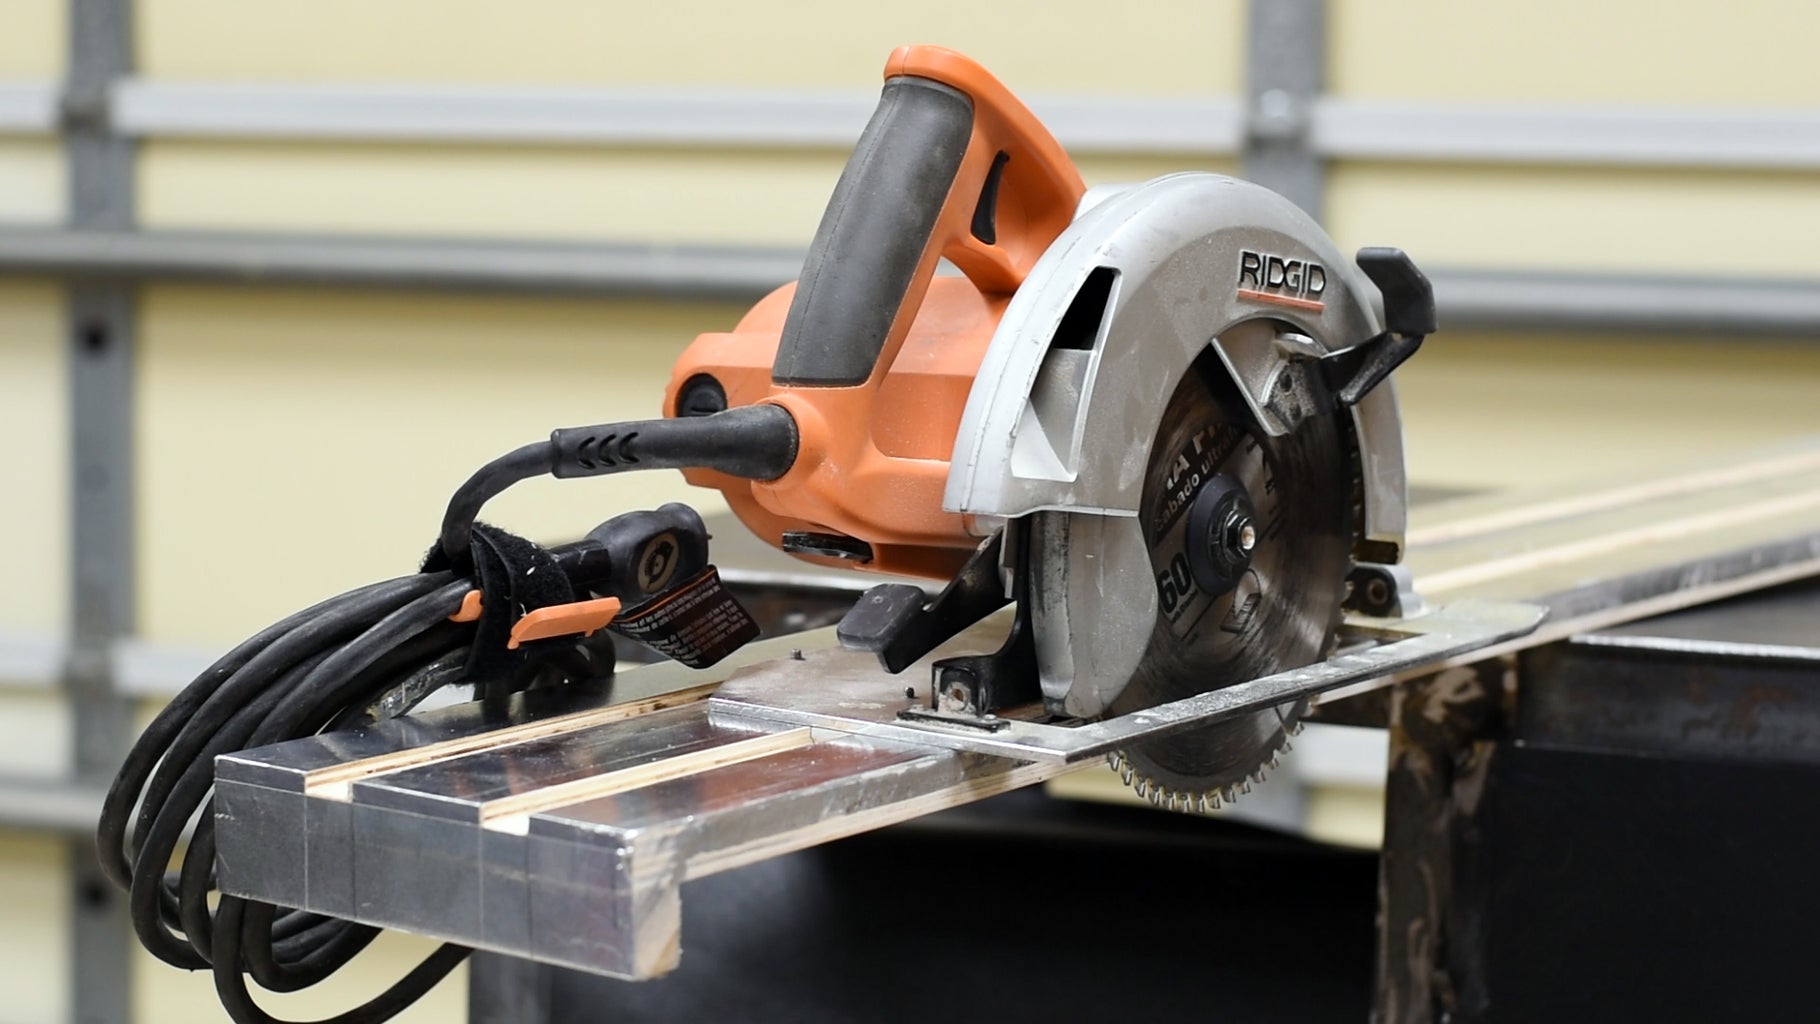
Step 5: Adding the Bars to the Circular Saw


The bars I am using was salvaged from an audio-video rack. You can go to your local hardware store to find bars to attach to your circular saw. I suggest bars with the minimum of 1/8-inch thickness.
Drill and tap the hole all the way though both the saw base and bar. Then, counter sink the hole for the screw head.
Now, add the second track. It is very important to maintain the same gap between the tracks. If you fail to do so, you will have tension with the slide of the saw.
Then, cut off the track at the end of the saw base.
Step 6: Cut Off the Track


Now, cut the track from the plywood.
I also attached a piece of wood to the end of the saw track. This should help with lining up the track onto the work surface. This piece was glued and screwed in place. Then, cut off the overhang .
Step 7: Extra


At this point, the track is done.
However, I wanted to experiment. I used aluminum tape. This only made it look cool. I can't say it made a huge difference on functionality.
Step 8: Making the First Cut.

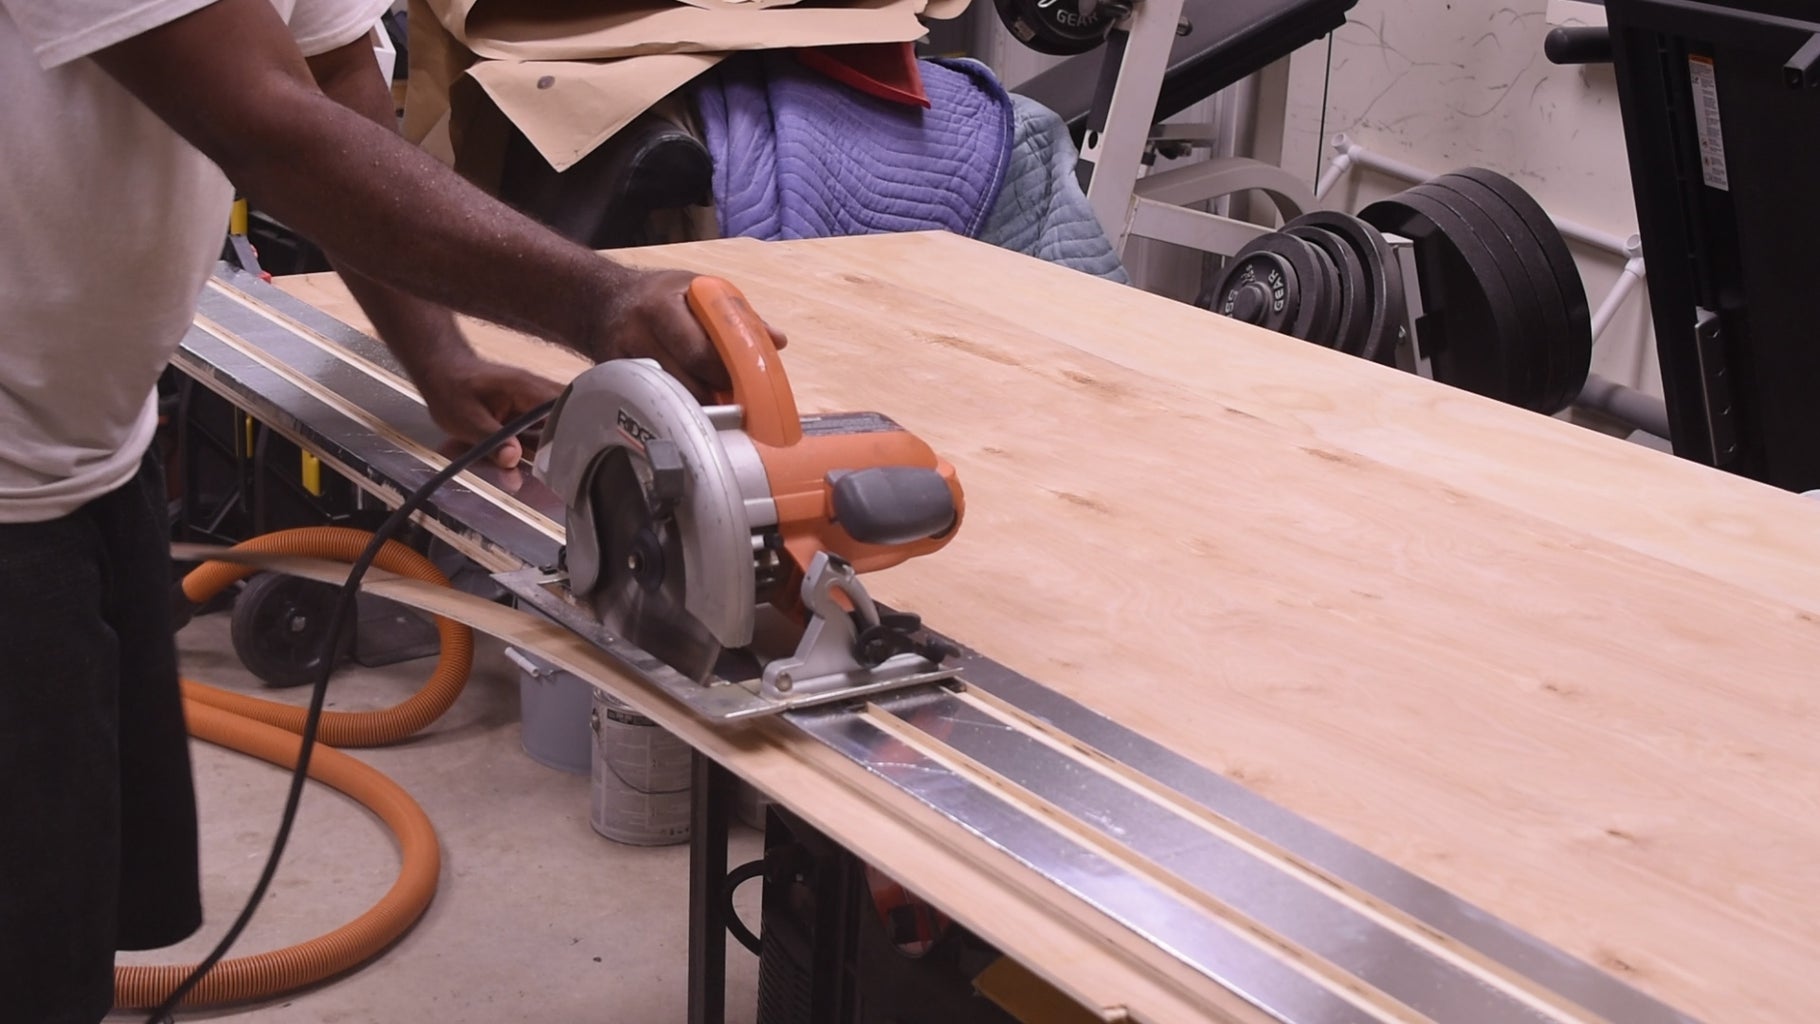


Clamp the track down and make the first pass through.


