

Introduction: How to Make an Angled Segmented Bowl With Your Bandsaw


This Instructable will teach you how to make segmented bowls with angled sides from strips or boards of hardwood. No lathe required, just a bandsaw!
There are two ways to prepare the 'blank' to cut your bowls from. I will show both methods:
(1) Make an 8-sided or 12-sided ring from segments of wood. See step 1.
(2) Laminate two boards with the grain direction at a right angle. This method is a little easier. See step 2.
The basic technique for cutting straight-sided bowls is detailed in my earlier Instructable here:
https://www.instructables.com/id/How-to-Make-Wooden...
You should refer to it for more detail on some of the steps below.
Step 1: Cut Segments and Glue Bowl-Rings and Stack


This step is a condensed and updated version of step 3 and 4 of my earlier Instructable.
Set your miter saw to 15 degrees. From a 2.5" wide and ¾" thick board cut twelve segments with a 2.5" outside (long) length. This will give you 12 segments for a dodecagon, i.e. a 12-sided 'ring' with a diameter of about 9.5 inches. Apply wood glue to the angled edges and glue together three segments at a time. After the glue dries for about an hour, glue together two each of the three-segment pieces. You now have two halves of the ring with six segments each. If this sounds confusing, look at the drawings!
It is unlikely that the two six-segment halves match perfectly when put against each other. Use a tablesaw to lightly trim the exposed edges with a straight 180-degree cut. A simple jig as shown in the picture is helpful. The two halves now fit accurately and should be glued together.
Make two (or more) of these rings and run each one through a planer to flatten lightly. Then glue the rings on top of each other, offsetting the joints in each layer.
You now have a stack of wooden rings. The drawing shows a stack with two layers at 1-½ inches high (H).
Step 2: Alternative: Laminate Boards to Prepare a Blank for Your Bowl

Use this alternative method to prepare a 'blank' from which to cut your bowl.
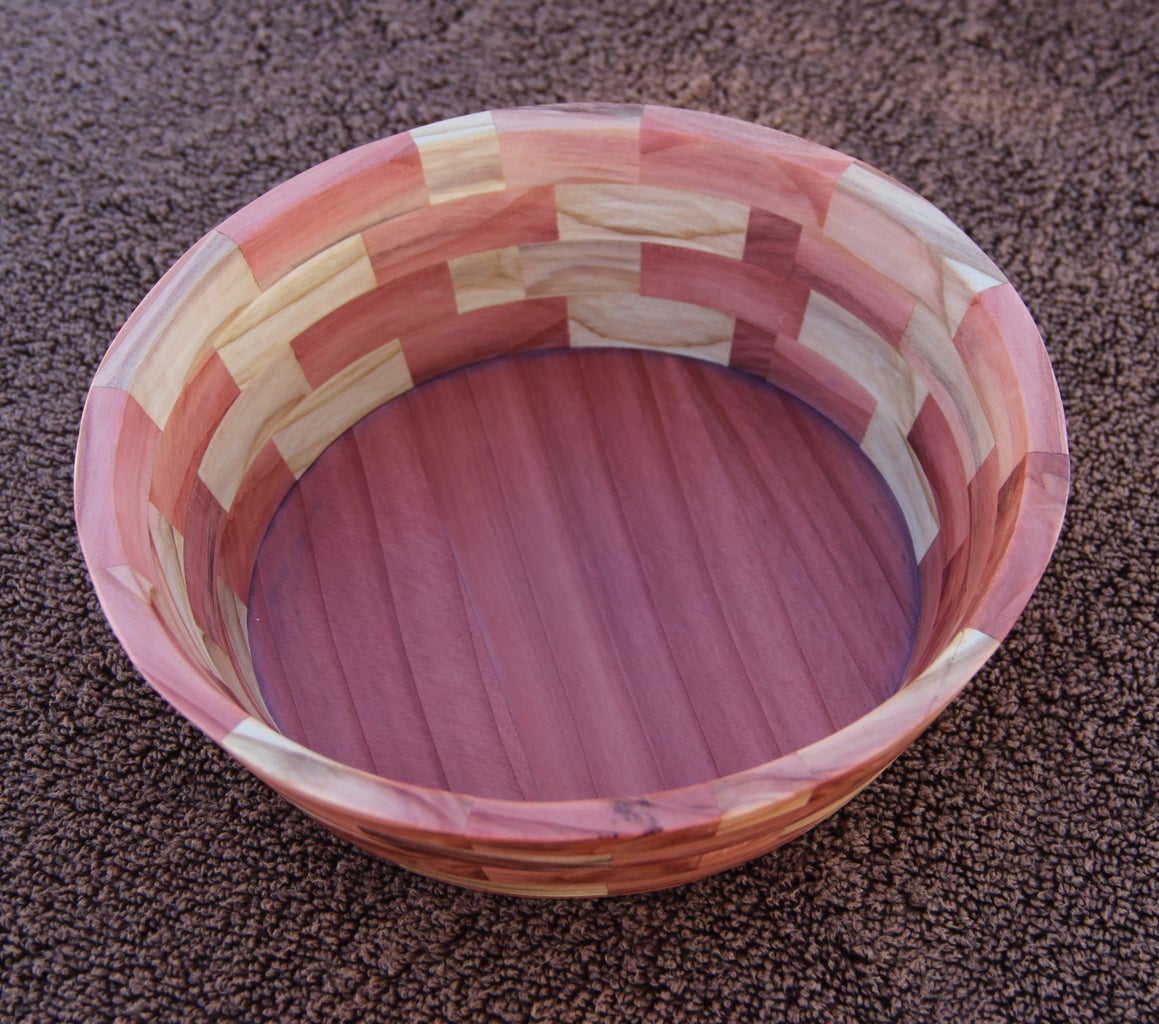
Laminate two or more boards together, making sure that the grain directions run perpendicular to each other. Laminating two boards cross-grain as opposed to using just a single board as a blank will create much stronger rings when you make the circular cuts later on. If you use different colored woods you will enhance the look of your final bowl. The boards should be flat to assure a strong lamination. Size the boards for the desired diameter of your bowl, e.g. 10" by 10" by ¾" thick.
Mark the center of the laminated board, draw a circle just touching the edges, then trim the corners off. Drill a 3/32" hole through the center for a 6d nail to serve as pivot point when cutting the rings later on.
Step 3: Determine the Angle Α of Your Bowl Sides

Calculate the angle α for the side of your bowl using the instructions in the next step. It is very important to calculate and set the angle α correctly so that the rings will match each other in size. Following this method will ensure the bottom of the first ring will fit perfectly onto the top of the second ring, the bottom of the second ring will fit onto the top of the third ring, etc. The calculation is actually quite easy, so don't be scared!
You need to measure the height H of your ring-stack or laminated board and decide on the width (thickness) W of your bowl side. I find that ¼” to ½” is a good range for W. The angle α is fully determined by the values of H and W. The included table gives some typical values for angle α if you don’t want to do the calculation.
Attachments

Step 4: Calculate the Bowl Angle Α

W = radial width of bowl rings, your choice
H = height of ring-stack or laminated board
K = bandsaw blade kerf (width of cut)
My bandsaw blade kerf K is about 0.04 inch
α = bowl angle, also tilt angle of bandsaw table
Calculate (approx.) angle α of band saw table:
tan α = (W + K) / H
α = atan ((W + K)/H)
Example:
W = 0.25 inch, H = 1.5 inch, K = 0.04 inch
Result: α = 10.9 deg
You can ‘Google’ the result by searching for: "atan(0.29/1.5) in degrees"
Step 5: Cutting Bowl Rings


Adjust your bandsaw table to cut at angle α.
Make the first circular cut as described in step 6 of my earlier Instructable.
Move your bandsaw fence to the left by W + K inches to cut the next ring.
Follow the technique in my earlier Instructable to cut additional rings, moving the fence by W + K inches each time.
Step 6: Glue Angled Bowl


The set of angled rings that you just cut will fit perfectly on top of each other.
Glue the through-cut of each ring to close up the rings, and then glue them on top of each other to create your bowl.
Make a tall basket by using all rings, or make several smaller bowls.
You can also 'nest' the smaller rings into the larger rings and glue up a stepped bowl as seen in the last picture above.
Step 7: Finishing


Sand the inside smooth before attaching a bottom. It's much easier this way! Prepare slightly oversized bottom board and glue to the bowl. After the glue dries trim the bottom flush to the bowl sides. This can be done easily on your bandsaw with the table set at the angle α.
Sand the outside and edges smooth, rounding all edges as desired. Finish with stain, polyurethane, varnish, or a food grade finish like salad bowl oil or mineral oil.

Participated in the
Wood Contest


