

Introduction: Light-Up Card


A fun way to explore electronics is by making this light-up pop-up card. This project is a great way to learn about circuits while making a gift for a friend or to celebrate your favorite holiday.
This card is made with a paper circuit - a working electronic circuit directly on paper. Once you learn the basics of a paper circuit, you can start designing your own unique cards and projects using these materials. Today you’ll be using a template to create a light up card.
The template was adapted from Light-Up Valentine Cards by SparkFun Electronics which can be found at http://sfe.io/valentinecards.
Supplies
- 2 pieces of 8.5”x11” Letter size cardstock for template and popup
- Pop Up Card Template 2 pages, printed single sided
- 4.5” x 3.75” piece of vellum, wax paper or tissue paper
- 1 Coin cell battery CR2032
- 1 LED
- 1 LilyPad Button (optional)
- ~15 inches of copper tape
- X-acto knife / hobby knife
- Scissors
- Tape - clear tape, stickers or scraps of vinyl
- Decorating supplies - construction paper, pens/markers, stickers, crayons, etc
Optional:
- Ruler
- Glue stick or glue dots
Step 1: Step 1: Prepare Template


Print out both pages of the Light Up Card Template, single sided, and set the pages on your workstation. Trim the extra edges around the template. You’ll start by building the circuit. Look for the page that has the circuit outline.
Step 2: Step 2: Build the Circuit With Copper Tape


The template has symbols and numbers for all the parts of this project. The colored lines mark where to put the copper tape. Start with Line 1 on the template. Carefully peel the white paper backing from the tape and press the adhesive side down onto the paper to cover the gray line. At the end, you can tear with your hands or cut with scissors.
Step 2 is a similar line, but this one has a corner. Start at the end and press the tape along the line until the corner. Here you can make a crease in the tape by folding it backward - that will make it easier to fold the tape around the corner and continue down to the end of the line.
Note: If you don’t want to use a button, continue on to line 3 and fill the gap with tape. This will make your card stay lit when there is a battery attached. Tear or cut at the end.
Line 3 is the last line of copper tape, but this one is a little different than the others. To make a place for our battery to plug into the circuit, we’ll be making a small flap of tape at the end - this is shown on the template by the dotted outline. First place the tape along line 3 until you reach the edge of the circle. Instead of cutting here, fold some tape over to make a flap where there is copper on both the top and bottom. Now there is a piece of tape without any adhesive on it - you just created a crafty battery holder!
Step 3: Step 3: Add LED


Now it’s time to add some parts to our paper circuit that will use the battery power. Start with the LED. This electronic part has to be plugged in a certain way in order to work in the circuit.
LEDs have two wires coming out of them - a longer and a shorter wire. The longer wire is the positive side of the LED, and the shorter is the negative. You can mark the negative wire with a black permanent marker or nail polish to help identify it later.
On the template there is a circle with a number 4 to represent the LED and a positive symbol and negative symbol next to the copper tape lines. To make the LED sit flat on the paper so the wires can touch the copper, bend them flat with your fingers. Another way to tell the positive and negative side of an LED is to look from the top down, most LEDs have a flat edge - this is the negative side.
Place the LED on the symbol and adjust the wire so that the positive touches the copper tape marked with the positive symbol and the negative wire touches the tape marked with the negative symbol. You may want to bend the negative side a little so all the wire touches the copper tape.
To hold the LED onto the copper you can use some tape over the wire. Press down to make a strong connection. The tape isn’t a functional part of the circuit, it keeps the metal in the wires and the copper touching so the electricity has a path to flow through.
Step 4: Step 4: Add Button


Next, add the button. The oval with the number 5 inside of it is where you’ll place the button on the template. Place the button with the pressable side facing up, and line it up with the outline making sure each end of the button is touching the copper tape line underneath it. Hold the button down to the paper by taping the ends.
If you don’t have a button, you can place copper tape across the line, filling the gap. This means there will be no ‘on/off’ switch in your circuit and the LED will always light up when a battery is connected.
Step 5: Step 5: Add Battery and Test


The last part of the circuit is number 6 on the template. Take the battery out of the package. You’ll notice that unlike other batteries you may have seen that have a positive and negative end, this battery has only one label for the positive side which is on the top. Place the battery with the positive side up in the circle on the template and move the copper tape flap on top of it. Hold down with your finger and press the button on the side of the circuit to test it out! To keep the battery from moving around, use a piece of tape over it to secure.
Step 6: Step 6: Troubleshooting

When working with hand crafted electronics, sometimes things don’t work the first time. If your card isn’t lighting up, here are some troubleshooting tips.
Check Connections - If your card isn’t lighting up, it may be because the electrical connections between the pieces aren’t strong. Try pressing down on places where the wires in the LED meet the copper tape. If the tape isn’t holding enough pressure the wire may be lifting up. If more pressure fixes the issue, place some more tape over these places. You can try this technique around the button, and the battery to check that all the pieces are connected.
If the project still isn’t working, try checking for any broken connections in the copper tape. If the path for the electricity to flow through is disconnected the project won’t light up. Look for any unintended tears in the copper tape. To fix it, use a small piece of copper tape as a patch. Some types of copper tape do not allow electricity to flow through the adhesive. If your tape doesn’t patch the tear, you can fold a piece on itself to make a little copper tape segment, then tape that over like a bridge.
Check LED Orientation - If all the connections look secure but the project is still not working, check the LED - maybe it got put in backwards. This can happen accidentally since it can be hard to tell which is the positive and negative wire after bending them flat. Try carefully peel up the tape and turn the LED around so it’s placed the right way and retape.
Check for Short Circuits - The last troubleshooting technique to try is looking for short circuits. In a circuit, if two pieces are touching where they aren’t supposed to, the electricity will flow through that connection instead of the path we want it to. This can damage components or even use up all the energy in the battery. Common places for short circuits in this project are underneath the LED and near the battery. If you spot some copper tape that’s too long, you can peel it up and trim it. The battery may have drained before you noticed this issue so you can test out to see if your circuit still lights up. If not you may need a fresh battery.
Step 7: Step 7: Folding the Card


Now it’s time to add the pop up layer and customize our light up card! Take a look at the pop up template.
First, cut out the middle of the frame to make a window - a hobby knife works best for this step. You can use a ruler to help you make straight, even cuts. Then cut the two lines on either side of the window to release the middle for folding. Trim the edges of the template to remove the extra paper.
Now fold the pop up. Start with the dotted lines in the middle of the template and gently fold over - make sure not to fold the entire page in half, only the edges. Next, fold the bottom of the pop up frame. You can see the pop up is already starting to look 3D!
To fold the top of the card you’ll do two opposite folds, first the top edge. Carefully fold in the same direction as the bottom edge. Now the frame should be mostly sticking out from the card. Finally, fold the last edge in the opposite direction to make the final part of the frame.
Step 8: Step 8: Add the Pop Up Layer

After folding, add a 3.75 inch by 4.5 inch piece of vellum, wax paper, or other semi-transparent material to the back of the cutout. You can also use the inside of the window as a template to trace - add about a quarter inch all around so there is some overlap when you attach it to the card.
Attach to the frame with tape or glue.
Now you can place the pop up over your circuit so the light shines through the window and try it out.
Step 9: Step 9: Decorate!


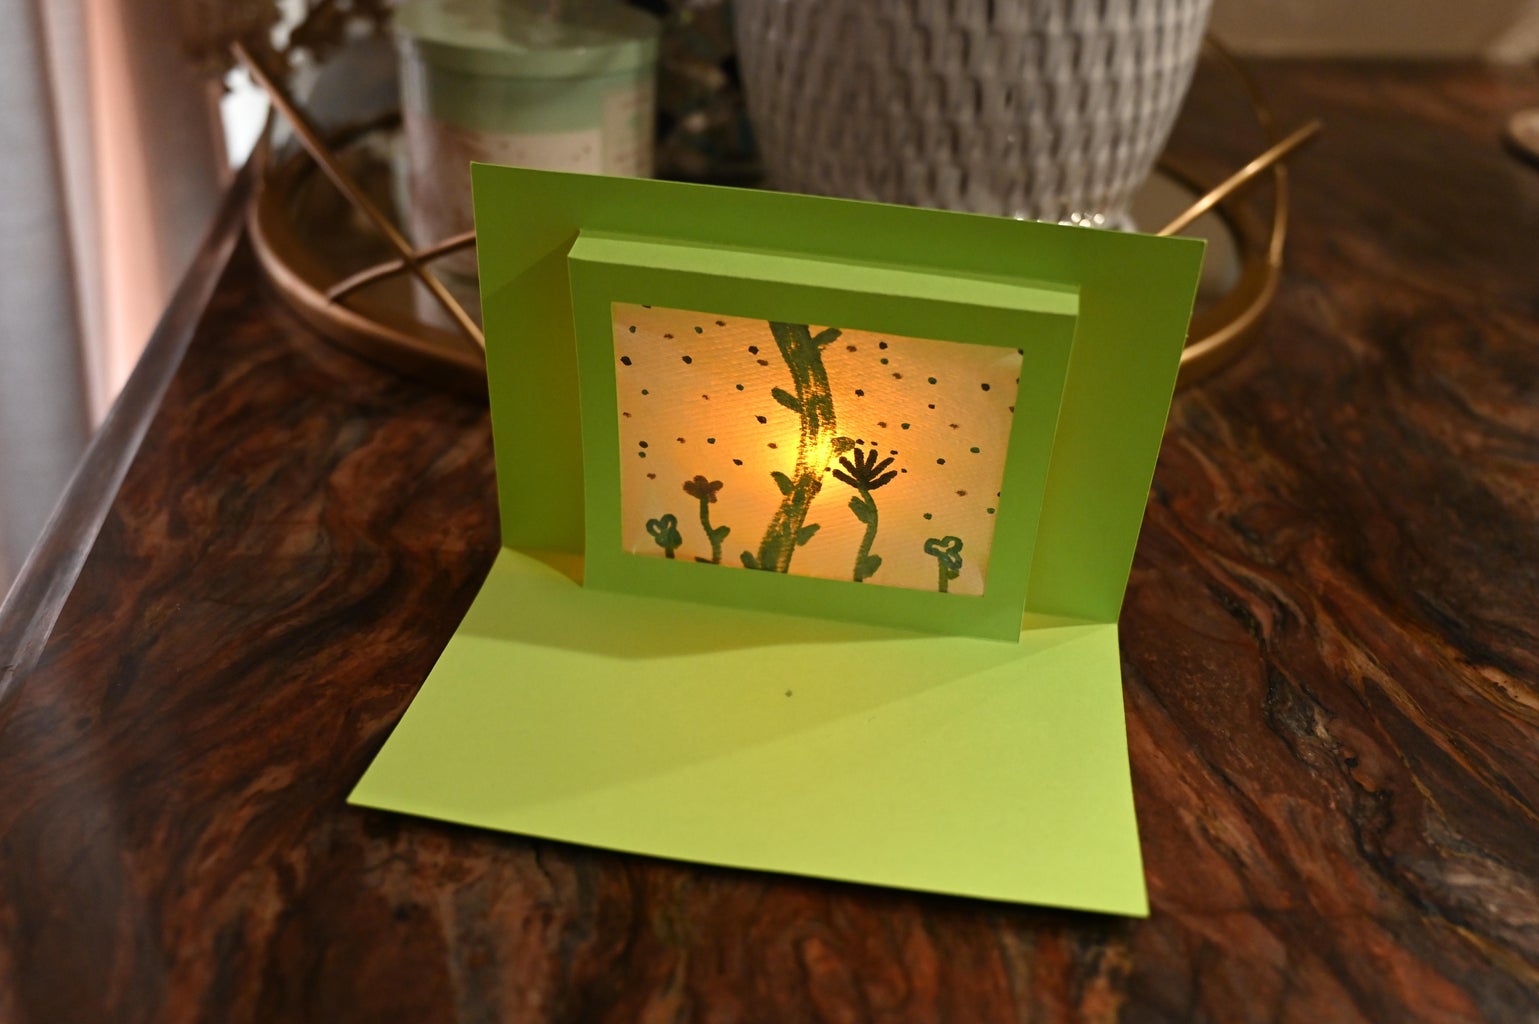


Finally it’s time to decorate the card with stickers, markers, or other craft items. This card can be customized for any holiday or occasion. To attach the card to the circuit template, you can use tape or glue.You can also put a sticker and note on where to push to light up the card since the button is hidden by the pop up layer.
We'd love to see what you've made, so if you try out this project and make your own card, share it with us!


