

Introduction: MLAB | LASERCUT RINGBLADES INSPIRED BY NAKIA


Did you know that Wakanda sends its undercover spies, called 'War Dogs', to monitor the outside World and inform T'Challa (the Black Panther). In our laboratory, we especially adore Nakia, our favorite War Dog.
Follow these simple steps to create your own Ring Blades similar to the one branded by Nakia and the Dora Milaje when vanquishing her enemies during the climatic fight scenes in the film using Tinkercad!
Hint: If you need a little inspiration before you get started....
Check out the mLab Episode III: 'The Revolution Will Not Be Televised' #WakandaForever
Step 1: Let's Get Started!
In this Step-by-Step, we will show you how to make a 3D model of a Ring Blade inspired by the character Nakia of the Dora Milaje from the Black Panther film. In order to create our 3D model, we will use the software, Tinkercad. Tinkercad is an online 3D design or CAD software that allows for you to transform your ideas into 3D models simply using your computer. As an added bonus, it's also free to use!
Now, if the term "CAD" sounds unfamiliar to you, don’t fear. CAD stands for Computer-Aided Design.
It is a type of software that allows for us to build 3D objects using our computer.
Once we are finished with our Tinkercad model, we can export the model to a 3D Printer, a machine that uses materials such as plastic in order to print physical objects or even a cutting machine like a Laser Cutter, a machine that uses lasers to cut objects out of materials like cardboard and wood.
If you don't have access to a 3D Printer or Cutting Machine, you can also order a 3D print from Tinkercad or share a snapshot of your design with family and friends via Social Media. Regardless of what you decide to do with your CAD Model, the most important step is to get started.
So...Let's Get Started!
Quick Tips for Setting Up You Tinkercad Workplane!
(These Tips are Optional, But if You are new to Tinkercad, Please Read!)
Edit Grid: Make sure that you go to the lower right corner of your Workplane and 'Edit Grid' in order to change the ‘Units’ to Inches (this is optional, but will make your life so much easier).
In addition, if you are using a 3D Printer or Cutting Machine, ensure your Workplane is the same size of your Machine's Work Bed.
For Example, we are using the Epilog Mini Laser Cutter, so we will adjust our Grid to be a Height of 12 inches and Width of 24 inches.
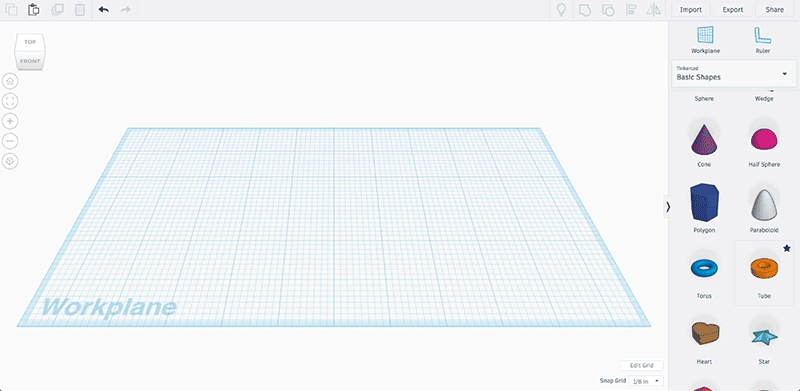
Now...Let’s begin with exploring the ‘Basic Shapes’ on the right-hand side of your Tinkercad window.
Step 2: Let's Explore the Basic Shapes and Controls!
When you are getting started with anything new, especially software, it's sometimes worthwhile to explore and get a feel for the environment.
Let's start by selecting a 'Shape' from the 'Basic Shapes' Toolbar on the Right-Hand-Side of your window and dragging the shape onto your Workplane.
In our case, we selected a orange 'Tube' and started playing around with its 'Dimensions'. Use the tiny white/black boxes around the selected 'Shape' to control the - Length, Width, and Height. Use the various black arrows around the selected 'Shape' to control the - Rotation.
Now, let's explore a few other 'Basic Shapes' that we will need in order to create our Ring Blade;
Tube | Round Roof | Cylinder.
Tip: If you are concerned about the yellow color; Don't Panic!
We can change the color of the shape, can you figure out how?
Hint: Look at the 'Shape' Menu above your Workplane and the 'Solid' Feature.
Step 3: Make the Ring for the Ring Blades
Now that we have a little bit of experience with Tinkercad, let's get started with our 'Basic Shape'.
Before we can get started, let's clear our Workplace of any shapes or models in order to begin creating the rings of our Ring Blade on a clean Workplane.
Hint: While we will list the dimensions or measurements we used in order to create our version of Nakia's Ring Blades for the Mini Epilog Laser Cutter, please do not feel that you have to replicate every step exactly.
Remember, the exciting part about using a CAD Software such as Tinkercad is that you can make anything your heart desires. Simply use the following as suggestions for designing your Ring Blade.

Part A:
- Select a 'Tube' from our 'Basic Shapes' Toolbar and bring it to our Workplane.
- Adjust to the desired Height of the Tube
- In the above example, our adjusted Height = 0.25 inches
- Change to the desired Length and Width of the Tube, ensuring the Tube maintains its overall shape.
- In the above example, our adjusted Length = 5.00 inches and adjusted Width = 5.00 inches
Part B:
- In the Shape Toolbar, adjust to desired Radius for the Tube.
- In the above example, we made our Radius = 2
- In the Shape Toolbar, adjust to desired Bevel for the Tube.
- In the above example, we made our Bevel = 0.2
- In the Shape Toolbar, adjust to desired Bevel Segments for the Tube.
- In the above example, we made our Bevel Segments = 10.0
- In the Shape Toolbar, adjust to desired Wall Thickness for the Tube.
- In the above example, we made our Wall Thickness = 0.15
At this moment, you should have a curved Ring on your Workplane. Now to make a handle for our Ring Blade.
Step 4: Make the Grips for Ringblades
Bravo! We have the first part of our Ring Blades, the Ring, Done!
Now we must start on the handles or grips for the Ring Blades, which allows for the Ring Blades to be easy for Nakia to wield in battle.

Part A:
- Select a 'Round Roof' from our 'Basic Shapes' Toolbar and bring it to our Workplane.
- Rotate, using the black double-ended arrow above the selected Round Roof, 90 degrees counter-clockwise (or the opposite way a clock would typically operate).
- Ensure the Round Roof's peak is lying flat on to your Workplane.
- Adjust to the desired Height of the Round Roof.
- In the above example, our adjusted Height = 0.25 inches
- Change to the desired Length and Width of the Round Roof, ensuring the Round Roof maintains its overall shape.
- In the above example, our adjusted Length (Diameter) = 1.75 inches
- In the above example, our adjusted Width = 0.75 inches
Part B:
- Select and Move the Round Roof to desired grip location on the Tube
- Select all the Shapes - Round Roof and Tube, then 'Align' them along the Midpoint
- Hint: On your keyboard, hold down CTRL + A (this selects all the shapes). Then, click the middle Black Dots along the 'Length' and 'Height' of the 'Selected Shapes' (this aligns all the shapes at the midpoint).
Now, it's time to make room for your LEDs (Light Emitting Diodes) on your Ring Blades...
Step 5: Make the LED Holes for the Ringblade
Hold Tight! We are almost there!
Now, we must create the holes for LEDs in order to provide a little Princess Shuri flair to our Ring Blades.

Part A:
- Select a 'Cylinder' from the 'Basic Shapes' Toolbar and bring it to your Workplane.
- Hint: This will create a LED hole in the Ring Blade.
- Adjust Cylinder to the desired Length and Width
- In the above example; we made our Length = Width = 0.2 inches
- Change the Cylinder into a Hole
- Hint: Select the 'Hole' tool which is located in the Shape Toolbar
- Duplicate the Cylinder in order to create a trio (3) of Cylinders
- Arrange the Cylinders as Desired on the Ring Blade
- Click & Drag your mouse across all of the Shapes on your Workplane
- Use the Group tool to combine all of the selected Shapes on your Workplane
Adjust the Height of the Ring Blade off the Workplane
Hint: Adjust the Height of the Ring Blade off the Workplane by selecting the black triangle above the shape
In the above example, we adjusted the Height off the Workplane = - 0.125 Inches
Finally, we can Export our simple Ring Blade to a Cutting Machine, such as our Laser Cutter.
Tip: If you would like to make a more detailed or advanced version of your Ring Blade, release your inner Maker and brainstorm alternative ways to create a Ring Blade. For Example, we decided to create a (3) Layer Ring Blade in order to create sufficient space for our LEDs and Batteries in the Grip area of our Ring Blade.
Step 6: Tips and Tricks to Further Customize Your Ring Blades
When it comes to your Ring Blades, it's very important to customize it in order to make it your very own.
As you have seen so far, Tinkercad allows for you to make quite advanced CAD Models using a variety of Basic Shapes and techniques. For example, you can easily change the color of your Ring Blades or add any other customization that speaks to the Wakandan inside of you.
For a little inspiration, look at the customization we did with our Ring Blades!
Now, go ahead and play around with our Customized 3D Ring Blades above. Use your mouse or trackpad to move, zoom, and rotate the model. Hint: You can also use the control buttons on the top left corner of the screen. Have Fun!
Don't forget to share snapshots of your creations with us on Social Media using the Hashtags - #MakeAnything #BlackPanther #Mbadika.
Step 7: Bonus | Laser Cut Ring Blades
If you have access to a Laser Cutter (or any other type of Cutting Machine);
Congratulations! You can make your Ring Blade CAD Model into reality. On Tinkercad, you can go to the upper Right Hand Corner and Export your CAD Model as a .SVG File which you can upload to the Laser Cutter or Cutting Machine Software which corresponds to your specific Machine.
If .SVG sounds a like an alien format, don't panic just yet. SVG (Scaled Vector Graphics) files are a very popular file format for 2D or CAD Models and its similar to exporting a Document as a Microsoft Word (.doc) or PDF format (.pdf). Once you upload the .SVG File to your specific software, the software will transform your CAD model into a language that machines, in particular 2D Cutting Machines, can understand.
So, in order to recap:
.SVG = Language for 2D Cutting Machine Software
In our case, we used Inkscape, which allows for you to upload .SVG files and convert the file format that corresponds to your specific Cutting Machine. If you are able to, Adobe Illustrator or Corel are excellent alternatives.
Step 8: Extra Credit | Assemble Ring Blade Parts and Tools


Once you've laser cut (or created via alternative methods) your Ring Blades, it's time to decorate your Ring Blades to prepare for battle.
For our Ring Blades, we decided to go with our favorite color palette; Blue, Silver, and Green/Yellow. Nonetheless, please select or create the color palette that speaks to your inner War Dog.
Hence, as you can see from the above images, we will need the following materials and tools in order to create our Ring Blades;
- Wooden Ring Blades (of course)
- Acrylic Paint (Select Desired Colors)
- Plastic Paint Tray
- Foam Brush and/or Traditional Paint Brushes
- Traditional Wood Glue
- Leather Patch
- Metal Ruler
- Copper Wire
- (6) 3mm LEDs (Select Desired Colors)
- (4) CR2032 3V Coin Cell Batteries
- (2) Red Push Button(s)
- Double-Sided Tape
- Painters Tape
- Permanent Marker
- Contact Cement * (Please Use with the Permission of a Parent or Guardian)
Tools
- OLFA or XACTO Knife
- Sharp Nosed Wire Cutters
- Scissors (Fabric or Craft Scissors will be your friend for this Project)
Next, let's get started adding the finishing touches to our Ring Blades.
Step 9: Paint the Ring Blades


First Things First...we need to paint our Ring Blades.
We wanted our Ring Blades to be stylish as well as slightly realistic, we decided to paint the following components;
- Outer Rings; Blue
- Inner Ring; Silver
Using your Acrylic Paint, fill your Plastic Paint Tray with the various Acrylic Paints desired to decorate your Ring Blades.
Now, using your Foam Paint Brush; Paint one side of your Outer Rings in order to allowed for them to dry while painting your Inner Ring. Once completely dry, paint the other side of your Outer Rings, then your Inner Ring.
While waiting for Rings to completely dry, we can begin working on our electronic circuit to provide a little flair to our Ring Blades.
Step 10: Prepare Your Circuit: Part I


In the Black Panther film, Princess Shuri or Wakanda's residential Genius, re-engineers Nakia's Ring Blades to be powered by the most desired material in the Marvel Cinematic Universe (MCU); Vibranium.
For our Ring Blades, we also wanted to add a Princess Shuri flair to our Ring Blades; A LED Circuit.
In order to create our LED Circuit to incorporate LEDs into Nakia's Ring Blades, we need to make and test our LED Circuit.
Part A:
First, we need to lay out our materials for our LED Circuits;
- (6) 3mm LEDs
- (4) CR2032 3V Coin Cell Batteries
- (2) Red Push Button(s)
- (10) 2" Copper Wire strands
- Painter's Tape
- Permanent Marker
- Scissors
Part B:
Once we have all of our materials for our LED Circuit, let's begin assembling our Circuit;
- Using your Scissors, Cut your Painter's Tape into (8) - 0.5" pieces
- Label (4) of the Painter's Tape pieces (-) for Negative
- Label (4) of the Painter's Tape pieces (+) for Positive
- For all of your 2" Copper Wire strands, Create a 'J' Shape
- On your Coin Cell Batteries, place a 'J' Shaped Copper Wire Strand on the Negative side of the Battery
- Hint: The Negative Side of the Coin Cell Battery will have Patterned Background
- Place a piece of the (-) Painter's Tape on the 'J' Shaped Copper Wire Strand.
- Hint: Ensure that at least 1" of Copper Wire extends beyond the Coin Cell Battery for your Circuit.
- Flip your Coin Cell Battery, place a 'J' Shaped Copper Wire Strand on the Positive Side of the Battery
- Hint: The Positive Side of the Coin Cell Battery will have the (+) Symbol
- Place a piece of the (+) Painter's Tape on the 'J' Shaped Copper Wire Strand.
- Hint: Ensure that at least 1" of Copper Wire extends beyond the Coin Cell Battery for your Circuit in the opposite direction of the Copper Wire strand on the Negative Side of the Battery.
- Ensure both pieces of Painter's Tape are sealed, as well as ensure a solid connection between the Copper Wire and Coin Cell Battery underneath the Painter's Tape.
- Repeat the above steps for the second LED Circuit.
Step 11: Prepare Your Circuit: Part II


Now, we have prepared our Coin Cell Batteries for our LED Circuit, we must prepare our LEDs.
As you may notice from our screenshot of our Tinkercad Circuits (yes, you can also use Tinkercad to test various Electronic Circuits), we need to wire our LEDs appropriately in order to properly connect to our Batteries and our Red Push Button.
A Quick Review of LEDs;
Positive Lead = Long Leg | Negative Lead = Short Leg
Hence, we are going to twist the Leads (i.e. Legs) of our (3) LEDs for our Ring Blades in the following order;
Part A:
- LED #01 Negative (-) Leg - Leave this Lead alone...for now.
- Twist the Positive (+) Leg of LED #01 with the Negative (-) Leg of LED #02.
- Twist the Positive (+) Leg of LED #02 with the Negative (-) Leg of LED #03.
Next, let's prepare our Red Push Button;
- Transform your remaining (4) 2" Copper Wire strands into 'J' Shapes, just like you did in the previous Step for the Coin Cell Batteries.
- Place the hook component of your 'J' Shaped Copper Wire strand through one of the holes in the leads of your Red Push Button. Then place another 'J' Shaped Copper Wire strand through the hole of the other lead of your Red Push Button.
- Hint: The Copper Wire strand(s) should hang from the lead(s) of the Red Push Button.
- Twist the hook component of your Copper Wire strand hanging from the leads of the Red Push Button in order to prevent the strands from falling out of the holes in the leads.
- Repeat the above steps for the second Red Push Button for the other Ring Blade.
Now, let's put it all together!
Part B:
- Twist the Negative (-) Leg of LED #01 with one of the Copper Wire leads from the Red Push Button.
- Twist the Positive (+) Leg of Coin Cell Battery #01 with the Negative (-) Leg of Coin Cell Battery #02.
- Twist the Negative (-) Leg of Coin Cell Battery #01 with the remaining Copper Wire lead from the Red Push Button.
- Twist the Positive (+) Leg of Coin Cell Battery #02 with the Positive (+) Leg of LED #03.
WE HAVE A CIRCUIT!
But first, press your Red Push Button in order to make sure that your Circuit works (since that will be important for our Ring Blades).
Step 12: Add the LED Circuit to the Ring Blades


Given we now have a functional LED Circuit, let's add our LED Circuit to our Ring Blades.
First, place your (3) 3mm LEDs from your LED Circuit into the holes we've pre-cut in our Ring Blades as shown.
In our Ring Blades, we used Contact Cement in order to ensure that the LEDs, alongside the Red Push Button and Coin Cell Batteries, wouldn't move within our handle.
Warning: Contact Cement isn't the most friendly material to work with given its flammable and inhalation hazards. If you are building your Ring Blade, ensure that you are in a well ventilated area and if you are a Minor, make sure that you have the permission of a Parent or Guardian.
Step 13: Glue All the Parts Together and Test It


Finally, let's glue everything together.
Once you finish placing your LED circuit in your handle, we used Wood Glue between ever 'Ring' layer in order to build our Ring Blade as follows; Outer Ring (w/ LED Circuit)(Blue) | Inner Ring (Silver) | Outer Ring (Blue)
Step 14: Add the Leather Grips to the Ringblades


For a little added flair, we decided to add Leather Grips to our Ring Blades.
In order to create our Leather Grips, we took a piece of Leather we obtained from our local Craft Store and using a Metal Ruler and Xacto Knife in order to create (4) 12" Leather Strips that are 0.25" in Width.
Tip: Given the price of Leather, you don't need to obtain yards of this material in order to add enough of a 'War Dog' accent to your Ring Blades.
Next, using your Contact Cement, glue one of your 12" Leather Strips to another 12" Leather Strip in order to make a 24" Leather Strip for your Leather Grip. Do the same for the remaining (2) 12" Leather Strips.
Once you have your (2) 24" Leather Strips, add a little contact cement to one end of a 24" Leather Strip and adhere the piece to your desired 'start' location on your Ring Blade handle.
Now, this is the fun part;
Start wrapping the Leather Strip around your Ring Blade Handle making your desired pattern until you are finished with your Leather Strip.
When finished, apply a little Contact Cement to the end of the Leather Strip and press the piece on the underlying Leather Strip. Hold for 30 seconds to allow for Contact Cement to dry before repeating the process with the second Ring Blade.
Hint: While wrapping your Ring Blade, ensure that your Leather Strip doesn't block or obscure the LEDs in your Ring Blade handles.
Step 15: Test Out Your Ring Blades!


We pushed your Maker Skills a little more than usual, but you made it!
Now, it's time to test our your Ring Blades (with the obligatory sound effects
Don't forget to share snapshots of your creations with us on Social Media using the Hashtags -#MakeAnything #BlackPanther #Mbadika.

Participated in the
Epilog Challenge 9


