

Introduction: MLAB | 3D PRINTED KIMOYO BEADS INSPIRED BY BLACK PANTHER


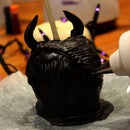
Looking for a last-minute Halloween Costume idea inspired by Black Panther or Avengers: Infinity War? Do you have access to a 3D printer?
Don't fret. The mLab Crew has you covered.
Follow these simple steps to create your very own Kimoyo Beads inspired by Black Panther as a last minute addition to bring your Halloween Costume to life.
Kimoyo Beads are wearable devices that allow for the citizens of Wakanda (the fictional world where Black Panther reigns as King T'Challa) to interact with the wide-range of Vibranium (the fictional material that powers the majority of Wakanda and has allowed for it to become the most technologically advanced society on Planet Earth) powered devices. There are several different beads including;
A Prime Bead - Contains the medical knowledge regarding a Wakandan Citizen, given at birth.
An A/V (Audio/Visual) Bead - Provides a holographic display with access to the Wakandan Network (i.e. internet) as well as allows for the transmission of video files and broadcasts with a customizable display.
A Communication Bead - Provides the equivalent of mobile phone service including the transmission of phone calls and text messages (i.e. via hand movements in the form of sign language).
Based on their needs, Wakandans can also add additional beads in order to improve the quality of their everyday lives including for personal security or weaponry. [Courtesy of Fandom - Marvel Database]
In addition, as a Bonus, we will show how your Kimoyo Bead can also serve as a tool to ensure yourself and your colleagues have proof of your Wakandan Citizenship via a temporary Wakandan Tattoo.
Hint: If you need a little inspiration before you get started...#WakandaForever.
Step 1: Let's Get Started
In this Step-by-Step, we will show you how to make a 3D model of a Kimoyo Bead inspired by the character Princess Shuri from the upcoming Black Panther film. In order to create our 3D model, we will use the software, Tinkercad. Tinkercad is an online 3D design or CAD software that allows for you to transform your ideas into 3D models simply using your computer. As an added bonus, it's also free to use!
Now, if the term "CAD" sounds unfamiliar to you, don’t fear. CAD stands for Computer-Aided Design.
It is a type of software that allows us to build 3D objects using our computer.
Once we are finished with our Tinkercad model, we can export the file to a 3D Printer, a machine that uses materials such as plastic in order to print physical objects like our CAD Model of a Kimoyo Bead. If you don't have access to a 3D Printer, you can also order a 3D print from Tinkercad or share a snapshot of your design with family and friends via Social Media. Regardless of what you decide to do with your CAD Model, the most important step is to get started. So...Let's Get Started!
Quick Tips for Setting Up You Tinkercad Workplane!
(These Tips are Optional, But if You are New to Tinkercad, Please Read!)
Edit Grid: Make sure that you go to the lower right corner of your Workplane and 'Edit Grid' in order to change the ‘Units’ to Inches (this is optional, but will make your life so much easier).
Pre-Select your 3D Printer: If you have decided to 3D Print your CAD Model, you can save yourself the guesswork of ensuring your Model will fit your 3D Printer by selecting your 3D Printer of choice using the ‘Preset’ Options. For this project, we are using the MakerBot Replicator 2. Pre-selecting your 3D Printer will allow for you to ensure that the Crown that you are designing will fit within the printing boundaries of the 3D Printer of your choice.
Now, Let’s begin with exploring the ‘Basic Shapes’ on the right-hand side of your Tinkercad window.
Step 2: Make the Base for Your Kimoyo Bead
Now that we have a little bit of experience with Tinkercad, let's get started with our first 'Basic Shape'.
Before we can get started, let's clear our Workplane of any shapes or models in order to begin creating the Base for our Kimoyo Bead on a clean Workplane.
Hint: While we will list the dimensions or measurements we used in order to create our version of Princess Shuri's Kimoyo Beads for the Makerbot Replicator 2 3D Printer, please do not feel that you have to replicate every step exactly. Remember, the exciting part about using a CAD Software such as Tinkercad is that you can make anything your heart desires. Simply use the following as suggestions for designing your Kimoyo Bead.
Part A: Select a 'Sphere' from our 'Basic Shapes' Toolbar and bring it to our Workplane.
Change to the desired Length and Width of the Sphere, ensuring the Length=Width.
In the above example, we made our Length = Width = 20mm (0.79 Inches).
Adjust to the desired Height of the Half SphereIn the above example, our adjusted Height = 20mm (0.79 Inches)
Part B: Select a 'transparent Cylinder' from our 'Basic Shapes' Toolbar and bring it to our Workplane.
Change to the desired Length and Width of the Sphere, ensuring the Length=Width.
In the above example, we made our Length = Width = 5mm (0.79 Inches) in order to thread the beads easily using either an elastic cord or leather cords.
Adjust to the desired Height of the Half Sphere. In the above example, our adjusted Height = 25mm (0.79 Inches) in order to ensure the hole cuts completely through the Kimoyo Bead.
At this moment, you should have (2) Shapes on your Workplane.
Part C: Select BOTH Shapes by holding the SHIFT Key and selecting each Shape.
Now, Select the Group Icon in the upper left corner Toolbar to create your Kimoyo Bead.
Tip: When a Shape is selected in Tinkercad, a light blue outline will appear around the shape.
Once we have the Base for our Kimoyo Bead completed, it's time to create our Wakandan Symbol.
Step 3: Make Your Wakandan Symbol
Bravo! We have the first part of our Kimoyo Bead, Done!
Now, let's start creating the Wakandan Symbol for the Kimoyo Bead, which allows for the Kimoyo Bead to be your proof that you are a member of Wakanda.
Part A:
Press the 'W' Key on your Keyboard and select an area on your Kimoyo Bead to place your Wakandan Symbol.
Select the 'Scribble' Tool from our 'Basic Shapes' Toolbar and bring it to our new Workplane on the Kimoyo Bead.
[You will be transported to a new Window in order to Scribble (or draw) the Shape that you desire.]
Part B:
The 'Scribble' Tool allows for any of your creations to be transformed into a 3D Shape to either be 3D Printed by itself, merged with another shape, or create a unique hole.
In order to use the 'Scribble' Tool, simply hold the right click and draw whatever shape or symbol that you desire. When you are finished with a 'stroke', simply lift off the right click to complete.
As we are making Kimoyo Beads, it only makes sense for us to use the 'Scribble' Tool to create a Wakanda Symbol, as we did below.
[GIF]
We've included the Wakandan Alphabet as your guide to creating your own Wakandan Symbol.
Awesome-sauce! We are almost complete with our Kimoyo Bead.
Step 4: Let's Add the Finishing Touches!
Now, it's time to merge our Wakandan Symbol with our Kimoyo Bead.
Press the 'W' Key and select your original Workplane (changing from a Workplane on the surface of the Kimoyo Bead to the original Workplane).
Click & Drag your mouse across all of the Shapes on your Workplane
Use the Group tool to combine all of the selected Shapes on your Workplane.
Tip: Feel free to change the color and make your Kimoyo Bead your own!
Voila! You have just made a Kimoyo Bead fit for any Citizen of Wakanda using Tinkercad!
Step 5: Tips and Tricks to Further Customize Your Kimoyo Bead
When it comes to your Kimoyo Bead, it's very important to customize it in order to make it your very own.
As you have seen so far, Tinkercad allows you to make quite advanced CAD Models using a variety of Basic Shapes and techniques.
For example, you can easily change the color of your Kimoyo Bead or add any other customization that speaks to the Wakandan inside of you. For a little inspiration, look at the customization we did with our Kimoyo Bead!
Don't forget to share snapshots of your creations with us on Social Media using the Hashtags - #MakeAnything #BlackPanther #Mbadika.
Step 6: Bonus: Export Your Kimoyo Bead for the 3D Printer!

If you have access to a 3D Printer; Congratulations! You can make your Kimoyo Bead CAD Model into reality.
On Tinkercad, you can go to the upper Right Hand Corner and Export your CAD Model as a .STL File which you can upload to the 3D Printing Software which corresponds to your specific 3D Printer.
If .STL sounds a like an alien format, don't panic just yet. STL files are a very popular file format for 3D or CAD Models and its similar to exporting a Document as a Microsoft Word (.doc) or PDF format (.pdf).
Once you upload the .STL File to your 3D Printing Software, the software will transform your CAD model into a language that machines, in particular, 3D Printers, can understand.
So, in order to recap:
.STL = Language for 3D Modeling and Printing Software.gCode = Language for 3D Printers to understand CAD ModelsIn our case, we used Autodesk Print Studio, which allows for you to upload .STL files and convert the file into the .gCode that corresponds to your specific 3D Printer.
After we 3D Printed our Kimoyo Bead, we decided to take our Project to the next level using Invisible Blue Ink to transform our 3D Printed Kimoyo Bead into a portable Wakanda Stamp.
Step 7: Halloween Party Bonus: 3D Printed Kimoyo Bead - Wakandan Stamp


As we love to take things to the next level, we actually made our Kimoyo Beads into portable Wakanda Stamps for our Halloween mLab Workshops using the following materials;
Materials:
- 3D Printed Kimoyo Bead
- Blue Invisible Ink (Blacklight Reactive; Only Visible under Blacklight)
- Portable Blacklight
- Eyedropper
- Plastic Plate
WARNING: Do Not Swallow the Blue Invisible Ink! DO NOT SWALLOW!
Part A:
Using your Eyedropper, obtain a very small amount of the Blue Invisible Ink from its container and place on a Plastic Plate (or any other surface not used for consumption/eating but can hold a small amount of liquid).
Place the Wakandan Symbol side of your 3D Printed Kimoyo Bead into the small pool of the Blue Invisible Ink.
Gently blow on the 3D Printed Kimoyo Bead to remove any excess liquid from the Wakandan Symbol.
Part B:
Place the Wakandan Symbol on the desired spot on your Skin.
Gently (did we mention gently) lift the Wakandan Symbol carefully off the Skin.
Using the Portable Blacklight, take a glance at your new Wakandan Tattoo.
[The Wakandan Tattoo should last approximately 3-4 hours based on a typical hygiene routine].
WARNING: Do Not Attempt to be a true Wakandan and place your new Tattoo on the inner part of your Lip.
--------------------------------------------------------------------------------------------------------------------------------------------
[Special Thanks to Erica Nwankwo and Andres Mendez Perez for helping to inspire and bring this project to reality]

Participated in the
Halloween Contest 2018


