

Introduction: Magnetic Knife Rack


This easy to make magnetic knife strip is made from scraps of wood I had laying around the shop. Not only is this a great use of scraps, but the variety of the wood really makes this strip stand out in the kitchen. Strong magnets are located behind the rack and can hold any size knife you may have, from chef and bread knives to cleavers and small paring knives.
Making your own knife rack like this is easy with a hand router, and a few other hand tools. This project is a companion to the Router Lesson, there's loads of router information there if you'd like to know more about how a router works and some skills to use one.
Here's what I used to make this knife rack:
- Router with edge guide
- Straight cut router bit
- Orbital sander
- Circular Saw
- Double-sided tape or hot glue
- Mounting Hooks
- Food safe wood sealer
- Chisel and hammer (optional for squaring interior routed corners)
Ready? Let's make!
Step 1: Wood Glue Up

This project uses scrap wood glued together to form the base we'll need to make a knife rack from. If you're looking for more colorful or exotic wood, or if you don't have enough scrap wood at home, many lumber stores will sell either small sections of wood or may give you some from their scrap pile. It never hurts to ask!
My scraps were all roughly square and flat, so I just glued them all together in a pattern that I thought looked good based on the types of wood.

It doesn't matter the height size of the scrap pieces, as they will all be milled down to the same height with the router later. Glue each piece and gently clamp together and allow to dry. When done you'll have a glued stack with a flat bottom.
Step 2: Make Router Sled Rails

We will use the router to plane down the irregular height of this glue up, but first we'll need to make rails for the router to glide on. Using the glue up as a reference, our rails will need to be longer and higher than the glue up. The length was scribed onto a plank of wood, then cut to size.


These cut sections will be the rails that the router will glide on, but will need some stability before we can start using them. Thick wood stock was cut the same length as the rails which will be attached to add stability and ensure the rails stay perpendicular to the workbench (and the glue up wood blank that will be milled). Pilot holes were drilled into the rails and then countersunk so the screws would sit into the rails.


Screws were used to attach the rails to the stabilizing stock, use a square to make sure the rails are perpendicular.

With 2 rails we can attach them to the workbench and use them to plane down the glue up to a uniform height.
Step 3: Check Level

With both rails set up on your workbech a plank can be laid across the top of the rails to check if they are level. If there's any discrepancy check the workbench for levelness first, then check the rails to ensure they are symmetrical.
Having level rails means that when the router is riding on top the router bit will carve a level surface.
Step 4: Affix Rails to Workbench

With the workbench and rails leveled the rails can be affixed to the workbench. Pilot holes were drilled into the rail stabilizers then screwed down to the workbench. If you don't want to screw directly into your workbench you can always use double-sided tape.

Make sure you've spaced out the rails far enough apart to allow the work piece to fit comfortably between the rails.
Step 5: Glue Work Piece

There will need to be clear and unobstructed access to the entire top of the work piece, to allow the router to level the entire top the work piece will need to be glued down to the work bench between the rails. A small amount of hot glue on the flat back of the work piece is a good choice as the work piece can be easily removed from the workbench, and the hot glue doesn't leave much residue to be removed after the surface has been leveled.
Add a small dab of hot glue to the backside of the glued up work piece and then firmly press the work piece down to the workbench in between the rails.
Step 6: Make Router Sled

To level the top of our work piece a sled will need to ride along the rails made earlier. The sled needs to be long enough to pass over the entire spacing of the rails, and wide enough to accommodate the router base. It's also important to make sure the sled is thick enough not to deflect when the router is placed on top, which can cause the routing to not be level and dish.
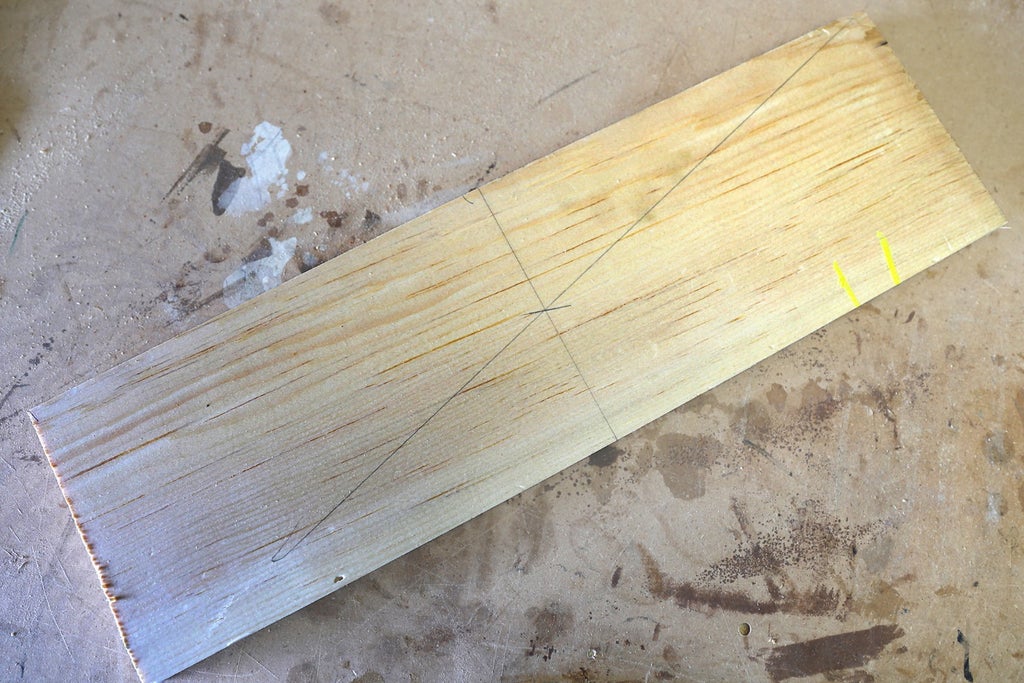
Start by selecting a firm plank that's long enough to cover double the width of the spacing of the rails. Draw a diagonal line between the corners of the plank, marking the center point of the plank.
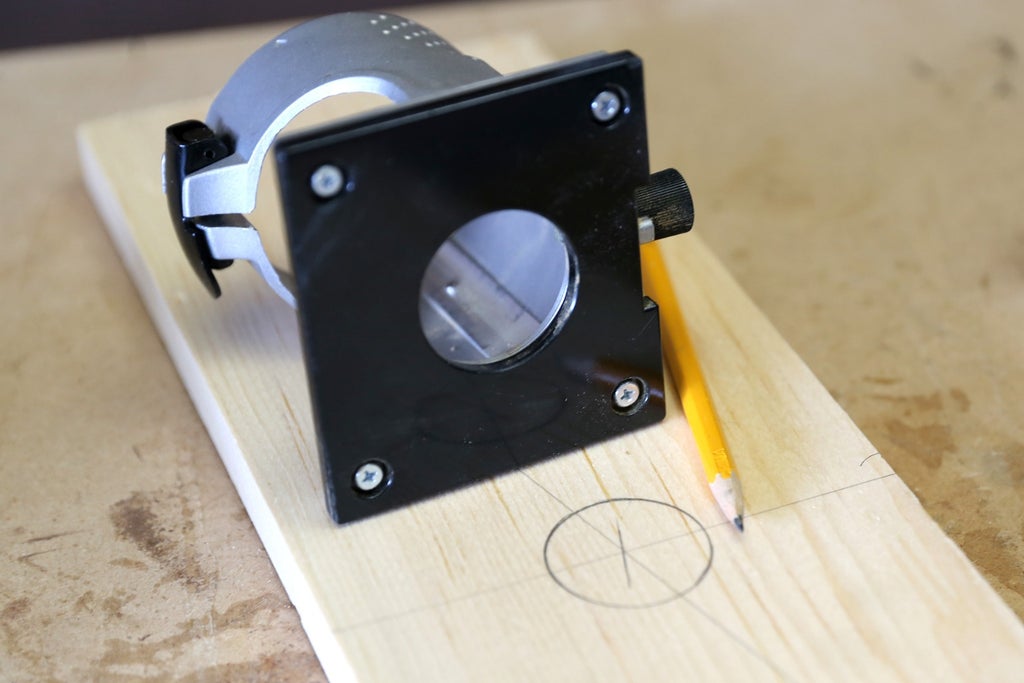
Place the router base over the intersection of the scribed lines and trace the circular router opening with a pencil when it's centered over the intersection.
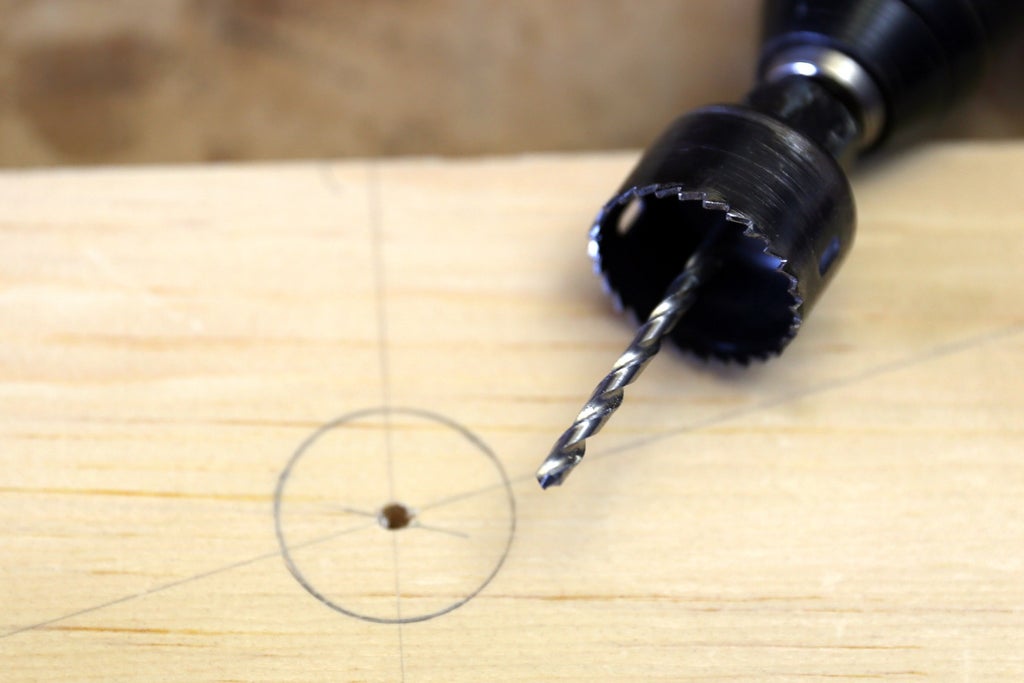
Using the techniques in the Drilling Perfect Holes Lesson, a hole saw was used to make an opening at intersection circle. This opening will allow the router to pass through the sled.

Router bases have a removable plate held on with 4 small screws. Remove the plate and center the router base over the drilled opening, then use a pencil to mark the screw holes from the base plate onto the sled. A drill bit the same size as the screws was used at each of the four pencil marks.
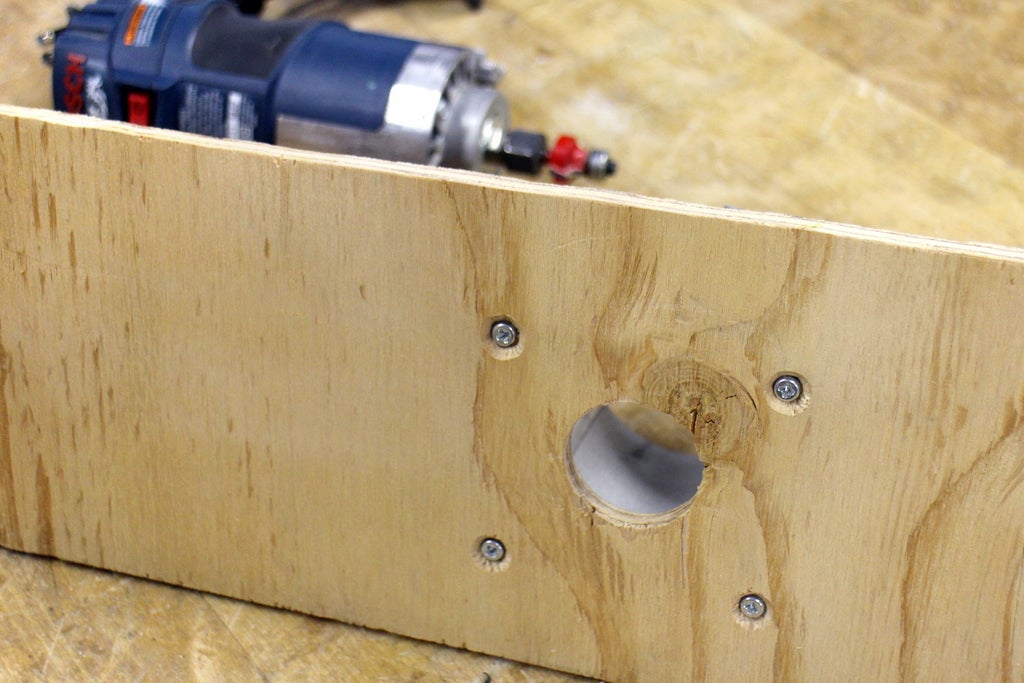
Once the holes are drilled a countersink was used so the base plate screws will sit inside the sled. Use the same screws that were in the removable plate to attach the sled to the removable router base.
Step 7: Select Router Bit

To plane down the irregular height of the glue up, a straight cut router bit can be selected. If you have a few options for straight cut bits know that a larger diameter bit will remove more material but will be slower going through the material, a smaller diameter bit will remove less material but be faster moving through the material. Since we're going to be moving through different densities of wood and doing multiple passes I chose a smaller diameter bit so there is smaller amounts taken each pass.
Step 8: Plane Glue-up

Insert the router bit into the collet and screw the nut into the threaded neck until it's snug. Set the router into the sled and put the sled in the rails, then set the router depth to about 1/4" lower than the highest point of the glue up. Starting with the router away from the glue up, power up the router and slowly move towards the glue up and gently eat away at the highest points from the glue up.
Continue routing at 1/4" depth increments until the lowest point of the glue up is reached. This may be several passes as minimal amount of material removal is desired. To plane down this piece of glue up took about 30 minutes.
It may happen that you will see striations and burn marks (indicated with arrows below) from the router achieving different depth cuts along the same path, or if the router is left too long in one area the bit can make a burn mark in the wood.

These striations and burns aren't a big deal as long as they aren't deep or too different from the adjacent wood, these imperfections can easily be accounted for when sanding with rough sandpaper after routing.
Step 9: Square One Edge

After planing the top to an even height the edges need to be cleaned up to be nice and straight.
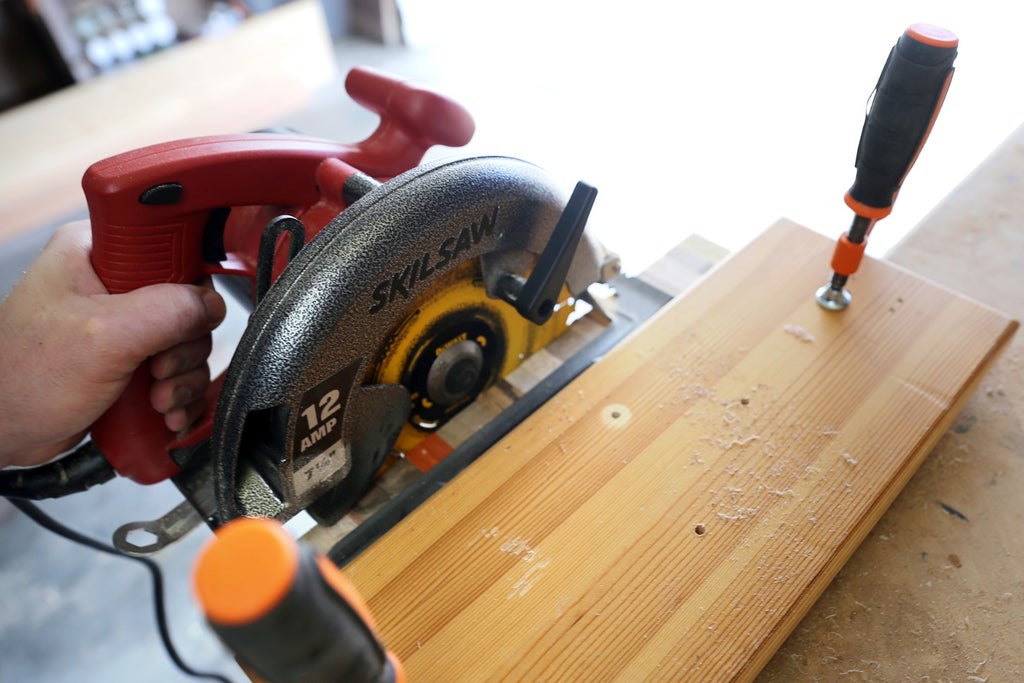
Even though the bottom edge of the pieces were lined up against a straight edge while being glued up there's still some inconsistencies in the relatively "straight" edge. The planed glue up was clamped to the workbench under a straight edge (in this case a scrap piece of wood with a straight edge), the straight edge is the fence that the circular saw will ride against and trim up one edge of the glue up.
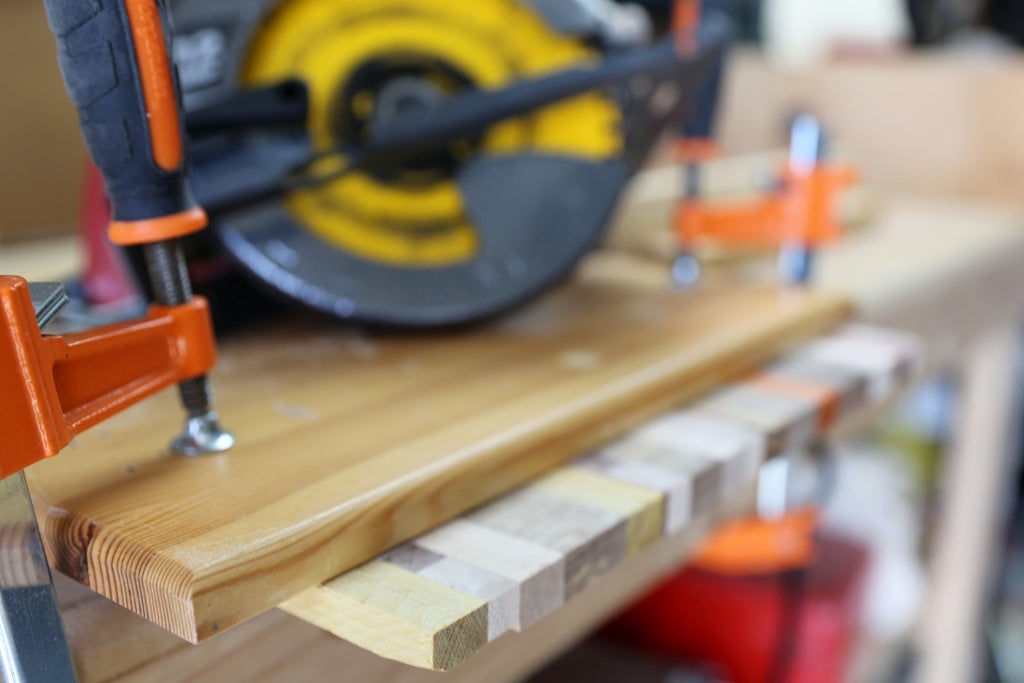
Use a carpenter's square to ensure the fence is square against the glue up, then carefully run the circular saw against the fence to make a clean cut along the bottom of the glue up.
Step 10: Square Other Edge

With the one edge trimmed square the straight edge guide attachment can be used on the router base to square the opposing side. Attach the straight edge guide to the router base and set the distance by laying the router base on the top of the glue up with the fence against the already trimmed side, then adjust the fence distance so the straight cut router bit is just biting into the opposing side.
Slowly run the router with the fence against the straightened side to remove the irregular edge from the opposing side. As before, you may need to do two shallow passes or go very slow to remove all the material.

The majority of the routed edge will be square and any striations can be removed with a coarse sander during the finishing stages, or in our case will be cleaned up with a roundover router bit in the next step.
Step 11: Roundover Edges


By changing router bits to a 1/4" roundover, the edges of the rack can be profiled. To get at all the edges without being obstructed, the rack was attached to the workbench with strong double-sided tape.
Set the router base to the depth desired, its always a good idea to run the router on a test piece of wood before committing to the project - that way you can make multiple adjustments if necessary.
Carefully router every side until the edge profile desired is achieved.

Step 12: Measure Magnet Insert

With the edge finished attention can be turned to the magnetic insert in the back of the rack.
A centerline was measured and scribed using a straight edge ruler and a pencil with an offset of about 1" from each end, this center line will be the route traced with the router and which the magnets will sit inside.
Step 13: Cavity Router Bit


To clear out the cavity to insert the magnets a 1/2" straight cut router bit was selected, matching the width of the magnets used in this knife rack.
Step 14: Set Router Depth

To maximize magnetic attraction to the knife blade the magnets will need to be embedded as close to surface of the knife rack as possible, around 1/4" is great and should hold most knives.

Set the router base to the desired depth, remembering that the bit may be a little lower depending on how it was inserted so always do a check before starting.
Step 15: Secure Wood + Set Fence

The rack will need to be positioned with the back side facing upwards, double-sided tape was applied and the rack was stuck to the workbench.

Set the edge guide to the distance from the edge of the knife rack so that the router bot falls directly on top of the center line drawn. In the example shown above the edge guide was too tall so the knife rack was placed on a scrap piece of wood as a standoff to gain the additional height needed.
Step 16: Router Magnetic Cavity

If you're using mixed wood like I was you'll want to make multiple shallow passes so your router bit doesn't get bogged down. Start the router outside of the intended cut, line up the edge guide and then slowly lower the router onto the center line to enter the cut. Continue making passes on the center line until the desired depth is achieved.
Since the router makes rounded cuts and the magnets are square the ends of the cuts will need to be squared. Use a small chisel to chip away the rounded ends to make a sharp corner.

Step 17: Epoxy Magnets

With the cavity cut the magnets can be glued in place. A layer of epoxy was smeared along the bottom of the cut channel, then a square magnet was laid against one end and pressed into place.

The next magnet was carefully laid next to the first ensuring they don't try and flip and attach face to face. This can be tricky, but when the ends touch they should lay flat and not flip over face-to-face. Continue laying magnets into the channel until filled, after another layer of epoxy was smeared on top to trap the magnets into the cavity.
Allow the epoxy to cure overnight before handling the knife rack.
Step 18: Sanding

With the epoxy cured and solid the knife rack can be sanded to remove any burrs from routing and smooth the entire surface. Before starting making a visual inspection of the knife rack to determine where the problem areas might be, for example the back area may have epoxy overflow and the front may have burn marks from the roundover profile.

Dried epoxy overpour

Burned on edges from roundover profile. Starting with coarse 80 grit sandpaper the entire surface was uniformly sanded. Be careful around the edges as coarse grit sandpaper can remove a lot of material and sanding too vigorously can alter the desired shape of the knife block. The photo below illustrates a good example of the amount of material removed from coarse grit sandpaper, rough un-sanded on the left and initial sanding on the right.

Switching to a finer grit of sandpaper of around 180 we'll use a trick from the Sanding Lesson and run a pencil on the surface of the knife block to make squiggly marks and show the sanding progress and ensure a uniform surface.
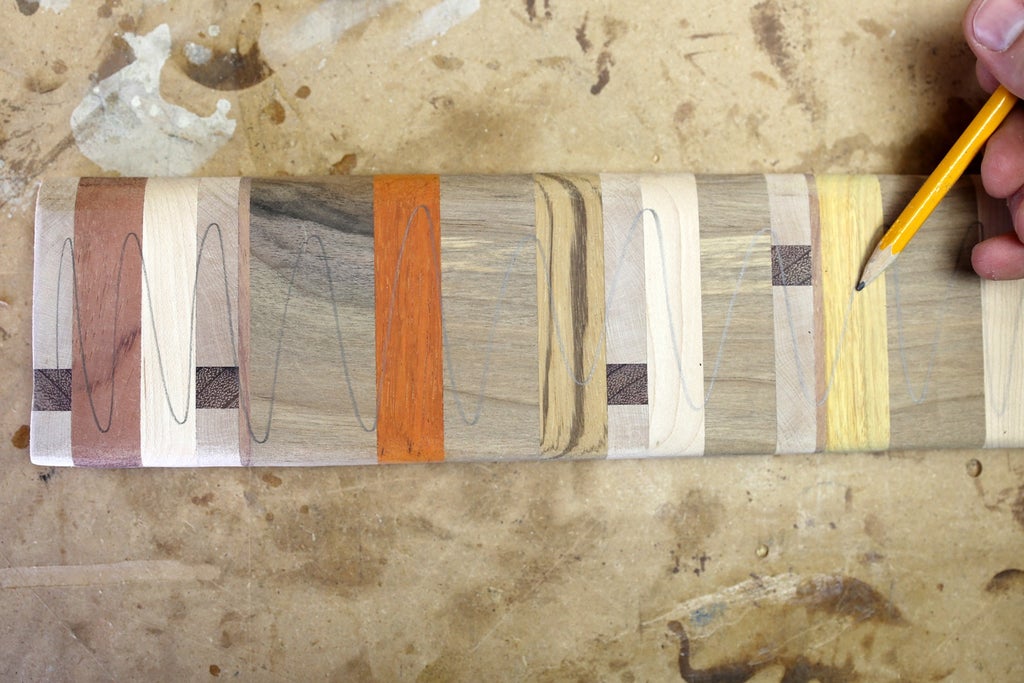

Continue working up the sandpaper grits to about 300, using the pencil marks as a guide and to achieve a smooth finish. If using a mixed variety of wood there will be different densities that react differently when sanding, some will sand down faster than others so it's important not to sand too aggressively.

Note on the bottom left of the photo above the slight indent in the purple heart wood which is less dense than the surrounding maple, this is an example of sanding too aggressively.
Step 19: Seal Wood

Since this is going in a kitchen, I used a food safe finish to protect the wood. There's plenty to say about finishes, if you want to know more you can learn about wood finishes in the Color + Finishes Lesson.
Almost finishes are food safe after they are cured, but for this project I used Good Stuff which is an easy to apply wipe on urethane.

After the finish was applied on all sides the knife rack was rested on four upturned screws to allow all sides to cure completely.
Step 20: Install Wall Attachments

To attach the knife rack to the wall low profile slotted wall hangers were used. To make installation easier pilot holes were drilled into the back of the knife rack, I chose to place my slotted wall hangers centered over the magnet cavity, but anywhere on the back is fine.


The picture above shows the screw placement in the slotted hanger, the screw will be installed in the wall at the desired location and the knife rack slotted into the screw to hang.
Step 21: Mount to Wall

One screw was installed into the wall where I wanted the knife rack and then the rack installed on the single screw. Using a spirit level the rack was moved up and down to find the where it was level .

Marking where the rack was level the rack was removed and the second screw was installed into the wall, the rack can be rehung now perfectly level and ready to accept your knives.
Step 22: Stack Knifes

A magnetic knife rack looks great in your kitchen, or someone else's as a gift. Once hanging on the wall stack up your knifes however you like them, this magnetic knife holder can handle all knives big and small.

Have you made your own magnetic knife rack?I want to see it!
Happy making :)


