

Introduction: Outboard Motor Mounts


This ´ible is about how to make motor mount plates for a small boat.
I recently acquired my grandpa´s old fishing boat after he became a bit too old to go fishing. The boat was in pretty good shape and needed very little maintenance. Since I am a guy who can´t just sit around and do nothing I still managed to find something that needed to be repaired on the boat -the mounting plates for the motor.
The old ones were working just fine but they had seen better days. And since it was such an easy project I decided to spend a couple of hours and make new ones.
Be sure to check out the video and subscribe!
Let´s get started!
Supplies
- A small sheet of film plywood
- Stainless steel bolts/washers/cap nuts
- Tough paint
Tools:
- Circular saw
- Belt sander
- Drill
Step 1: Cut It Out!


The first step is to cut out both plates from film plywood. The old mounting plates in my case were made from around 12mm plywood but I decided to step it up and use 20 mm plywood. Doing so you have to make sure the mounting bracket on the motor can actually clamp on such a thick wall. It is a very good idea to use film plywood since it is better suited for wet environments. It already has a protective film on both faces and the edges can be painted. I think the piece I used I actually found on the street a couple of years ago.
Anyway, copy the shape from old mounting plates or if you do not have any make templates from cardboard. Cut it out with a circular saw or with a jig saw. To make the edges nicer and to round over the corners I used my belt sander.
Step 2: Try It Out!


The second step is to try out if the plates actually fit your boat. In my case, the inner plate needed to be chamfered on the top to fit. I chamfered it with my cordless planer but the belt sander would have worked as well (just a little bit slower)
Drill out the holes for the bolts and attach the plates. Definitely use stainless steel bolts for this as they can withstand moisture much much better and will not rust. They cost a bit more but you only need four of each.
After the plates are attached mount the motor and see if everything works as planned.
Step 3: Paint It!


The third step is to take it all off again for painting. Sealing the edges with paint really helps with the longevity of plywood. It´s good to use high-quality oil-based paint. I used Hammerite which I think is meant to be used on metal but I can't find a reason why it should not work on plywood.
I did one really thick coat of paint on all the edges as well as both faces. This should make it last!
While the paint on the mounting plates was drying I also decided to sand and oil the oars.
Step 4: Install Everything!


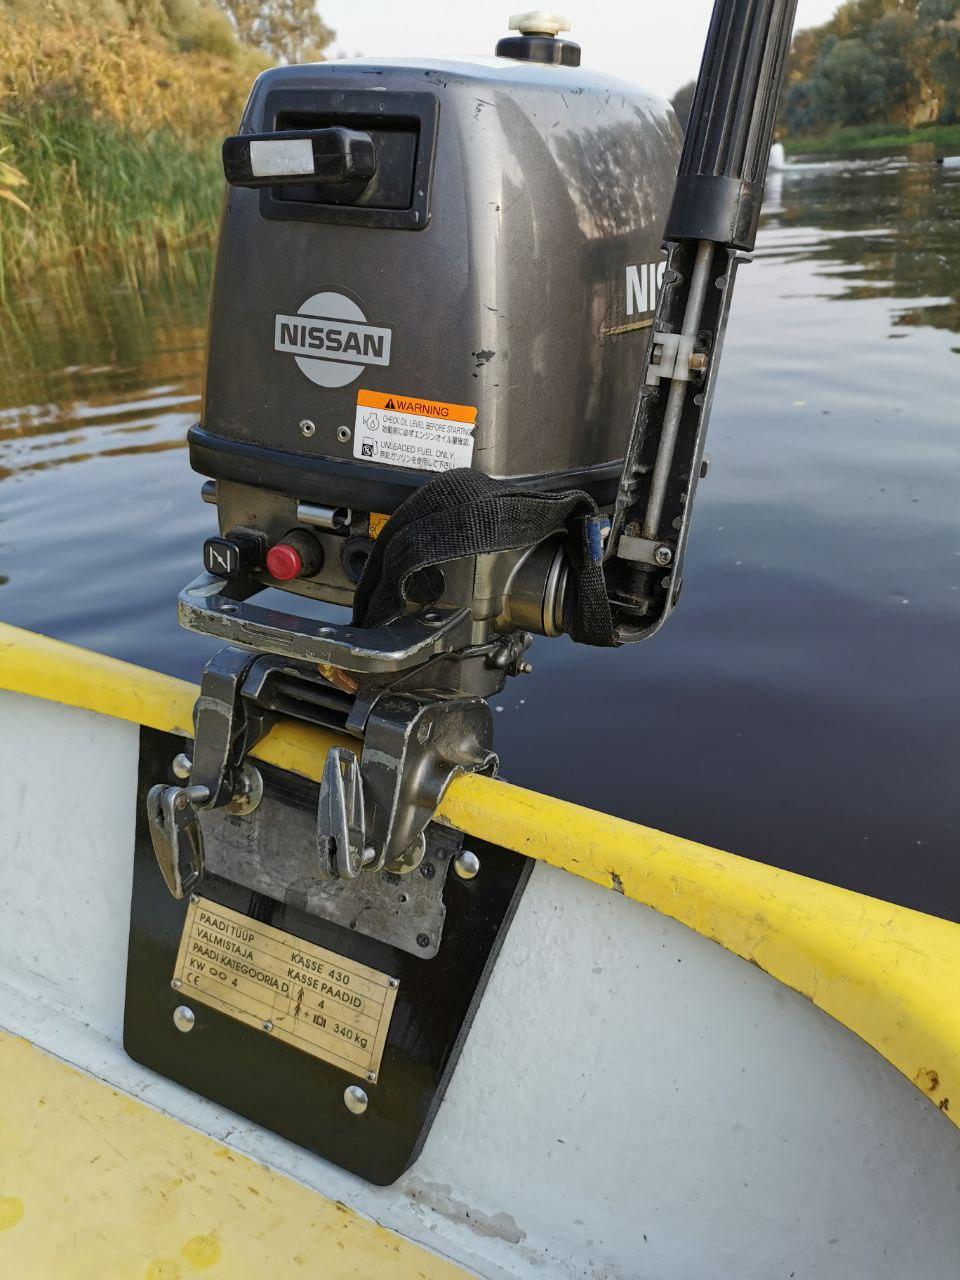
Now you are pretty much done! Install the plates and attach any other hardware. I cleaned and screwed back the boat´s information plate and the plastic plate that stops the clamping screws from digging into the plywood.
Install the motor and go try it out!
Check out the video to see how our first boat trip went!
Let me know if you have any questions or suggestions!
All the best
Andu

Participated in the
Back to Basics Contest


