

Introduction: Creative Pickled Blueberry Recipe for Foodies


Growing and processing fruits and produce from back yard gardens can be a rewarding experience; and for those who have severe food allergies it has become necessary to either buy fresh organic or grow their own food and preserve it. It can be a challenging experience for some, especially if they have to alter recipes to accommodate those dietary restrictions.
Over the past few years I have home canned fruits and jams and had always used methods that I was taught from the old timers. I decided to make some pickled blueberries for Christmas gifts and because I had never pickled fruit before, I wanted to be certain that what I preserved would be safe to eat. I spent a couple of days online reading about home canning and pickling methods.
For this instructable I will be sharing some of the things I learned from this experience and how to make pickled blueberries using the water bath canning method. Follow through and let's get started~
Step 1: Valuable Home Canning Information for Everyone!

This instructable is from my own experience and research, so please don't take my word for everything and read the links I have shared from professionals who are the experts!
I was taught to invert the hot filled jars to insure they would seal, but modern techniques do not advise this method. I never learned the importance of canning low acid foods using the pressure canned method. I was fortunate because I have only tried canning fruits, and jams but this was my first experience pickling. After reading articles about home canning, I realized that my canning experience was very outdated.
Here is what I learned:
The most important thing I learned was, like baking, canning is a science and every ingredient and instructions for making it, plays a huge part in the final outcome of the recipe, but the more you know, the less risk is involved in preserving a safe food for you and your family to enjoy.
When using the water bath method, The correct combination of the ingredients in the recipe, boiling heat, and air tight seals safely preserves the food.
Beginners are encouraged to start by canning jams, jellies and pickles using tested recipes. I recommend recipes for "small batch canning", using a water bath canner. They are less overwhelming, take less time, and could save you money, if home canning is not something you want to seriously pursue.
It helps to review Ball's canning guide if you have not canned in a few years, you might discover they simplified the process!
Most recipes are written for altitudes of 1000 feet above sea level and if you are at a higher altitude the instructions given will not safely preserve your food. Adjustments for processing and pressure will need to be adjusted.
Filtered water is usually recommended for home canning by the professionals. Hard water can make the appearance of the canned goods cloudy and leave a heavy mineral deposit in the bottom of the jars. Hard water can interfere with the acid during the fermentation process.
Tomatoes are something that must be preserved according to modern methods, because new varieties have been developed that were not available before and require pressure canning to be safe.
Before you make changes to tested recipes make sure that it is OK to do so. Often times the author will state the changes that can be made to the recipe. I am sure the professionals say this because most people do not have the experience or knowledge it takes to make such changes. There are articles written by experienced professionals, about how to tweak a canning recipe safely. I took the extra time to view the authors experience in canning and I read the comment section of the blog or website.
Cookware used for canning purposes should be non-reactive. I left a link below that explains the science in detail.
Here are links that should give you a good start, to learn how to safely can your own food and I recommend them even if you have a lot of canning experience; you might learn some time saving tips~
Ball Home canning preparing the jars and lid
OK, let's can some pickled blueberries!
Step 2: Where to Find Tested Recipes

I spoke with representatives at the Ball company inquiring about where to find tested canning recipes and how they test recipes in the lab. A lab expert test the ph levels in the recipe, a high acid food has a low ph and a low acid food has a high ph. The technician also performs a heat test that measures the heat at the coldest spot in the jar, using a special lid with a temperature probe. These test determine which process is best, a water bath process or a pressure canned process for the food item. The heat test will determine how long it takes for the coldest spot in the jar to reach the temperature for safely preserving the food.
They shared these links: here and here about the procedures they go through to test their recipes and recipe developing. Laboratory tested recipes here and here .
You can find canning recipes from test kitchens and universities, with a test kitchen facility and laboratory. Not all published cookbooks have tested their recipes in a laboratory for home canning purposes. Here is a great resource with detailed information that should answer all of your questions about testing home canned food items.
Step 3: Utensils and Ingredients


I followed Marisa McClellan's recipe from Food in Jars because I read, it had been a tested recipe. This is what showed up on my search: http://foodinjars.com/2015/08/gingery-pickled-blu... Aug 1, 2015 ... Marisa from Jars in Food shared: Gingery Pickled Blueberries […] This recipe was tested by the Ball Canning team and it is safe for canning.
The author also states in the comment section, that her original recipe was tested by the Ball Canning Team.
This recipe follows the same amounts and ingredients as Marisa's; except I wrote the utensil list and instructions in my words.
This is what you need:
This recipe makes 6 (1/2 pints or 3 pint jars) of pickled Blueberries.
Utensils:
Water bath canneror I used a large stock pot ( I don't have small children around, so I was OK with this ) " You can put canning jar "screw bands" in the bottom to prevent the jars from breaking, Paige mentions this in her canning class. There is a safety draw back when substituting a large stock pot for a water bath canner though, a canner has a rack that goes inside the pot that allows you to safely lift the jars from the pot and as you lift the rack, the handles are clipped on the sides of the pot to rest, making the rack higher, so the jars can be safely removed from the pot.
6 (1/2 pints or 3 One pint) canning jars, lids, and screw bands
Jar lifter or tongs
Stainless steel or non- reactive medium sauce pan and lid
Stainless steel or wooden slotted spoon and ladle
Measuring cups
Vegetable peeler and knife
Colander
Lint free dish towel
Funnel I prefer stainless steel like this one
Ingredients: Marisa's original recipe
3 pounds of fresh Blueberries
1 1/2 cups of Apple Cider Vinegar ( I added this: 5% acidity is used for water bath canning ) there are varying levels of acidity for different brands. Do not substitute fresh lemon juice for the vinegar in this recipe.
3/4 Cup Filtered water
1 1/2 Cups white sugar
3 inches peeled thin ginger strips
Step 4: Set Up Work Station and Water Bath Canner


Follow the manufacturers instructions for the water bath canner and jar preparations.I recently purchased Sure Jell pectin and the instructions mention the jars and lids must be sterilized in boiling water for ten minutes, however Ball's blue book does not require boiling the lids and screw bands for their jars . I recommend reading about it for yourself. I have hard water and using a stainless steel pot, I add 1/2 cup of white vinegar to the water to prevent the minerals from coating the jars or canner.
I always wipe down the counter tops and stove area with a solution of vinegar and water to avoid any chemical residue on the surface, that could contaminate the food.
Set up a work station.
Step 5: Sort and Wash Blueberries and Measure the Ingredients


3 Pounds of blueberries
Sort and stem blueberries
Wash the blueberries
1 1/2 cups of Apple Cider Vinegar
3/4 Cup Filtered water
1 1/2 Cups white sugar
3 inches peeled and thinly sliced ginger strips
Step 6: Time to Make the Brine


Combine the water, vinegar and sugar in a medium sauce pan and stir to combine.
Bring the mixture to a boil.
Add the ginger and stir.
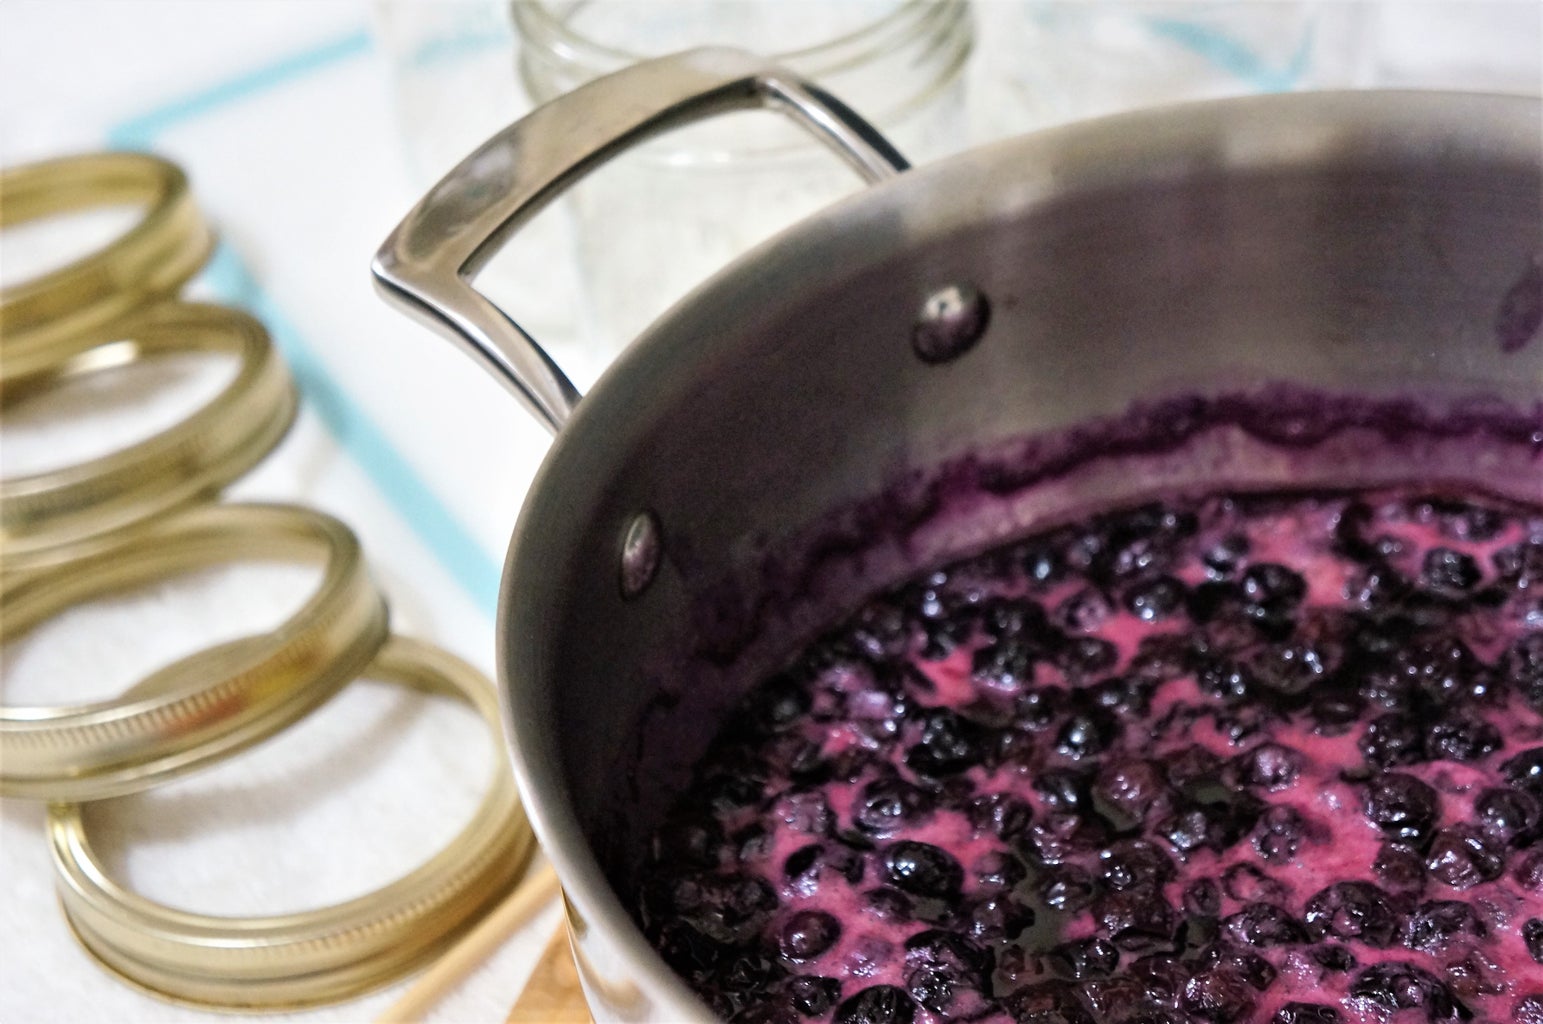
When the brine is vigorously boiling, add the blueberries and gently stir to combine.
Cook 5 to 7 minutes until the brine has returned to a rolling boil and the color has changed to a dark purple color.
Remove saucepan from heat.
Step 7: Filling the Jars


The funnel I had was not working very well, so I used the ladle instead and it got a little messy when I had to add a little more brine for the head space.
It is time to fill the jars with blueberries.
Ladle the blueberries into the jars using a slotted spoon and save enough room to add the brine mixture.
Cover the blueberries with the brine mixture leaving 1/2 inch head space.
Remove the air bubbles from the jars using a wooden skewer or wooden spoon.
Skim off foam if necessary.
Adjust the brine level if necessary.
Clean the jar rims and apply lids and using your fingers, screw bands down evenly and firmly, just to the point of resistance. It is important to clean the top of the jar and around the rim of the jar because sticky residue in those areas will prevent the lids from making an airtight seal with the jar.
Store the left over brine in the refrigerator to use for flavoring smoothies or sauces.
Step 8: Process Jars in Waterbath


It is time to process the jars in the water-bath canner.
Place the jars into the water-bath canner for ten minutes (adjust processing time for higher altitudes).
When cooking time is finished, remove the jars using the jar lifter.
Place hot jars on a layered kitchen towel to cool.
When the jars have completely cooled for 12 to 24 hours, remove the screw bands and check the seals.
If the lids pop when you push the center they did not seal and any unsealed jars should be stored in the refrigerator. You can remove the lids that did not seal and replace them with a new one and re-process the jar following the procedure again for the water-bath.
Let the jars rest for 24 hours to allow the flavors to blend before eating. All my jars sealed perfectly using the sure tight lids.
Storing the processed jars is important also. Store them in open boxes on the shelf or provide a layer of cardboard between the layers of jars, Here is my source .
Store the canned goods without the screw bands. Condensation builds up between the lid and the screw band which can cause the metal to rust and allow air to get inside the jar. Here is more information about removing the screw bands for storing .
Step 9: What About Exchanging Ingredients and Tweaking Tested Recipes?

In the past the Ball corporation have always took a hard stance, when consumers questioned them about exchanging or altering their tested recipes until the past few years. They have begun to list ingredients that can be exchanged or included in a few of their recipes. I called and asked about adding dried spices and herbs to a tested jam or pickled recipes and was told it was OK to add dried spices and dried herbs ( in small amounts) to the recipe as long as I did not add fresh ingredients ( adding fresh ingredients to a recipe, will alter the acidity levels important in safely preserving the food ) . If you decide to try this please double check for the suggested amounts.
Naturally most of the people I spoke with, discouraged tweaking the ingredients to a tested recipe but I did find someone who does share tested recipes and offers some guidelines about tweaking tested recipes here and here .
Step 10: Experimenting With Fresh Herbs and Dried Spices


I experimented with different hot pepper spices and fresh peppers to a couple of the jars and then I refrigerated them or put them in the freezer (using jars designed for this purpose). I did not change the original tested recipe and re-can them in the hot water bath, just to be clear.
I played around with the blueberries to see what flavor profiles I could create ~ We loved the flavor and kick that the fresh and dried peppers added to the blueberries. I will be experimenting with fresh herbs for refrigerator versions.
I like the idea of making small batches so it is easy to change the flavor to an opened jar by adding favorite ingredients.
I made a south west style sauce for roasted chicken with the brine, from the pickled blueberries and my husband and I loved it. I should have added the blueberries about five or ten minutes before the chicken was done but it was still very good.
I added lime juice, chopped Poblano peppers, cayenne pepper, and cumin to taste to the pickled blueberry brine and simmered it over the stove for a few minutes.
The powdered spices did not make the sauce cloudy, because it was so dark, however I would not use it with lighter colored fruit.
I made a batch using Jalapeno peppers, my husband does not like it as hot as I do, so I added fresh peppers in (my) dipping sauce, to make it hotter, so we both could enjoy it the way we like it.
I made one jar into a jam by cooking the pickled blueberries longer, reducing the liquid and it set up nicely.
After speaking with the Ball representative, I feel I can safely use dried herbs and spices to this recipe using the water bath method, but please call and inquire about doing this yourself before canning your recipe. In the future I will be testing the dried herbs and spices, using the brine mixture in small dishes before I add the fruit. When I am happy with the combination, I will add the spices to the whole batch of brine and bring it to a boil and add the fruit and follow the rest of the instructions for making the recipe.
Step 11: Jar Embellishments


I could not find jar labels unless I ordered them online so I designed these because photo prints were 40% off.
I created the pictures in pixlr and added the text: the recipe, processing date, expiration date,spices and herbs that could be added for flavoring, and how to use the blueberries. I ordered the prints online.
I trimmed the pages down, placed the pages in order, folded the pages and stapled the center. I trimmed the lid label and placed it between the screw band and the top of the lid and tightened the screw band.
I used a heavy needle to punch a hole in the corner, slipped twine through the hole and attached the booklet to the jar.I made a larger book that includes the recipes and the information in the mini book for actual reading~
I will be including a few spices in smaller containers with lids, smaller than what you see here, with the jam.
When the jars are labeled, I will wrap and address them, take them to the post office and pre-pay the postage, But I won't mail them until early December! All I will need to do is drop them in the drop box at the post office and walk away! So much easier~
Step 12: Sunshiine's Final Thoughts


This would be a great recipe for any beginner who would like to give the water bath canning method a try. It is easy to make and is not a time consuming affair, as long as you read the links I provided in advance. This pickled blueberry recipe would be a nice addition to a salad or thickened for a sweet and sour sauce for chicken~ I added the pickled blueberries to my turkey sandwich and it was delicious~
Because some of my jars will be used for gifts, I will give away the original water bath tested, pickled blueberry batches to family and friends. I will enclose recipes using the blueberries, along with small samples of the spices for the recipe and mail them to relatives. The jars will have an ingredients list, processing date, shelf expiration (1 year) and once opened use ( 7 days). I will also include Marisa's recipe that was tested by the Ball company for the water bath canning method and a link to this tutorial.
I purchased more fruit tonight to make my variations to the recipe, where the author says we can safely make certain substitutes. Stay tuned for the results.
Thanks for stopping by and happy canning~
sunshiine~

Grand Prize in the
Canning and Pickling Challenge 2017


