

Introduction: Retro Bluetooth Boombox


All the convenience of the 2010's, all the style of the 90's- this bluetooth boombox is the life of the party. With a 3D printer and some time spent finishing with the proper color scheme, you too can party like it's 1991.
All the parts are 3D printed or laser cut, but you could do everything with a 3D printer. The bluetooth speaker is a deconstructed BOSEbuild, but any bluetooth speaker components would work.
See a live demo of this project! Check out this video on of the webinar I hosted on July 11th 2017 to watch me design and render the style of this boombox in Fusion 360.
Step 1: Tools + Materials
3D Printing
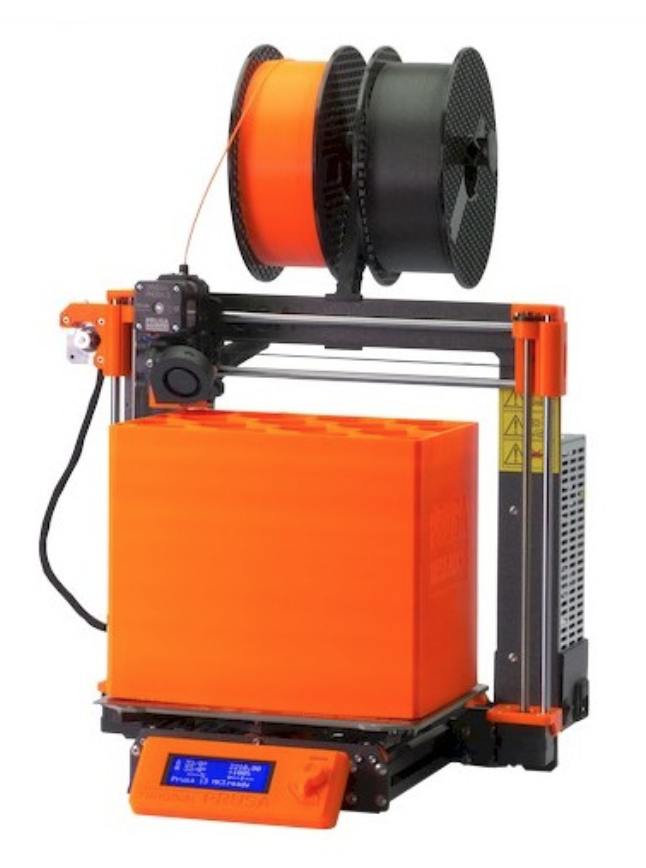
I use a Prusa I3Mk3S for just about everything. It's the best bang for your buck, in my opinion- very well made, 3D printable replacement parts, accurate and reliable.

- Filament: I used ASA for this project, but PLA will work just fine.
Paint + Finish
- Spray Paint: I used Montana Gold, but any spray paint will do. You could also just use colored PLA.
- 220 Grit Sandpaper: This is used between coats of paint to get a smooth surface
Electronics + Hardware
- Bluetooth Speaker: For the bluetooth speaker I used a BOSEbuild Cube because they gave us one to play with and it sounds really good. Any bluetooth speaker will do as long as you're willing to design the enclosure so that it fits the parts.
- Battery: I added a 12V rechargeable battery as a power source. It charges fast, the charger has an LED indicator to let you know when it's charged, and it drives this robust speaker with no trouble.
- Male DC Power Terminal: This connects the power cable from the battery to the bluetooth speaker controller.
- Female DC Poer Terminal (elbow): This part connects the bluetooth speaker controller to the battery pack. The design has the controller facing forward with a plate in front of it, so this will need to be trimmed down to fit.
- M3 Machine Screws: All of the fastening is done with M3 10mm machine screws. You can probably find them cheaper on Amazon, but I used McMaster Carr because it's so easy to insert the model into Fusion and order it there.
Step 2: Design
To design anything, you've got to start with precedents. I remembered the boombox I had when I was a kid- boxy, big speakers, retractable handle, controls on the front... I was nowhere near as cool as the kid in the picture below, but this is the theme I'm going for. I spent some time looking around online for pictures of old boomboxes and got a general idea of promotions, shapes, features, etc.
Wild Style

There's no point in just making a copy of a 90's boombox and putting bluetooth components in it. Why would it be that big? Why not just gut an old one and put the parts in it? Where's the fun in that? I wanted to design something myself.
The next thing I needed to get a handle on was graphics and colors. Two sources came to mind as the authors of the quintessential 80's-90's aesthetic.
Keith Haring

Image credit: The Keith Haring Foundation
This guy was a seriously prolific, seriously influential artist at the time. You've seen his work all over the place without knowing it. Lots of people were influenced by him, and his style quickly became the touchstone of art, graphic design, and all kinds of media.
Memphis Group

Lastly, the Memphis Group gets the credit for creating the quintessential design aesthetic of the 80's and 90's. Bright contrasting colors, busy patterns, whimsical shapes, and a general sense of fun and playfulness are the general theme here.

I started with a couple of quick sketches to get the general idea down. Bose gave us a BOSEbuild cube to play with, so I know the design would have a single speaker.
Step 3: 3D Modeling


I did the whole thing in Fusion 360 (just like everything else I design and make). I'll be doing a live webinar on modeling and rendering this project if you want to learn more. Check our Facebook page for updates!
- .F3D Files: These are Fusion 360 archive files. To use them, click upload in the Data Panel in Fusion and they will open as a native file.
- .STL Files: These are ready-to-print exported parts. You'll need to print the "inside cover" part twice- these are the caps that keep the handle connected to the shell.
- .DXF Files: These are the 2D vector files for the front and back covers. You can use these to laser cut these parts or cut them by hand if you want, but I've also included STLs of these parts if all you've got is a 3D printer.
Attachments


Step 4: 3D Print
The parts all fit on a Makerbot Replicator 2 build plate. I used Simplify 3D to slice the models. Whatever slicer you use make sure to turn on support structures for the shell part.
The size of the largest part (the shell) is 250mm X 140mm X 100mm.
I laser cut my front and back covers, but you can do these on a 3D printer using the STL files I included for them.
Step 5: Prime the Parts


Now for the finishes! This is usually the most time consuming part of a project. The first step is always to prime the areas to be painted. Primer gives you a neutral base color to work with (white in the case) and it gives the spray paint a surface to adhere to. Always prime first!
As you can see in the video, I've put masking tape over that parts that I don't want to paint. These include the inside of the shell, the cavities on the inside of the handle, and the inside cover pieces except for the little patch that will be seen when the handle is up.
I use MTN Gold spray paint for pretty much everything because it's water based (keep your VOC's, thank you very much) and the colors look awesome.
I used "Dolphins" (cyan) "Pure Magenta" and "Shock Yellow". These make up a triadic color scheme meaning the three main colors used are equidistant from each other on the color wheel. This color scheme was all over the place in the 80's-90's.
I also used Chrome for the shell and the sides of the handle to bring it back to the quintessential metallic finish on the old boomboxes.
Step 6: Paint First Coat
As with priming, I try to use best practices to get a nice even coat. Here are the rules of thumb:
- Hold the can 6"-10" away from the surface when painting. If you get too close the paint will pool and ruin the finish. If you get too far away it will turn into sticky dust on the surface.
- Paint in a sweeping motion, start the spray away from the part, end the spray away from the part. Sometimes when you push the tip, the paint will splatter a bit in the beginning because of excess paint being in the tube or on the nozzle, so you want to make sure that splatter doesn't get on the part.
- Allow the paint to dry before sanding or applying additional coats. Sanding sticky paint will ruin the surface, and painting wet paint will make the paint coagulate and make the surface uneven.
Step 7: Sand
I used 220 sandpaper between coats for this project, but if you want to do it like a pro, step up in the grit size between coats. Start with 220, then 300, then 320, then 400, etc. If you take your time with this, you can get unbelievable finish quality.
Step 8: Paint Second Coat
With the silver paint done, I applied more making tape over the silver sides of the handle so I could do a two-tone finish on it. I used a razor blade to get clean edges between the colors.
Step 9: Glue Handle Parts

First, the handles need to be fastened to the shell. To do this, I just removed the tape on the inside covers, slid the handle onto the shell, then glued and clamped them to the cavities on the inside of the handle.
Step 10: Assemble

- Back Plate
- Front Plate Lower
- Bezel
- Battery
- Front Plate Upper
- M3 X 10mm Screws
- Power Cable
- BOSEbuild Speaker
- BOSEbuild Speaker Controller
- Chassis + Handle

The shell is designed with nut pockets on the front, but the holes are small enough that you can just thread the screws into the plastic. I used a 3mm tap to tap the holes to make sure the screws had good purchase.
The speaker and controller go in side-by-side with the speaker on the right. There's a recess in the shell that keeps the parts in place. The bezel has two holes in it that let the backs of the speaker and controller poke out. The cable has to be plugged into the front of the controller before the bezel is screwed on.
The cable is the only part that's soldered. The male terminal has screw terminals on it and the female elbow terminal has solder terminals. I left off the plastic cover for the female terminal and cut off the longest part of the + solder terminal so it would fit behind the front panel.

Next, I added the battery and the back panel. The battery has an input and and output built in, so I just plugged the output into the cable from the controller. The charging input goes into the hole in the back panel. I used a little hot glue to keep it in place, and I used double-sided tape to keep the battery in place. The battery has a switch that I made a hole in the panel for as well.

The front panel is pretty straightforward except for the buttons. The easiest way to do this is to press the slider onto the slider on the controller first- it will stay in place. The buttons should be inserted into the front cover and held in place while the covers are placed on the shell. They will be held in place by the buttons on the controller.
Step 11: Decorate and Rock Out

I made some vinyl stickers based on Keith Haring paintings to pull the design together.

Overall it sounds great and people love the look. The hole in the front lets you plug in an AUX cable in case you want to listen to your Walkman.


