

Introduction: Rings of Saturn LED Music Visualizing Pendant Light


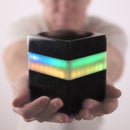

I made this LED pendant light from plywood, LED strips, and flexible LED channel. Since I designed this for my living room, the music syncing had to be incognito. With this in mind, I used warm white / cool white / amber LED strips, instead of RGB strips. In solid white mode, the rings give off various shades of white for a sophisticated modern look that hides the wild side when you switch the light to music visualizer mode
The build is fairly simple. Each of the two rings is made of a stack of three plywood rings, where the middle ring has a lesser radius to create a groove for the LEDs. The rings are simple to cut using a circle cutting jig and router. While I programmed an Arduino to do music visualization based on input from a microphone, you can very easily buy an off-the-shelf music controller for individually controllable LEDs, which is basically plug n’ play for LED strips.
I've included most of the parts for the build below, and the video walks you through the build process. I will come back and update this instructable with more build details soon. Or, feel free to leave any questions in the comments section and I will be happy to answer.
Step 1: Parts List
Flexible LED Channel: https://www.solidapollo.com/NF12-Neon-Flex-LED-St...
Walnut Plywood: https://goo.gl/GizBrF Circle Cutting Jig: https://goo.gl/GizBrF
Dewalt Router: http://amzn.to/2fnCv5d
Links to off-the-shelf LED controller and lights (this makes the mode switching, music syncing LEDs way easier to install), but note you'll need a separate controller for each ring.
- LED Music Controller with Remote and power supply: http://amzn.to/2fnCv5d
Use the above controller with one of the following three types of LED Strips:
- individually controllable warm white / cool white / amber (WWA) LED strips: http://amzn.to/2fnCv5d
- Individually controllable temperature varying warm white LED strip: http://amzn.to/2fnCv5d
- individually controllable RGB LED strip:
Links to LED Parts I used for the build:
SK6812 WWA Individually Controllable LED strips : http://amzn.to/2fnCv5d
Arduino Mega Clone: http://amzn.to/2fnCv5d
Electret Microphone: http://amzn.to/2fnCv5d
RF receiver and remote: http://amzn.to/2fnCv5d Follow me on Instagram: http://amzn.to/2fnCv5d
Step 2: Cut the Rings


[Note - the pictures show a jig saw, but I used a router with circle cutter jig. I had a couple errors as a result of not having a router bit long enough to go all the way through two 1/2" pieces of plywood. Make sure you get a router bit that is 1.25" long and you'll avoid this.]
Each ring is actually a stack of three rings that are glued together. The top and bottom rings in each stack are identical, and made from 1/2" walnut veneer plywood. The middle ring is made from 3/4" standard plywood (it isn't visible), and the diameter of the middle ring is 1" less (i.e., 0.5" less radius) than the top and bottom rings, so the stack forms a channel for the LED profile.
Cutting the rings is easiest with a circle cutting jig.
Stack the 1/2" walnut plywood sheets and screw them together, so you can cut the top and bottom rings at once.
When cutting each stack of rings, you'll want to work from the outside in, so cut in the following order:
1. Cut the outer radius of the top and bottom rings from the walnut plywood. (I cut them at 42" diameter.)
2. Shorten the distance to the router on your circle cutting jig by 0.5" (so diameter of the resulting ring is 1" less), then cut the outer radius of the middle ring (I cut at 41" diameter.)
3. Shorten the circle cutting jig by another 1.5" (so diameter is 40"), then cut the inner radius of all rings.
Then repeat steps 1-3 for the smaller ring.
Step 3: Glue Up the Rings


Stack the 3 rings and use wood glue to glue them together. Take your time and try to make sure the inner radius is as flush as possible on all three rings.
Step 4: Apply Edgebanding


Use 3/4" (or 5/8" if you can find it) walnut edgebanding for the outer radius of the top and bottom rings in each stack. I actually applied edgebanding to the outer radius before the glue up, but I think you can do this after glue up just as easily.
Use 2" walnut edgebanding to cover the inner radius. If the inner radii of all three rings in each stack aren't perfectly flush, you'll want to sand them flush before you do this. A belt sander is useful for this, but you can use any type of sander to get the job done.
Step 5: Apply the Finish


I applied two coats of danish oil to each ring stack
Step 6: Add LED Strips
Cut a chimney-like hole thru the middle channel and out the top of each ring to make a path for wiring to LED strips.
Use the adhesive backing on the LED strip to adhere it to the middle ring in each ring stack. Optionally, use some CA glue to make sure LED strips don't come unstuck.
Step 7: Install Flexible LED Channel
I cut the back out of the LED channel, so that I could adhere the LED strip to wood ring directly, and have more space between the LEDs and the diffuser on the channel. This results in better light diffusion and a more solid look to the light (instead of the dots LED strips often produce).
Then I bent the LED channel to the rough shape of the ring, cut it to size using a miter saw, and used CA glue to adhere it to the channel formed by the stack of three rings. I used electrical tape wrapped around the ends of the channel to make sure it stayed in place while the glue dried.
Step 8: Program the Arduino and Install the Electronics
This could be the basis of an entire Instructable on its own. I was learning as I went, and went through many iterations of electronic configurations. Ultimately, if you want to simplify this build use the off-the-shelf controller and remote I linked to above. If you are interested in building the electronics yourself, here is a link to the code I used (warning, it is very crude): https://github.com/modustrialmaker/Rings-of-Saturn-LED-Light-Music-Visualizer

Third Prize in the
Home Improvement Contest 2017


