

Introduction: Scrap Wood House Numbers


Make your house stand out on the block with easy to make house numbers made with scrap wood. This Instructable is the project companion to the free Woodworking Class All About Glue. You can read up on some glue theory and then use this project to apply your knowledge.
This simple project is great for those leftover scraps of wood from your last project. The more varied your wood is, the more striking the result. I sketched out a game plan before gathering up my materials.

Tools + Supplies:
Any scrap will work and the ends will be squared and cut to the right length, then glued together into a plank which your store bought house numbers can be mounted to.
Ready? Let's make!
Step 1: Cut Scraps to Length

Collect and cut your scraps to the approximate length for your house number sign. I like the random length stacked style, so these scraps are between 6"-8".
I had these scraps left over from some other projects, but you can easily find scraps at any lumber store. In this example we have a mix of pine, maple, walnut, purple heart, and zebrawood.

Since this is a scrap wood project it doesn't really matter what condition the wood is in, so chip out, nail holes, and rough edges are all acceptable. The important part is to have clean and straight edges for the glue to bond to. Try a few orders of your stack to get the style you like.
Step 2: Glue

Apply a bead of glue to each piece of wood, smear the bead with your finger to get even coverage, then clamp wood together. Remember to add cauls to the top and bottom of the clamps so the glue up stays together perpendicularly.
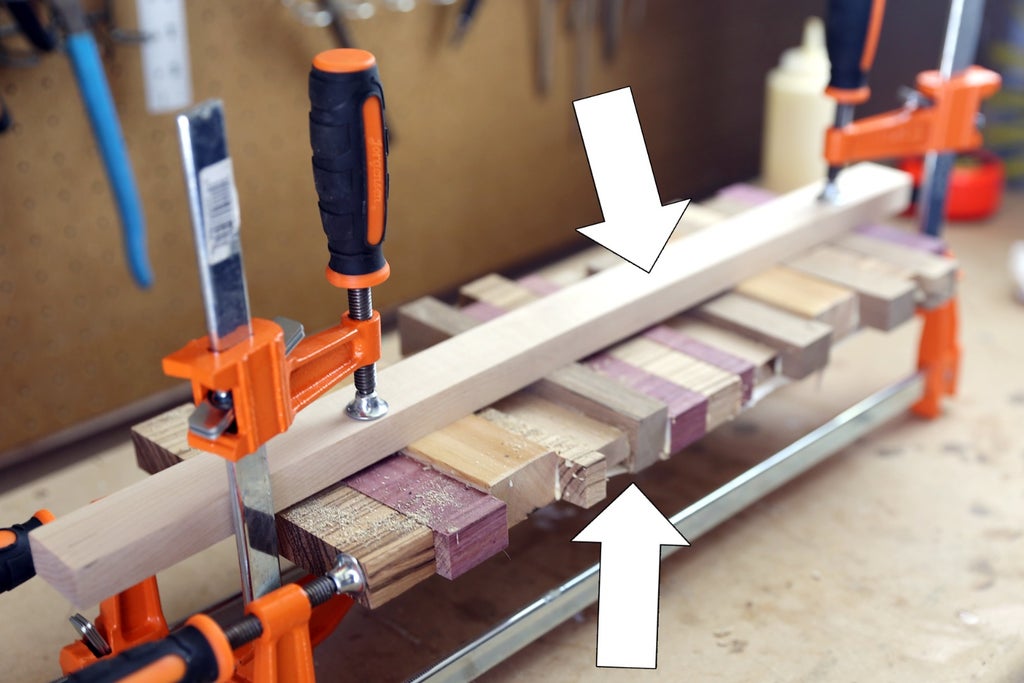
Clean up any excess glue and squeeze out by rubbing sawdust into the glue until it clumps together and falls away. Allow the glue up to dry overnight.
Step 3: Sanding

Once the glue has dried you can remove the clamps and inspect your work. Sometimes there's dried glue that you didn't catch while it was still wet, this can easily be removed now by either scraping or by using a sharp knife to get under the glue and pry it off (careful not to damage your work!).
Another method for getting off small amount of dried glue is to use sandpaper. The Sanding Lesson has lots of information, but if you're a pro and sanding then just start with a low grit and work you way up to finishing with a fine grit. Sand the surface and edges to get a smooth and clean look.


Start with a rough grit (80 grit) to remove any blemishes and dried glue, rub the sandpaper all over the wood until each section of wood is smoothed. Switch over to a finer grit sandpaper (120 grit) and rub over the piece again until the rough abrasion marks from the 80 grit are gone. Step up again to an even finer grit of sandpaper (180 grit) and rub over the wood pieces until they are nice and smooth. You can continue moving to finer sandpaper if you like, but for this outdoor project 180 grit is fine.
After sanding wipe down your work with a dry rag to remove any fine sawdust from sanding.
Step 4: Exterior Finish

This project is destined for outdoor use and will need to be protected with a finish to prevent the wood from rotting or discoloring. The Woodworking Class has a Finishes Lesson that talks a lot about types of finishes. Check it out if you want to know more. For this project, I applied a clear exterior polyurethane coating to achieve protection.

Apply the finish with either a foam brush, a chip brush, or lint-free rag. Make sure the polyurethane gets onto all parts of your piece, especially the uneven portions where the wood is glued together. After application wait a few hours until the surface is dry and apply a second coat, then allow to dry completely overnight.
Step 5: Apply House Numbers

Once the finish has dried the house numbers can be attached. I used 4" high numbers, but yours can be based on whatever matches your glue-up.
Arrange the house numbers on your scrap wood to determine the best location for each number, take care to place the screw holes as your scrap wood glue up may have some uneven areas.


With a pencil mark the screw hole locations, then drill a hole with a drill bit smaller than the diameter of the screws the house numbers came with - this small hole is called a pilot hole. You can learn more about drilling in the Drilling Lesson. Drill down as far as the screws are long.

Place the numbers back onto the scrap wood and tighten the screws down using a screwdriver.
Step 6: Mounting Hooks

Choose a mounting method that suits your needs. I wanted to have my house numbers removable and have minimal impact to where they were mounted (since I rent), so I used keyhole hangers which only require a 2 screws into wherever I mount.
Step 7: Mount Your Masterpiece!

All that's left is to mount your masterpiece near your front door, showing people where you live while showing off your woodworking skills.

Happy making :)
Did you make your own scrap wood house numbers? I want to see it!
Happy making :)


