

Introduction: Sending a Job to the Machine


Laser Basics.
ETCHING VS. CUTTING
- Etching is the process of removing a small layer of material from the top of the workpiece.
- Cutting goes all the way through the material.
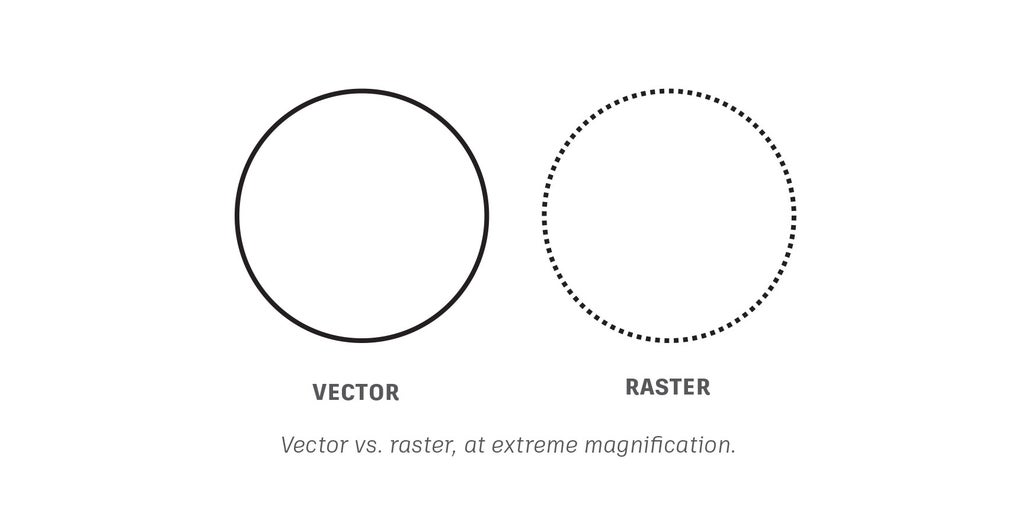
VECTOR VS. RASTER
Vector artwork is a collection of straight or curved
lines. Illustrator files and DXF files are examples of
vectors.
The laser software will follow a vector line and cut or etch, depending on power settings.
Bitmap or raster artwork is a collection of individual points. JPG, GIF, PNG and Photoshop are examples of bitmap files.
The laser software will interpret raster lines as instructions to etch, not cut. The laser will hit each dot or pixel with a short blast of light to burn an image into the material.
Step 1: Design Software
The interface for the laser is a printer driver that works from AutoCAD, Adobe Illustrator or CorelDRAW. Autodesk CAD products can export flat surfaces (faces) as a DXF and imported into graphics software.
In Illustrator or CorelDRAW, starting with an artboard size of 36" x 24" will make placing artwork easier.
SELECTING VECTORS IN DESIGN SOFTWARE
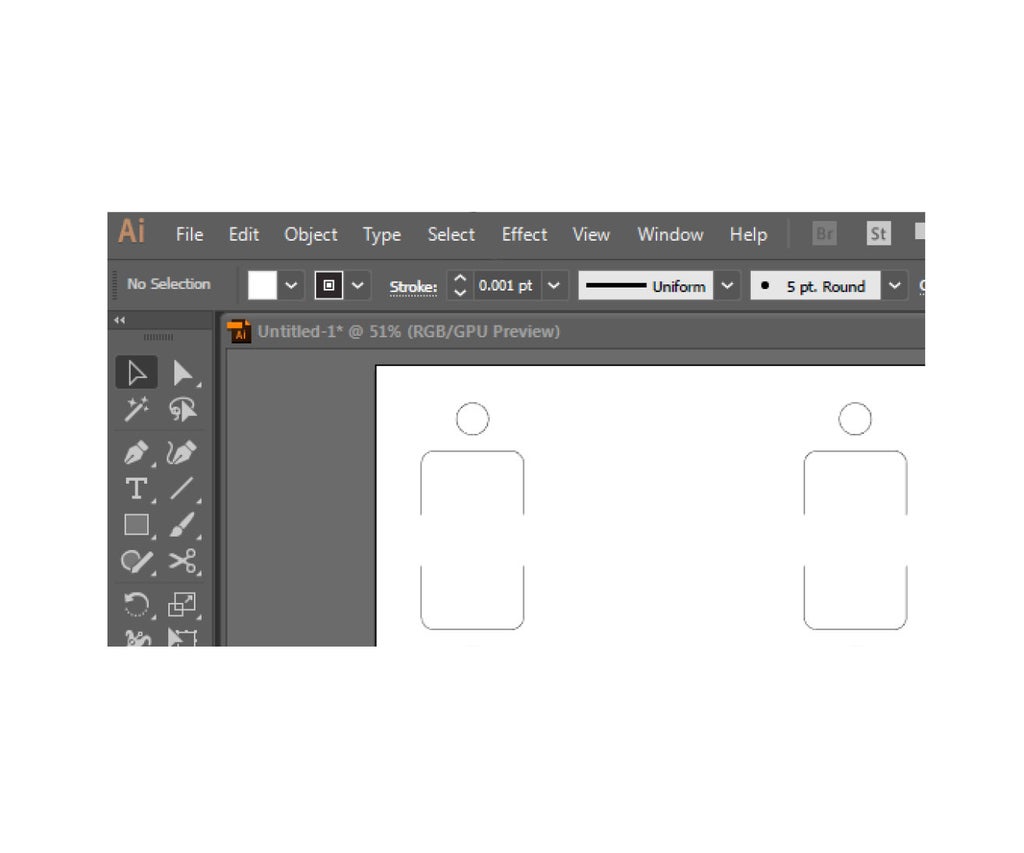
Adobe Illustrator
In Illustrator, lines with a 0.001" stroke will be a vector.
All other lines will be interpreted as a raster.

CorelDRAW
In CorelDRAW, lines with a width of hairline will be a vector.
All other lines will be interpreted as a raster.
Step 2: Job Settings
Using the printing preferences.
PREPARING THE JOB
Open the file in your graphics software.
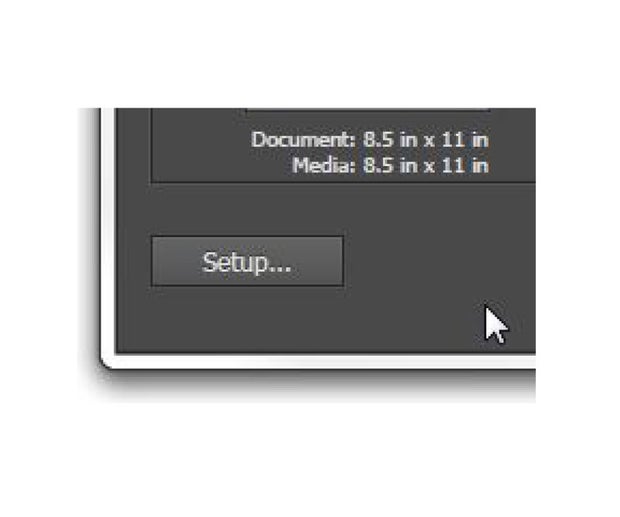
Select “Print” from the File menu.
Select the laser cutter you want to use.
Earth, Water, Fire or Air.
Open the Printing Preferences or Setup dialog to open the Epilog settings dialog.
CHANGING THE SETTINGS
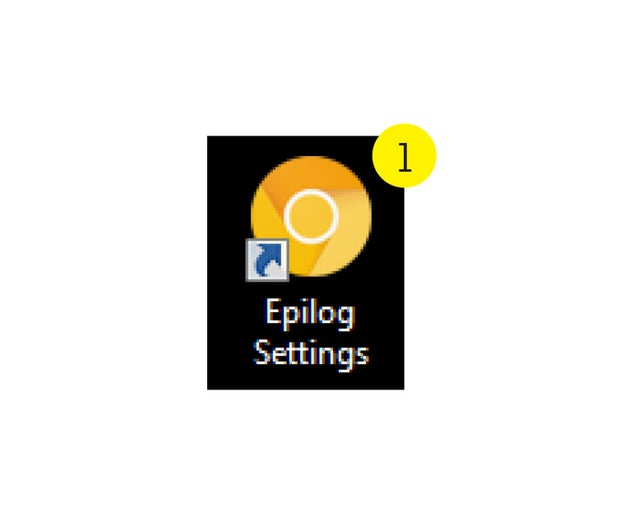
- Use the Epilog Settings file on the desktop to look up settings for your material.
- If rastering, set the resolution.
- As DPI increases, the image will look better but the job will take longer.
- Ensure that Autofocus and Center Engraving are not checked.
- Select the job type.
- You can choose to only work on rasters or vectors, or run both jobs together.
- Double check that the Piece Size is 36" x 24".
- Set speed & power for rasters.
- Set speed, power & frequency for vectors.
- Click OK.
- This will close the setup dialog, and return you to your graphics program.
- Click “print” in your graphics program to send the job to the laser.
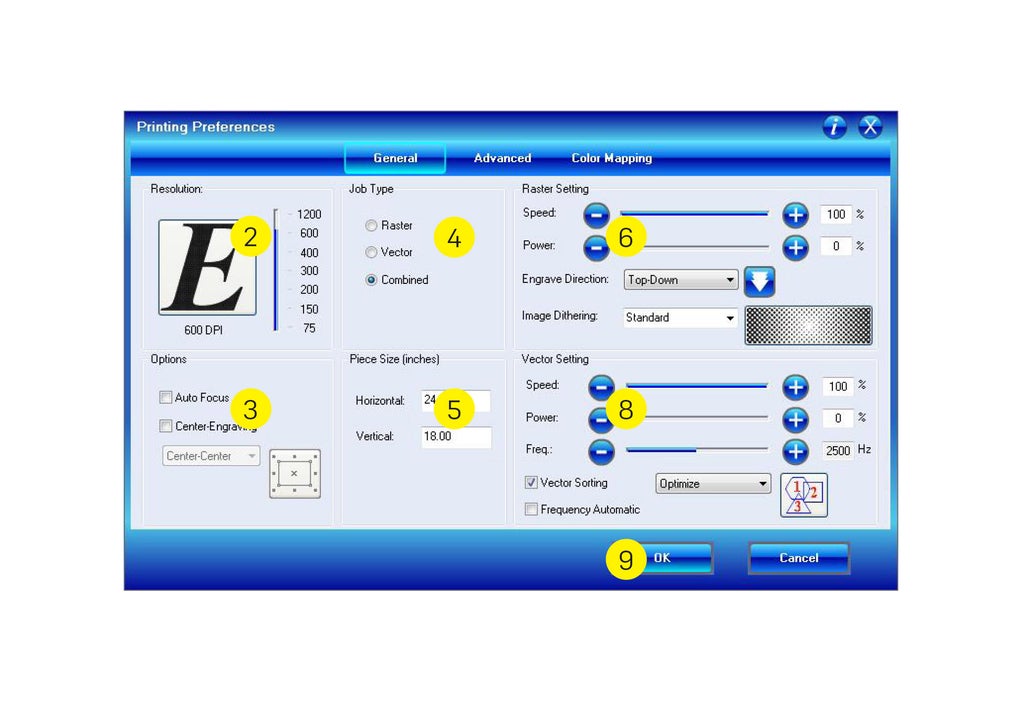
Image Dithering is the process of turning greyscale images into .
- Jarvis & Stucki produce the best patterns for photos.
- You will need to make a test cut to see the results.
Vector Sorting selects the order that items will be cut.
- In general, inside pieces should be cut before the perimeter.
- Use this option to override the default.
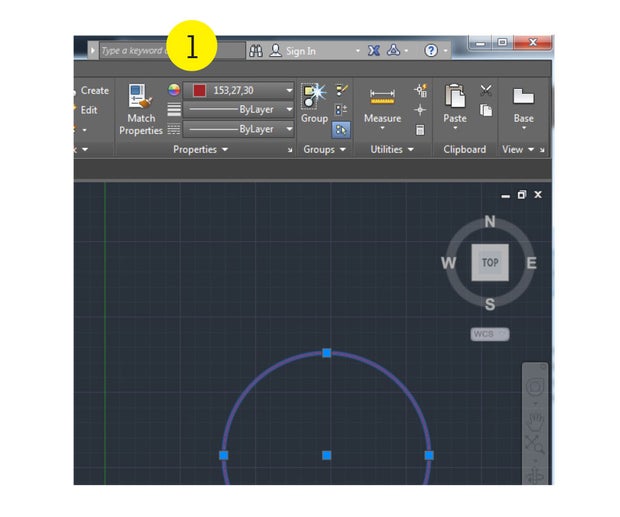
Step 3: AutoCAD
Using the laser with AutoCAD is more complicated, but more powerful.
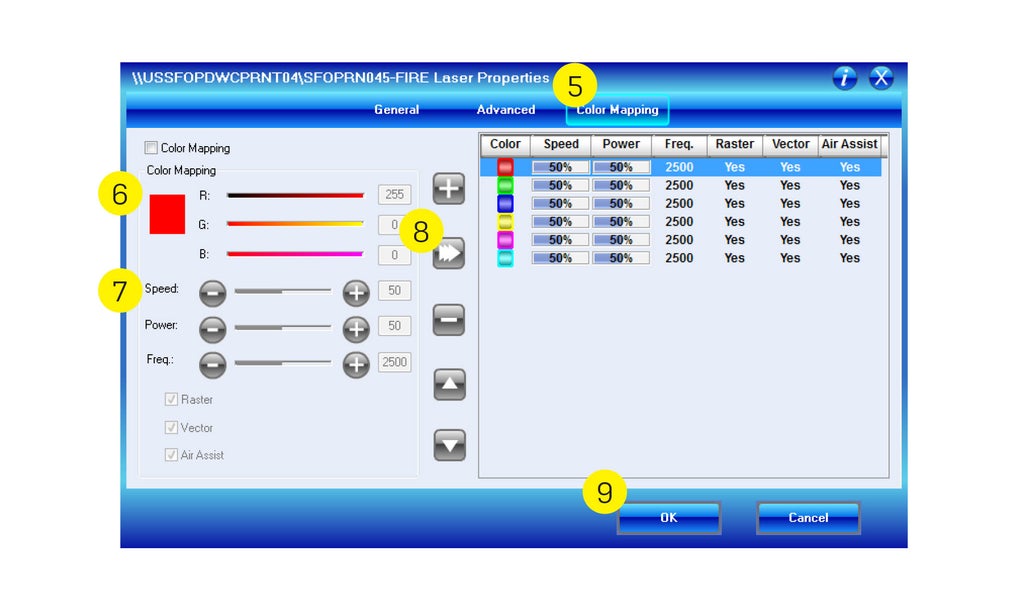
AutoCAD
AutoCAD uses color mapping to define different laser
options.
- Each line can be assigned a color in the drawing
software.
- This works in Illustrator and CorelDRAW also.
- In the laser software, each color is given different attributes (speed, power, vector, raster, etc).
- Apply a color to your geometry.
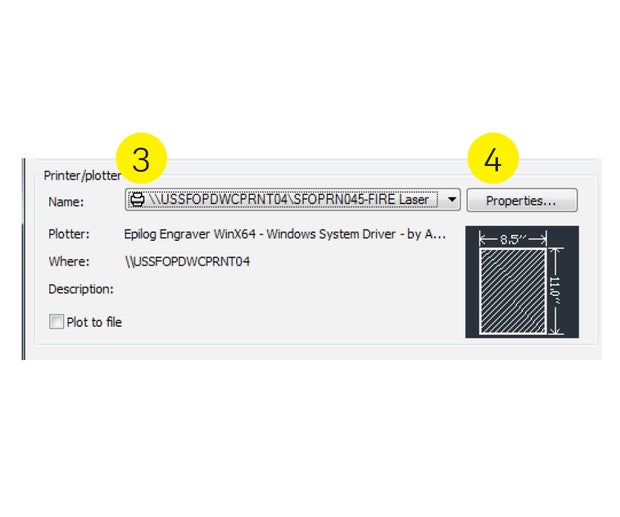
- Select Print from the File menu.
- Select the laser cutter you want to use.
- Earth, Water, Fire or Air.
- Click Properties, then Custom Properties.
- Click the Color Mapping tab.
- Change the color to match a color from your AutoCAD file.
- Adjust the setting that will be applied to all lines of that color.
- Click the arrow to save the settings for that color.
- Repeat for other colors if needed.
- Press Print to send to the machine.
Step 4: Set Home
Use any portion of your stock.
CHANGING THE USER HOME
If you want to work in a specific area of your stock, you can move the head of the laser and set a temporary home.

- Turn on the pointer.
- Press X/Y OFF.
- Press GO to confirm.
- Gently move the head & gantry until the pointer is indicating your desired start point.
- Press SET HOME.
- Press RESET to exit Set Home mode.
- To reset home to the original settings, turn the machine off and back on.
Step 5: Make an Air Pass
Make an air pass before cutting. An air pass follows the toolpath, with the cutting laser off.
- Turn on the pointer so you can see the path the laser will follow.
- Open the lid.
- Run the job.


