

Introduction: Simple Brass Whistle


This is a simple brass whistle I made from a solid piece of 3/4 in. brass rod on my wood lathe.
It can easily be made in an afternoon and is a great addition to any emergency pack or hiking backpack.
Step 1: Tools and Materials


Materials:
Tools:
- Lathe
- Nova Chuck
- Tailstock Chuck
- Step Drill
- 1/2 in. Drill Bit
- Flat File
- Triangle File
- Disc Sander
- Torch
- Sand Paper
- Buffing Compound
Step 2: How Does a Whistle Work

It's not necessary to understand how a whistle works in order to make one. However, understanding the physics behind a whistle will help you if you want to design your own whistle.
A whistle works by forcing air through a windway (B) over a fipple plug (A) which directs the high pressure air stream against the hard blade edge (C). This interaction of air being forced through the windway and the column of air inside the whistle creates a standing pressure wave that determines the the pitch of the whistle. If you make the volume of air in the whistle larger, you will get a lower tone. Make the volume smaller, and you will hear a higher tone.
By following this instructable you will learn how to create the windway, fipple plug, and blade edge to create your own whistle.
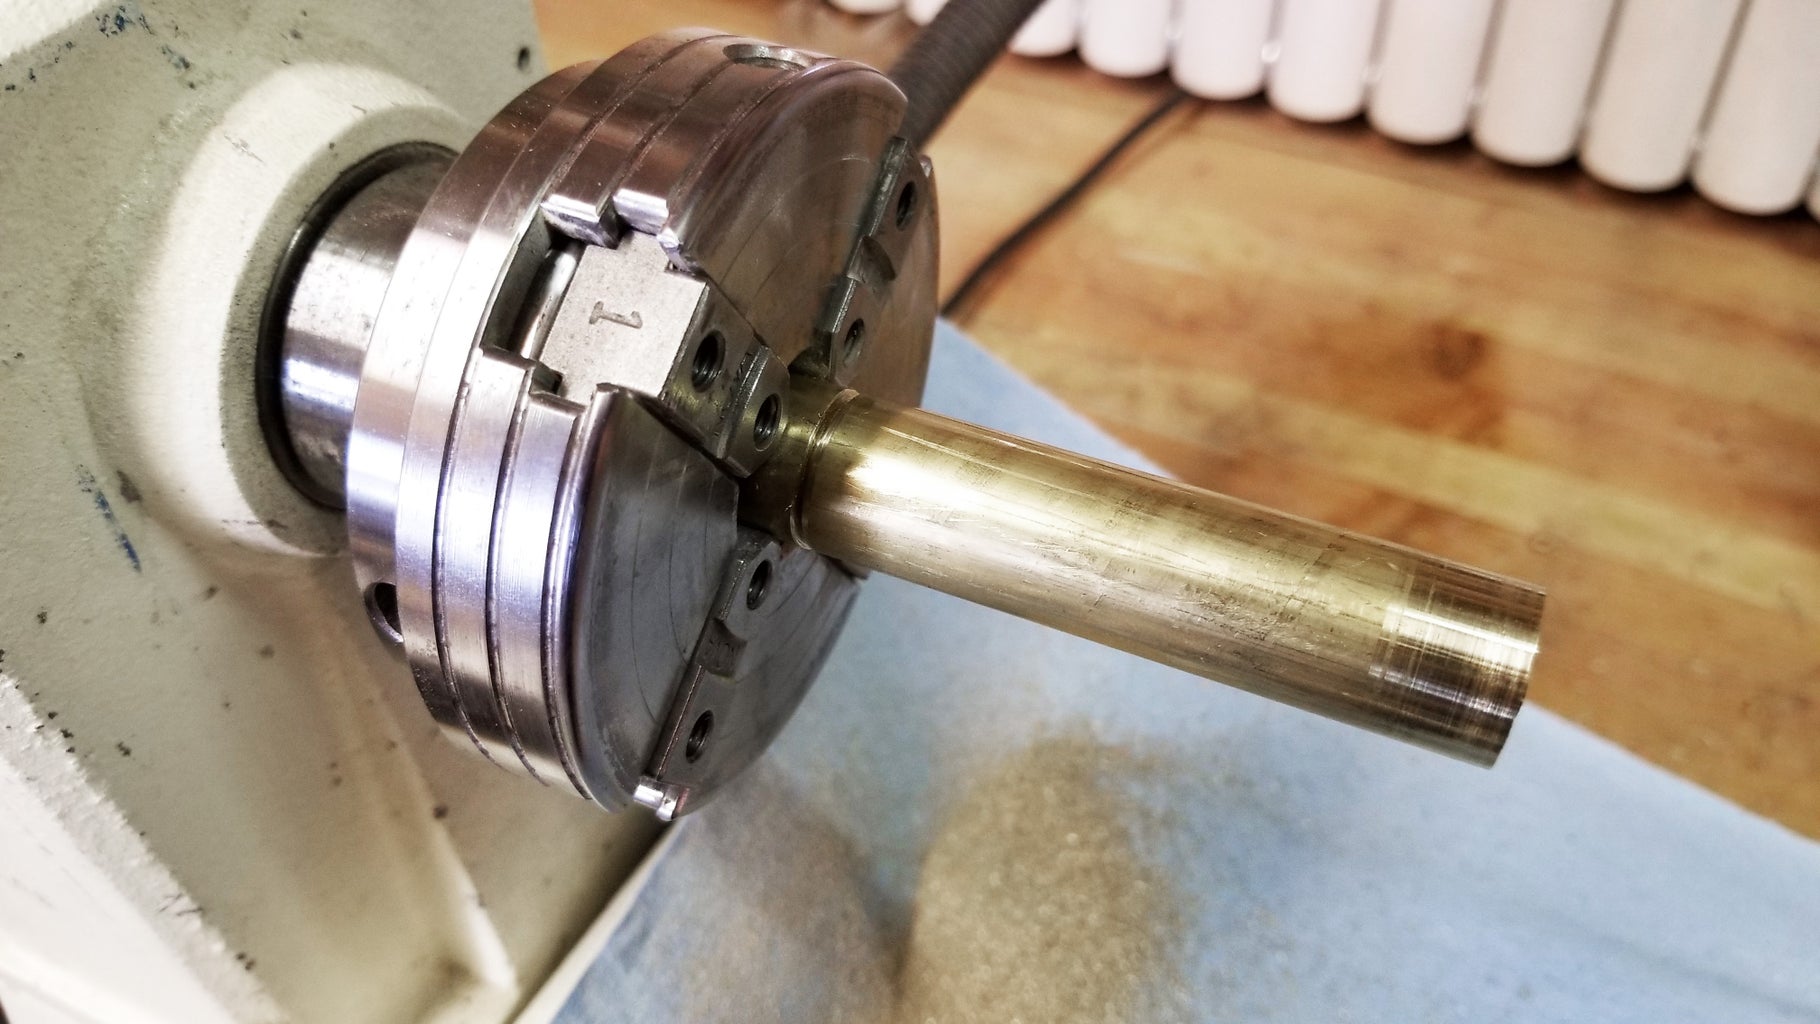
Step 3: Hollow Brass Rod


Since I am using my wood lathe to turn brass (something it was not designed to do) placing a shop towel down on the bed of the lathe will protect the motor and other moving parts from metal dust.
Mount a piece of 3/4 in. x 3 in, brass rod in the Nova Chuck. Using a short drill bit (a center drill would be best) start the hole in the center. Switch to a step drill to remove up to 1/2 in. in material. Once the 1/2 in. diameter hole has been reached, switch to a 1/2 in. spiral bit and drill 2 1/2 in. deep.
Step 4: Creating Fipple Plug


Mount a 1 1/2 in. - 2 in. length of the 3/4 in. brass rod in the Nova Chuck (if you have a solid piece of 1/2 in. stock you do not need to do this). Using your tool rest to help you stabilize the file (do not file your tool rest), turn down the stock until it's perfectly 1/2 in. in diameter. This is easily done by filing the stock in a tapering manner until it fits in the whistle body previously created then flattening it out at that size.
Step 5: Creating Fipple Plug

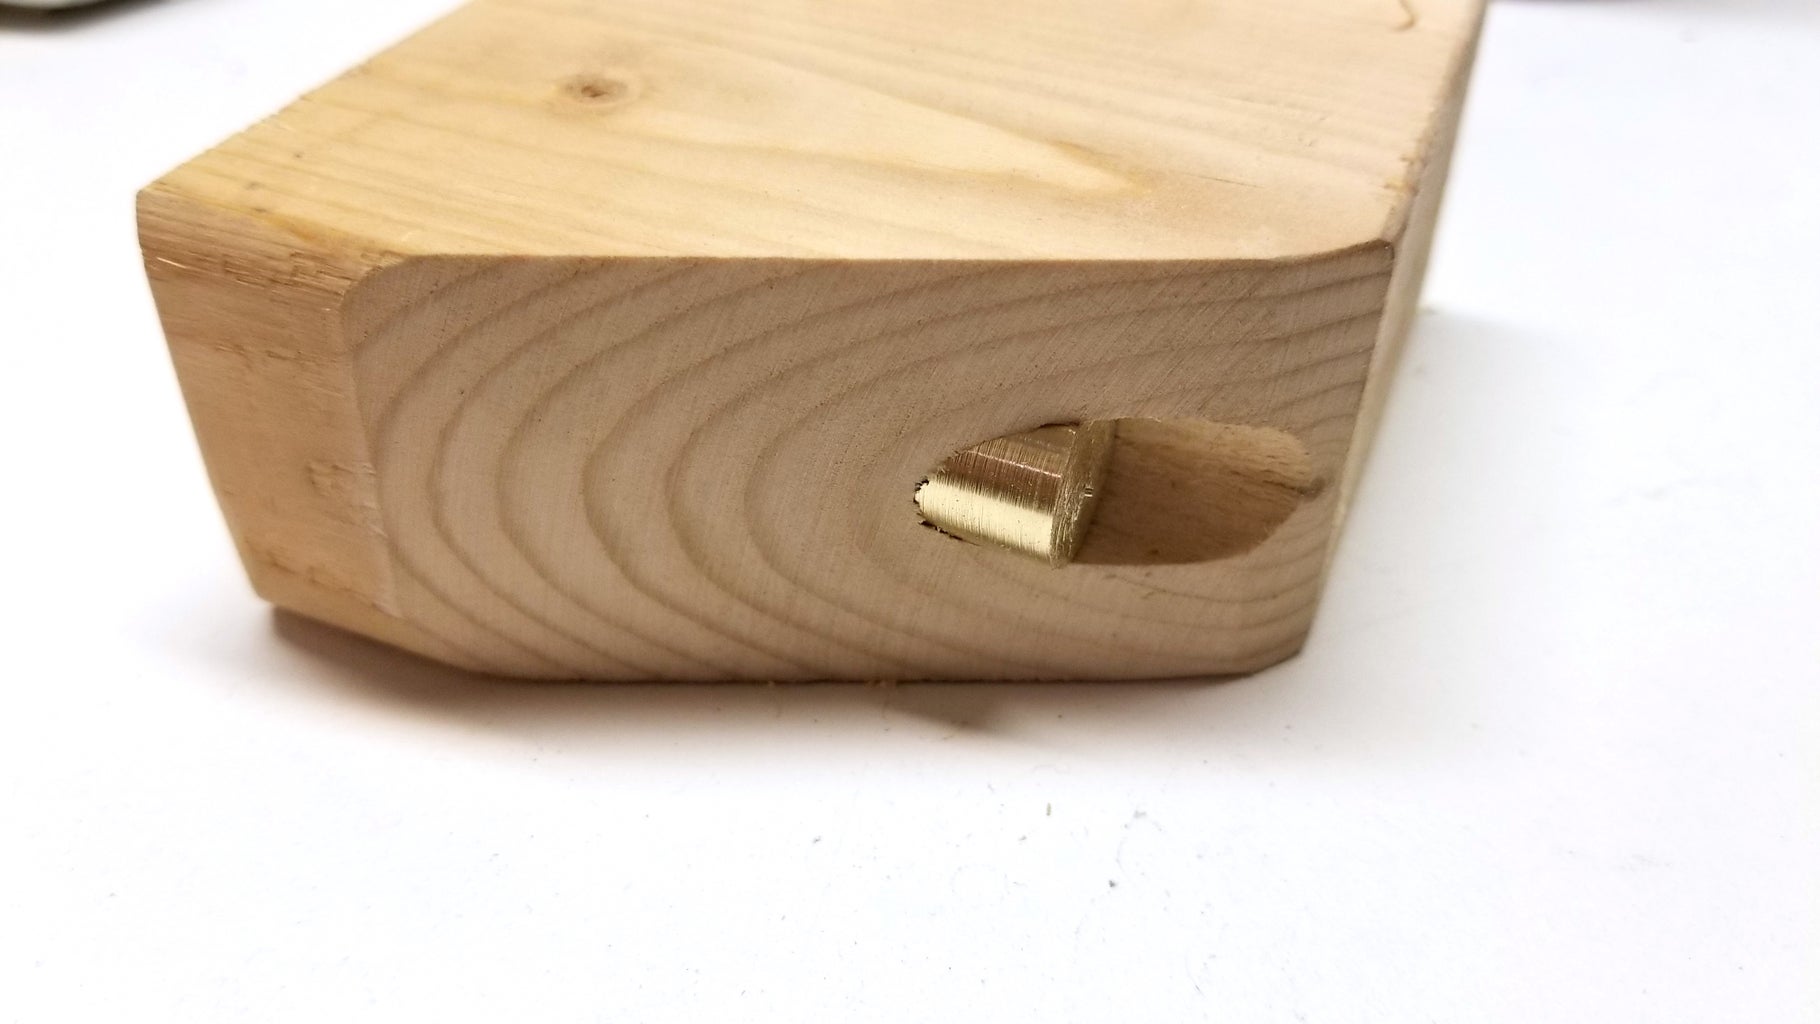


Drill a 1/2 in. hole in a piece of scrap wood. Cut away the wood around a 25 degree angle. Place the fipple plug in the hole and sand flat using a disc sander.
Step 6: Creating Fipple Plug Windway


Drill another 1/2 in. hole in a scrap piece of wood and cut away into that hole with a bandsaw. You want to remove approx. 1/16 in. to form the windway. Remove this using a disc sander as well.
Step 7: Create Vise Holder


Drill a 3/4 in. hole through a scrap piece of wood. Cut through the center of that hole with a bandsaw.
Step 8: Cut Window/Lip


Mark the length of the fipple block on the whistle body. Clamp the body in a vise and cut the window in the body using a triangle file. Be sure to keep one face of the file vertically to create the correct profile for the window. Cut until the bottom of the window is at the same level as the windway created with the top of the fipple block.
Step 9: Solder Fipple Block


Coat the fipple block in flux along the place a few small pieces of solder inside the whistle next to the fipple. Heat the whistle with a torch until solder flows freely into the joint. Be sure to completely solder around the fipple block and the whistle body. This was my first time soldering brass, not bad for my first time I think, but it could definitely be better.
Step 10: Sand and Polish Whistle


Grind the mouthpiece flat using a disc sander. Mount the whistle back in the lathe and sand and polish to your desired finish. I put the final touches on my whistle using my buffing wheel.

Participated in the
Metalworking Contest


