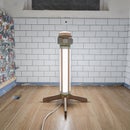
Introduction: Skatboard Wall Lamp
My brother has been getting quite crafty lately building all sorts of little projects from wood. Last week he came to me asking whether I could help him with a lamp idea he had seen on the internet. As a big brother, I was glad to help him out and also introduce him to the Instructables community!
What he had seen on Pinterest was a skateboard lamp with light bulbs instead of wheels. One can find quite a few similar lamp ideas there. We wanted to make something that looked like you could actually grab from the wall and ride. This meant that we could not use any bulky light sockets or regular light bulbs. I think our light turned out pretty nice and we even managed to give the "wheels" a really worn look with an ingenious technique.
Designing lamps is really cool as there are almost no boundaries. Pretty much anything could be turned into a lamp! The only crucial thing you have to know is wiring and that is not a hard thing to learn!
Let us show you how we turned this old skateboard into an awesome wall light!
Let´s go!
PS: If you find this ´ible worthy be sure to give it a vote in the Skateboard contest. We would be tremendously happy if you did! Thanks!
Step 1: Tools and Materials
For this project you will need:
- Old or cheap skateboard
- 4 light sockets. It is a great idea to use smaller sockets as they won't be so bulky and will fit the skateboard better. We used the Edison screw base (E14) sockets.
- 4 LED bulbs. Use LEDs because they consume much less energy and will not get so hot. Try to find light bulbs that have a similar shape to skateboard wheels.
- 4 quick wire connectors (with four slots). There are many different types of those. We used ones with clip-in.
- Electrical cord with a plug and a switch
- 2 meters of the same electrical cord
- Black spray paint
- Electrical wire ends (optional)
Tools:
- Glue gun
- Drill with a drillbit
- Pliers and a sharp knife or electrical strippers
- Hacksaw or an angle grinder with a metal blade
- Screwdriver and a small wrench
- Coarse sandpaper (not in the photo)
- A metal file (also not in the photo)
- Wire crimpers (optional)
Step 2: Disassemble
The first thing to do is to clean off any dirt that is on left on the skateboard from when it was used.
Then comes disassembly. The trucks can usually be removed with a screwdriver and a small wrench. The wheels should come off when unbolting the locknut as well. We, unfortunately, did not manage to unscrew the locknut and had to cut off the wheels with a hack saw
Step 3: Cut the Trucks
The next step is to cut the trucks to make room for the light sockets.
We started cutting it with a hack saw but as the blade was really dull we switched to angle grinder. If you also plan on using an angle grinder be sure to wear safety glasses, hearing protection and have the blade guard attached! Whether you use a hacksaw or an angle grinder it is also a really good idea to screw the truck down so it can not move when being cut. We screwed ours to a piece of wood that got clamped to the workbench.
The edges might be quite rough after cutting so be sure to use a metal file to remove any burr or sharp edges.
Step 4: Prepare the Wire Ends
Before connecting the wires to the light sockets and quick connectors one has to prepare the wire ends. To do this remove both outer and inner insulation from the wire. Wire strippers (a tool that does not cost too much) makes a quick work of it. If you do not have one then utility knife and a little patience will work too.
After you have exposed the wire you can also crimp on some wire ends but it is not a must. Alternatively, you could also solder the ends. You could also just leave it as is but you will probably find it difficult to push this wire into the clip-in connector.
Step 5: Glue the Sockets to Trucks
Connect the wires to the sockets bearing in mind that the hot wire has to be the bottom contact and neutral wire has to be the side contact. Glue two sockets together as straight as possible. Try to get glue only where the gap is to get a nice look. When glueing the sockets to the truck add glue only to parts that will not be visible. Make sure the sockets are firmly in place but do not go nuts with the glue - After all it will be a lamp, not a ridable skateboard!
Step 6: Paint and Assembly
When both trucks are done spray them black with spray paint. Let them dry and reassemble the skateboard.
Skateboard trucks usually have 6 holes for some reason. As only four holes are actually used the other two are perfect for bringing the wire to the other side of the skateboard. You just have to drill a hole through the wooden deck. It is quite easy to do when the truck is already installed. You might have to drill at an angle to avoid scratching the light sockets.
Step 7: Wiring and Fnal Touch
Connect all the wires using the quick connectors. All the hot wires (brown) have to be connected and all the neutral wires (blue) have to be connected. Do not put brown and blue wires in the same connector or you will create a short circuit and blow the fuse! Glue the connectors and the wires to the deck and try out the lights.
The LED bulbs that we had were a bit too bright so we came up with a method to "dim" them. It involved spraying the bulbs black. But of course, very little light will shine through like that. To remove some of the paint we used a coarse (40 grit) sandpaper. By slightly sanding the bulbs we removed some of the paint and could that way regulate how bright the lights were. As a big bonus, it also gave the "wheels" a really worn look which was ideal for our project.
Step 8: The End
The skateboard was attached to a wall using a single drywall screw on the top.
We hope you got inspired or learned something new from this project.
Let us know if you have any questions about this light. We are more than happy to answer all your questions!
All the best,
Andu and Erik
PS: If you find this ´ible worthy be sure to give it a vote in the Skateboard contest. We would be tremendously happy if you did! Thanks

Runner Up in the
Skateboard Contest


