

Introduction: Small Side Table


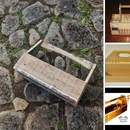


This small side table is designed to be a beginner project that can be managed by a high school student.
With minor changes to the shape or size of parts, this project can be easily personalized while still being successful.
based on a design from the book "Handmade Furniture: 21 Classic Woodworking Projects to Build for Your Home by RAFAEL NATHAN"

Supplies
Cutting list
Table
- legs 40 x 40 x 500 x 4
- side rails 20 x 140 x 265 x 2
- back rail 20 x 140 x 330
- front rails 20 x 40 x 330 x 2
- table top material to make 450 x 365
- draw support 20 x 40 x 285 x 2
- draw guides 20 x 20 x 270 x 2
Drawer
- sides 20 x 90 x 270 x 2
- back & front 20 x 80 x 306 x 2
- dress front 20 x 366 x 120
- Base MDF 305 x 235
glue, brackets to attach top to frame, drawer handle
Step 1: Cut Parts and Mark Out Joinery

Number all the matching leg to rail joints on the top
Mark out your joinery
- biscuits joints for side and back rails and dowel joints for front rails.
In some of the pictures, you will see dovetail joinery for the front rails, use dowel joints unless you want the challenge.
Step 2: Biscuit Joinery


Cut biscuit joints
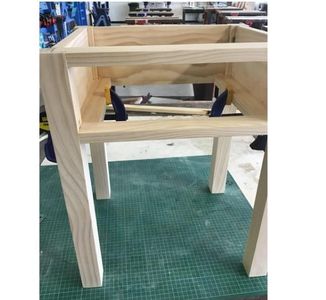
Step 3: Assembly


Assemble the two sides, glue, square, clamp, and leave to dry
Assemble the whole frame by gluing the front and back rails in place, glue, square, clamp, and leave to dry
Note: I know you will want to glue it all together all at once, avoid this action, you will need to concentrate on getting the frame square and neat. If you try and put it all together at once and become rushed for time, this ensures a ticket to wonky town. Take your time, and enjoy your work.
Step 4: Drawer Runners and Supports


- Glue and clamp drawer supports in place
- Glue and clamp draw guides in place
Step 5: Make Table Top

Glue and clamp your tabletop material together
Cut to size
Sand
Complete any router edge treatments
Step 6: Drawer

- Router out the housing trenches for drawer front and back
- Glue and clamp parts together ensuring the back is above the trench
- Check the drawer is square
- Cut the base material to fit, the approx size given.
- Cut the drawer front and screw it in place from inside the drawer
- Attach the drawer handle


