

Introduction: Starting and Ending Floss


Everyone has a favorite method for securing their floss. I personally like to use knots, just because it's the way I was taught. I know it's a method that works, so I stick to it.
There are other methods, though!
The first way to avoid knots is done by weaving in the ends of your floss. The second way to avoid a knot is to use a "waste" knot, which you'll cut away when you're done with that piece of floss. Any time you use a waste knot, you'll need to finish the end of your floss by weaving it in or knotting.
Step 1: Starting and Ending Using Knots

As I said in the introduction, this is definitely my favorite way!
There are some downsides, though:
- Knots are big. If you put a backing on a really knotty embroidery, the knots can make the front of the embroidery push out a bit.
- If you don't tie the knots tightly, you may find that they come unknotted later.
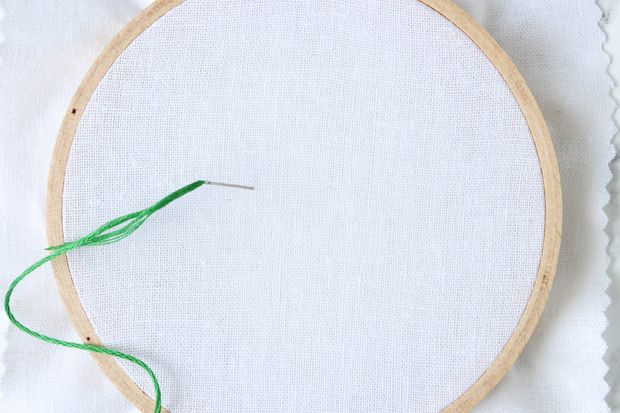
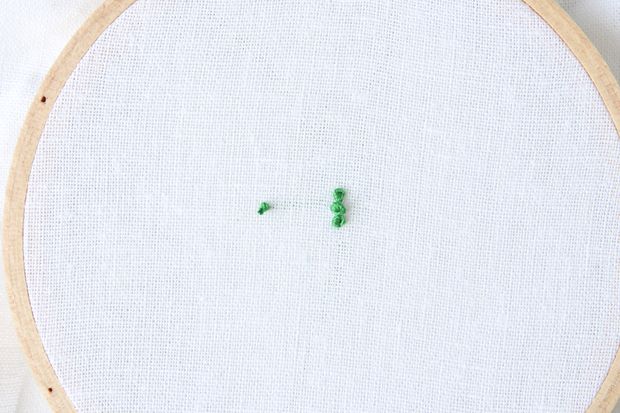
To begin with a knot simply knot the end of the floss! If I'm using 2 strands, I'll often knot twice just so it's less likely to pull through the fabric.
Ending with a knot when embroidering is incredibly easy since you have multiple strands to tie together.
Tie a standard knot at the end of your floss. You don't need anything fancy here.
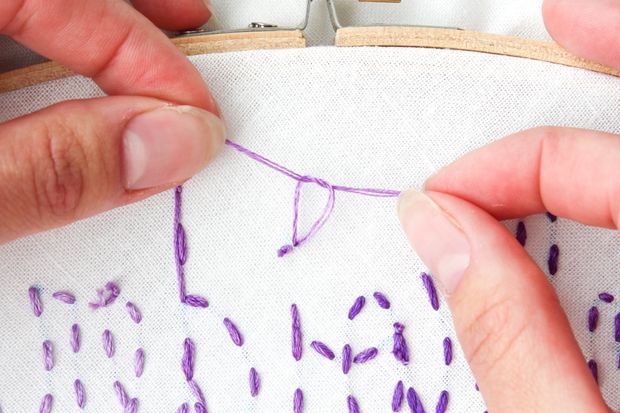

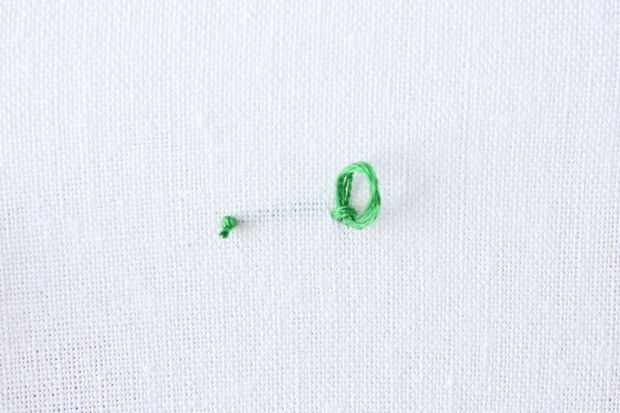
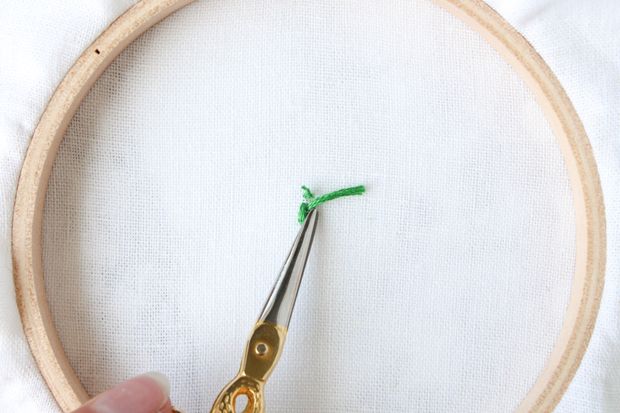
To tie off a piece of floss, simply divide the strands in half and tie them together.


Cut the strands close to the knot and you're done!
Step 2: Starting by Using Waste Knots on Lines of Stitching

A waste knot is essentially a knot that will sit on the top of your fabric while you stitch. You'll cut it away once you secure your floss with a few stitches.
This is the most secure method of starting your floss without a knot, and also the least visible way.
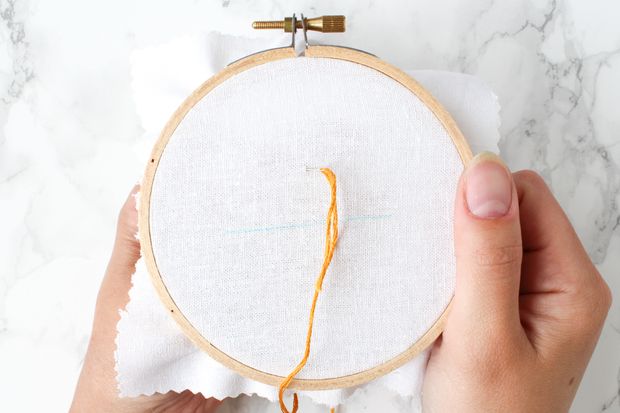

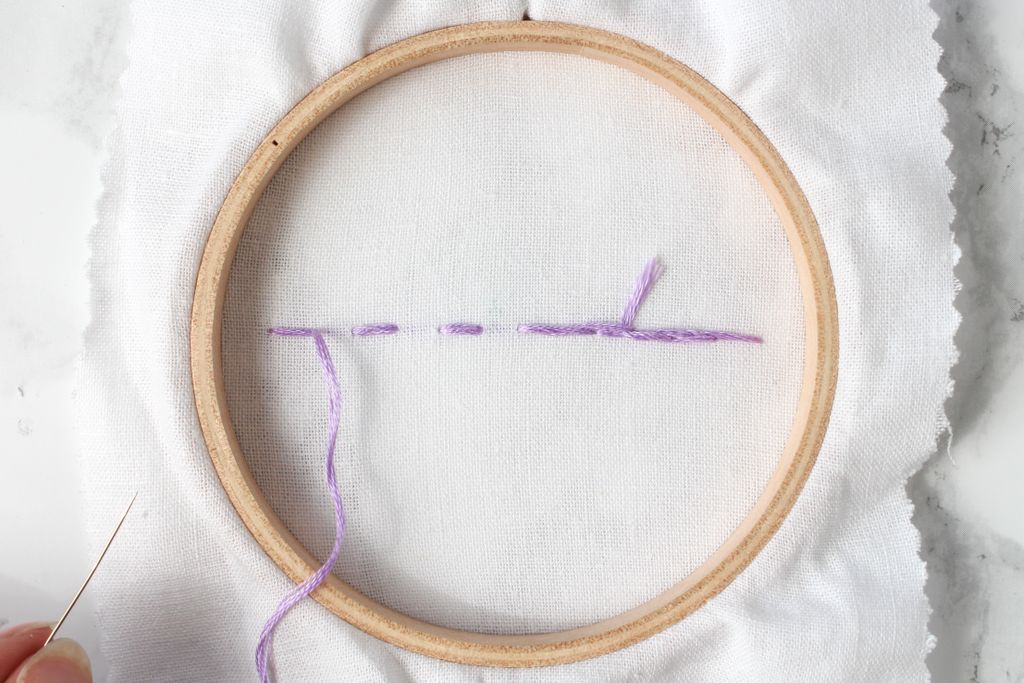
First, you want to put the needle through the fabric from front to back about an inch away from where you plan to start. You can place the knot on your stitching line or to the side - I prefer to put it to the side so I can keep stitching and worry about it at the end. Pull the floss through until the knot sits against the fabric.


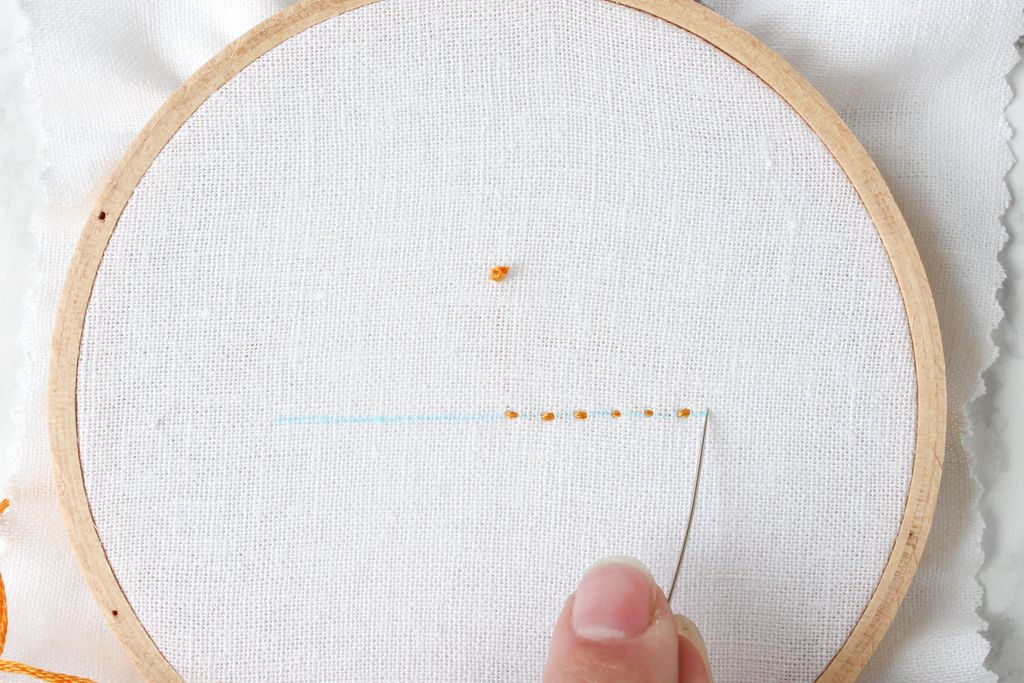
Then, bring the needle back to the front of the fabric at least an inch away from the end of the stitching line. Make tiny running stitches along the stitch line to where you want to start stitching. These stitches should be on your drawn line and only go over 1-2 threads of your fabric.

This is what the back of the embroidery should look like.
Now we're going to cover the tiny stitches with the actual stitching. Where I'm pointing with the needle is where I'll start stitching.

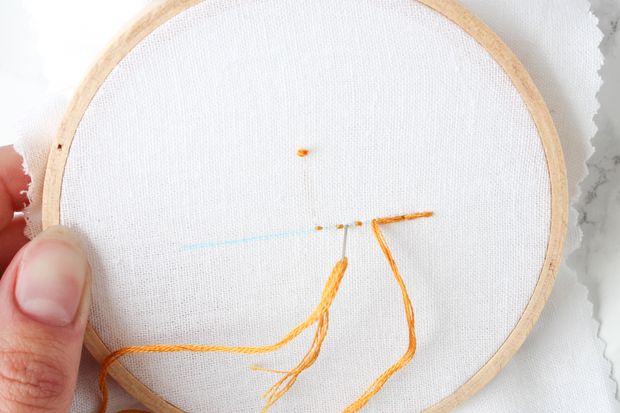
Stitch back towards the knot using whatever stitch you need, being careful to cover the tiny stitches you took to the starting point.


Once the tiny stitches we took in the beginning are covered with our actual stitches, we can cut the knot away. (Though I admit I prefer to keep the knot there until I'm done with that bit of floss or that area of the embroidery.)


Flip the hoop over and you'll see the tail that's left. Cut it off close to the stitching and you're set!
To finish the piece of floss you're working on, you can either knot it or weave in the ends. Here, I've knotted it.
Step 3: Starting by Using Waste Knots on French Knots and Seed Stitches


Put the needle through the fabric, front to back, about a 1/2 inch away from where you want to make the French knot. Pull it tight so the knot is sitting on the top of the fabric.


Bring the needle up right where you want the French knot or seed stitch to lay and make a super tiny stitch that goes over just 1 or 2 threads. (With my linen, I always do 2 threads - otherwise it can break under the pressure.)
Then, come up on one side of the original stitch and make a French knot over it. Now you can keep on stitching! I added a couple more French knots.

Once you're done stitching, cut the knot away and flip the hoop over so you can cut away the floss tail on the back.
And there you go! A clean start to tiny stitches.
End your stitching with a knot or by weaving in the ends. I always tie a knot.
Step 4: Starting and Finishing Floss by Weaving in the Ends

This method can be a little tedious, as it causes you to flip the hoop over during every stitch as you weave in the starting floss. You can use any line stitch (running, backstitch, stem, chain, split, etc.) you want in conjunction with this method, but it's not great for seed stitches or French knots.
All in all, I'm not convinced this method is very strong unless you're using lots of tiny stitches - I much prefer knotting or waste knots for securing my floss.
In the walkthrough below, I'll only be showing the back of the hoop. That's the important bit! The front will look completely normal - you'll just be weaving the floss ends through the stitches on the back of the fabric.
Starting by Weaving

Thread a needle with your floss but do not knot the end.
Push the needle through the fabric at the start of your line of stitching from back to front as normal. Pull the thread through the fabric until only a couple inches is left on the back.
Hold this thread end into place and take your first stitch.


With the next stitch, a loop should form on the back of the embroidery. Flip your embroidery over and weave the tail end under the loop of floss and pull it tightly. The tail end will flatten down against the fabric.

Every time a stitch forms on the back, weave the tail end under it until there's not much left. Continue stitching until you finish that piece of floss, and then come back and trim the end.

Here's a photo of how little floss is left after weaving the end into the stitches.
Ending by Weaving
Stitch as normal until you have (at minimum) 2-3 inches of floss left. Bring the needle and floss to the back of the embroidery.

Use the needle to weave your floss in and out of the stitches on the backside.

Trim the tail end(s) and you're done!

Here's a photo of the finished weaved ends. As you can see, it can get pretty bulky if you're using 6 strands of floss.


