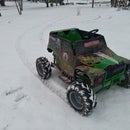
Introduction: Steering Radius Upgrade on 24v Grave Digger Power Wheels
One of the common complaints on the new 24v Grave Digger is that it comes with a very wide turning radius.
Fortunately, this is a very simple and cheap fix. There is a plastic limiter on the steering column, so all we really have to do is remove it and widen the slot that the limiting screw sits in.
All you'll need is a Dremel tool and a few basic screwdrivers/wrenches.
First picture on this step is the after, second picture is the before. Not sure if the pictures really do it justice, but just a few more degrees of turning radius make a big difference in how often the kiddos have to put it in reverse to make a turn.
Step 1: Remove the Limiter
On the underside of the ride, follow the steering column up to where it meets the body. You'll see the limiter. Mine was bright red, but I've heard they also made them in black. Simply unscrew the two screws holding it to the body and then pull the bolt out of the center. It's in an awkward position, so I held the screw head with vise grips and turned the nut with a 7mm socket.
After that, it slid right down the shaft.
Step 2: Pull Out the Steering Column
After the limiter is free from the body and steering column, you can pull the steering wheel out a few inches. Disconnect the wire clips and unscrew the phillips bolt. Then you can pull the wheel off the column. Then the column will slide out the underside.
Step 3: Widen the Slot
Using your dremel tool, carefully widen the slot on the limiter. I made mine about 1/8" longer on each end. Be careful not to go too far, or it will no longer limit the turning and your kiddo will grind the wheels against the front bumper. You can take a it off, then test it, then take more if necessary. It's not as easy to add more back on.
Step 4: Modify Bump Stops on Steering Knuckles
If you look under the rubber boots on the front steering knuckles, you'll see that there are little metal pegs that they're using as bump stops to keep the wheels from turning too far.
I found the easiest method of getting around them is to simply mount the cross member bar underneath instead of on top. That way it doesn't make contact with the bump stop. Simply undo the bolt, flip the top bar to the bottom and then bolt it back together.
Another option (if you have access do a disc grinder), is to grind notches into the steering knuckle where the bump stop makes contact. Grinding notches will allow the wheels to turn further before the bump stop stops the wheels. This method is stronger in the long run, but I haven't had any issues with breaking the retaining clip on ours. Others have reported breaking the clip and needing to use this method.
First picture is stock with the bump stock making contact, second picture is with the crossmember mounted underneath the knuckle to avoid contact with the bump stop.
Step 5: Go Play!
Now your kiddos will be able to turn a lot tighter. Should've come this way from the factory, but at least we can fix it ourselves for free.
If you've enjoyed this mod and are looking for others, check out my other instructables.
I also offer a soft spring upgrade kit that will make the suspension bounce a lot more. Email me at GraveDiggerUpgrades@gmail.com for more info.


