

Introduction: The Decorative Light of Four Elements


I designed and created this project specifically for The Elements Speed Challenge. This is the visual incorporation of all elements in a unique decorative light design.
If you have a 3D printer and know the basics of electronics I bet you can easily make one yourself. You won't need any screws because the back panel just clips perfectly onto the frame.
There are also small slots to guide where to glue 12V RGB LED strips, it makes the process much easier!
The light consumes ~5W and you can use a dimming switch. You can download STL files with different thicknesses of the outer wall.
Provided Amazon links are affiliates.
Main Tools:
- 3D printer https://amzn.to/3syckJk
- Soldering kit https://amzn.to/2X0eCVq
- Multimeter https://amzn.to/3bLuEIx
- Wire strippers https://amzn.to/2ZR3KJp
- Cutting pliers https://amzn.to/3qTLNWC
- Hot glue gun https://amzn.to/3B0FtRI
Main Components & Materials:
- LED RGB strip 12V https://amzn.to/3B0rco8
- Aluminum tape (48mm/1.9inch width) https://amzn.to/382Y1UZ
- 12V 1A Power Adapter https://amzn.to/3sxCX2k
- 5.5mm x 2.1mm female plug https://amzn.to/2W8Gfgs
- Switch+Dimmer https://amzn.to/3kfKAqD
Other Things:
Wires, heat-shrink tubes, a 500-ohm resistor, some sort of diffusion material
Attachments


Step 1: How to Make Custom Designs


Let's start with the design first. If you know 3D modeling basics you can modify the light to have any digital stencil you like. One important thing is that ideally all stencil points would be connected. It will make 3D printing much easier.
To import any stencil/drawing I used Convertio. You upload an image and it converts it into an SVG or DXF file. Then you can import it into 3D modeling software and make adjustments you want.
I used this image (by Alda-Rana from Deviantart) as all points connect perfectly into one shape. I had to do a little thicker lines as it will be easier to print.
But if you don't want any custom design, you can just print this one. It looks modern and really cool!
Step 2: 3D Printing


So if you decided to make an identical light, start printing right away. It will take a while and meanwhile you can work on other things for this project.
There are no special requirements for the print, but I printed at 0.2mm layer height for a better fit for the back cover and less visible lines.
The first layer here is INSANELY important. Make sure it prints perfectly as it will be the face of the light. You don't want any errors here.
The outside wall will be visible too. In my case, as I printed the version with walls of 2mm thick you can still see where those connect. So if you want to avoid that print STL version with 3mm or 4mm outer walls.
If you have a build plate area of 210x210mm then you will be able to fit it. You will need to angle it. This means that the sides will be right at the edges of the build plate. And those areas usually are lower in temperature. So if you never printed something this big it can be a good idea to increase the build plate temperature to prevent sides of the print to detach from the base.
I printed it with PETG filament. I bet you could use PLA, you will find notes for that at Step 4.
Step 3: Backlight and Light Diffusion


While the main part is 3D printing, we can work on electronics.
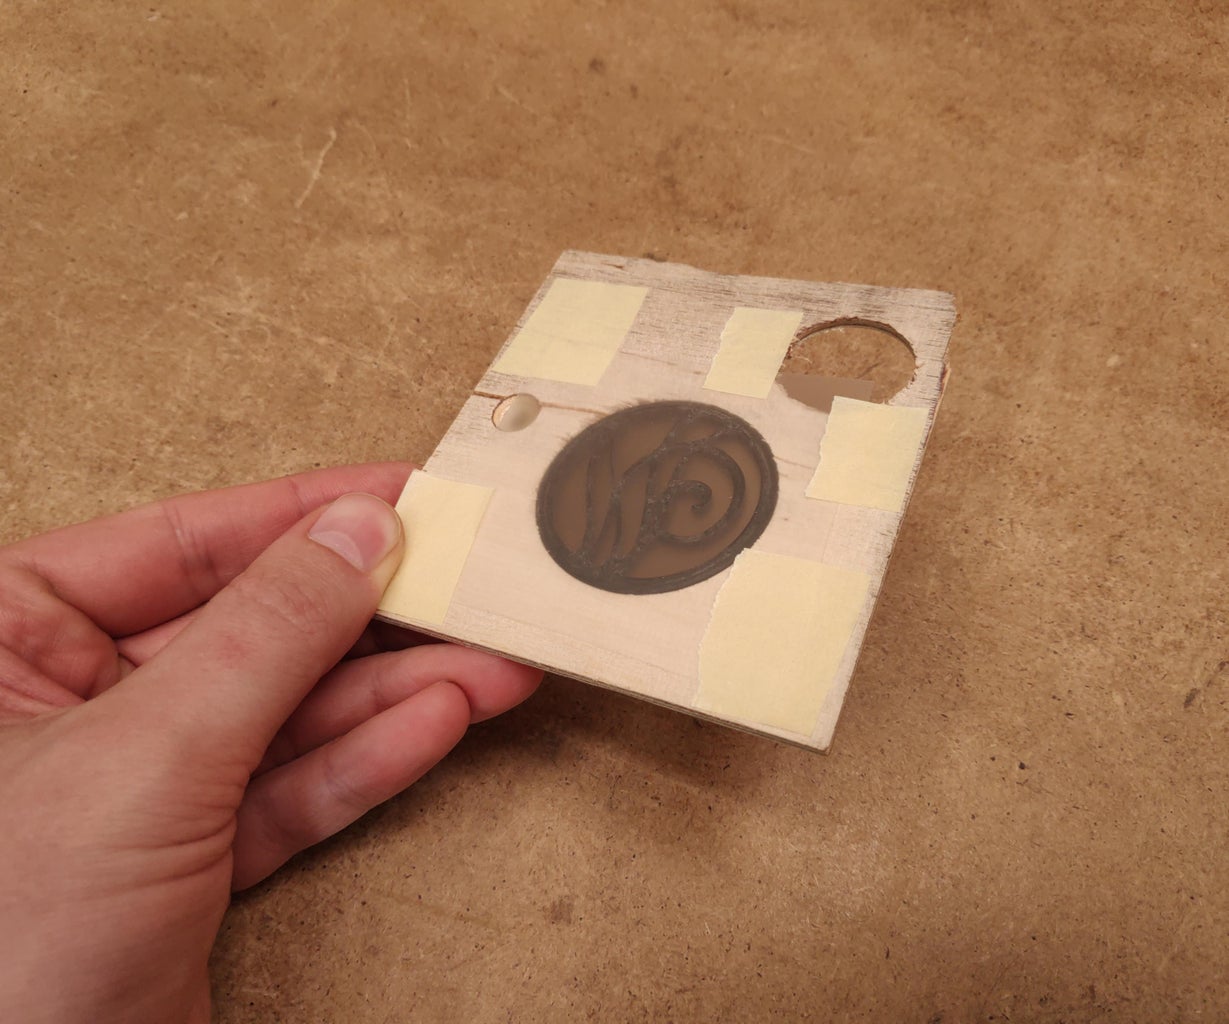
The first step here is to figure out how much diffusion we need to add. I will use generic 12V RGB LED strips and some basic diffusion sheets. Like you see in the photos you don't really want to glue them that light will shine directly to the diffusion sheet. It will make bad uniformity, especially when looking at an angle.
Instead, we need to bend the strip to a rectangle shape with all sides covered in aluminum tape. And remember that cameras exaggerate the unevenness. In person, the result looks absolutely perfect!
You should test yourself with materials you have how much and what to add to get the perfect diffusion at 30mm or slightly above 1 inch. You can use frosted acrylic, paper, or anything you want, just make sure the light diffuses evenly.
The folded strip will fit perfectly around the designed spot. I made some test prints just to make sure.
Step 4: 2in1


This step is called 2in1 because we need to add aluminum tape which will give a light reflection and better heat dissipation for LEDs.
We need to cut 16 pieces of 52x46mm from aluminum tape for each inside wall. My suggestion is to make a basic template, mark, and cut, works great! (If you are using PLA I suggest using two layers or more of the tape to help dissipate heat better. At 25C room temperature after 1 hour inside hottest spot gets to ~52C and outside ~40C).
Don't peel the tape all the way, first glue a small portion and only then peel. You can use a cotton swab (q-tip) to glue edges and it also cleans the permanent marker marks, which is nice.
Continue gluing the next piece where the previous ended and you will get a very uniform coverage without any gaps.
And don't forget to add some tape to the back cover too when it finishes printing. :)
Step 5: Adding Diffusion


Now we can cut some diffusion sheet pieces and glue them with super glue. The more diffusion you add the more uniform lighting will be. In this case, it is way better to have a dimmer light than brighter and with uneven lighting.
Step 6: Preparing LEDs


Now let's start cutting RGB strips to length. You will need to make four 20cm strips. Make sure to cut right in the middle of the contacts and then fold each 5cm LED section. Don’t overdo it, because when the protective peel is in place the strip doesn’t want to bend.
To get basic custom colors like:
- RED we just need to solder positive wire to 12V and negative to Red contact.
- To get CYAN we need to solder: 12V to positive, Green, and Blue to negative.
- And for WHITE we need to solder: 12V to positive, Red, Green, and Blue to negative.
- To get that BROWN'ish sand-looking color we need to solder: 12V to positive, Red, and Green to negative. But before you connect the Green, we need to add a 500-ohm resistor between Green contact and negative wire to reduce the intensity of the green color.
If you want something different you will need to do some testing ideally using a variable resistor how much resistance to add to find the color you want. Or you can just use green color on the Earth element, that works too. :)
Step 7: Final Touches


Before gluing test if all LEDs light up properly, are there enough wire length, and then cut off ends of the strips where contacts are. It will be easier to glue them in.
Next, proceed with gluing all the strips in place. Then hot-glue the wires and finish the wiring. Make sure to add enough glue that the wires would stay firmly in place. Use a heat-shrink tube to insulate wires.
As these are 12V LED strips you can use a very common 5.5x2.1 female plug. Just don't forget first to push the wire through the hole first and then solder the plug. Haha!
Step 8: Switch + Brightness Control


And the project is complete! To power it - you will need a 12V 1A power adapter. You can also add a switch with a dimming function, it works great!
I hope you enjoyed the project. 3D printing definitely gives limitless things you can design and make. And this one, I really like it. It looks unique and is very straightforward to make. :)
You can follow me:
- YouTube: https://www.youtube.com/diyperspective
- Instagram: https://www.instagram.com/diyperspective
You can support my work:

Second Prize in the
The Elements Speed Challenge


