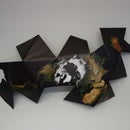
Introduction: Tree Monster
This is a super easy project that will definitely turn some heads in front of your house: I've been enjoying watching people's reactions (triple takes off their motorcycles). I was inspired by some examples of cartoon eyes in trees, and thought that I could give my creation a bit more personality with teeth for Halloween. The teeth were constructed from political campaign posters (coroplast), and I expect them to be reusable for a decade or more. Elections are a terribly wasteful enterprise, so why not do a little up-cycling and entertain your neighbors in the process.
You will need the following items for this project:
- 2 beach balls: white if you can get them, balloons could also work, but there is more risk they will pop or deflate with time (4$)
- Some campaign posters; make sure the election is over and you are not breaking any laws in your area (0$)
- Duct tape, packing tape
- Bendable slats or tubing: I had some slats used to fill in chain link fence.
- Giant balloon from the dollar store (1.25$)
- Leftover paint (white, black, blue)
- Utility knife, straight edge and paint brushes
Step 1: Paint Your Eyeballs
If you can find a large sphere that is already white, then please go for it. I grabbed two large beach balls from a dollar store, with a plan to paint them. We used some white primer paint we had left over and painted them. This is not ideal, as it has been flaking in a couple spots, but it should hold for the Halloween season (2 weeks and still good). We also had some blue paint left over from another project, so we used this for the iris. My brother is a natural artist, so he had no problem making a near perfect circle. For the black pupil, we only had spray-paint available, so we cut out a circle from a card paper and used it as a stencil. The red paint was added at the end with a small paint brush to add a little more spook and personality.
Step 2: Teeth
I made a point to collect campaign posters last time elections were held in my province. They've come in very handy for a few projects already.
SAFETY WARNING: make sure to have a fresh blade on your utility knife and wear gloves while cutting the coroplast. Also be mindful of body parts in the path of the knife: knee, fingers kids ect.
I ended up cutting the coroplast into 2 foot wide strips and cutting a zigzag pattern, leaving 6 inches width between teeth. Make sure to plan out your cuts, to ensure that they will match up to the next set of teeth (start and end of cuts terminate at the same height).
I had some slats used to fill in chain link fence, and I used these to stiffen the teeth and provide a more natural bend. You could use thin bamboo, or plastic tubing, or other material that will bend just enough. I then duct taped the slats across both sets of teeth, making sure that the ends were far from the seams between teeth. You can also overlap them to make sure the coroplast does not kink (I got one of those...).
Even with two strips of duct tape, I wasn't convinced this would be enough to hold the teeth sections together, so I made small holes and criss crossed some zip-ties across the slats at each seam.
Step 3: Installation
Your tree and ladder will dictate your installation method. I only have a small tree on display in front of my house, so I elected to lay the bottom teeth on the ground. These are kept in place with some thin wood stakes. The top teeth, eyes and nose are held in the tree with strips of packing tape.
The result is better than expected, and we keep seeing people slowing down in front of our yard to catch a glimpse of the strange apparition. Make sure to send me a picture if you build your own tree monster, there are several different arrangements you can make depending on the size and geometry of your tree and eyes.

Second Prize in the
Halloween Decor Contest 2015

Participated in the
Epilog Contest VII


