

Introduction: Vivarium for a Reptile


This ´ible is all about how I built a massive enclosure for a Green Iguana named Rango. The vivarium is 2.4 m (7.8 ft) tall, 1.9 m (6.2 ft) wide and 0.8 m (2.6 ft) deep giving the inhabitant more than 2.4 m3 (85 ft3) of living space!
Last year a relative of mine became a pet Iguana owner. The family quickly realized that the enclosure they had planned on using was becoming way too small for the animal as he would eventually grow up to 1.5m (5ft) long. This is when I was called in to build a really large vivarium.
The build process was really similar to building a bathroom - framing, plasterboard, waterproofing, tiling, etc. I have done a few bathrooms in the past but no way would I consider myself to be a professional. If you know a better way of doing things please let me know as well. The thing cost the owner around 500€ in materials (In Estonia, end of 2020). Workwise I spent around 50 hours on it plus 25-something hours that a friend of mine helped me.
Rango has now lived in his new enclosure for more than half a year and he seems pretty happy. So if you have a reptile who you want to make happy as well follow me along and I will show you how to build an epic vivarium!
Building, documenting, editing, and writing up this project was a ton of work. I would really your feedback and thoughts! Thanks
I kindly ask you to watch the build video playlist as well!
Please not that I built the enclosure following owners specification. I personally do not know a single thing about keeping a pet iguana.
Step 1: Things Needed


As I mentioned earlier building an enclosure for a reptile is pretty similar to building a bathroom. Mainly that it has to be waterproof and moisture resistant.
I think that the only mandatory power tool is a cordless drill. Everything else could be done with hand tools. For this build I used:
- Cordless drill
- Chop saw
- Impact driver
- Marking and carpentry tools
- Mudding tools
- Painting tools
- Tiling tools
I am not going to go into too many details in every step as it would make the article tremendously long and I am probably not competent enough to teach it anyway. Internet on the other hand has tons of resources and endless knowledge - please just steer right past them 5-minute craft videos!
Material-wise I am not going to give out the exact amount I used since I can´t really remember it and it is highly unlikely that you will build a vivarium measuring the same size. For the build I used:
- 75x50 (3X2) lumber
- 50x50 (2x2) lumber
- Moisture resistant plasterboard
- Two glass shower doors
- Wood and drywall screws
- Mud and joint tape
- Water barrier primer, mastic, and reinforcement tape
- Tiles
- Electrical components (and ventilation)
- Interior design elements (a log, wire mesh, baskets, seashells, etc.)
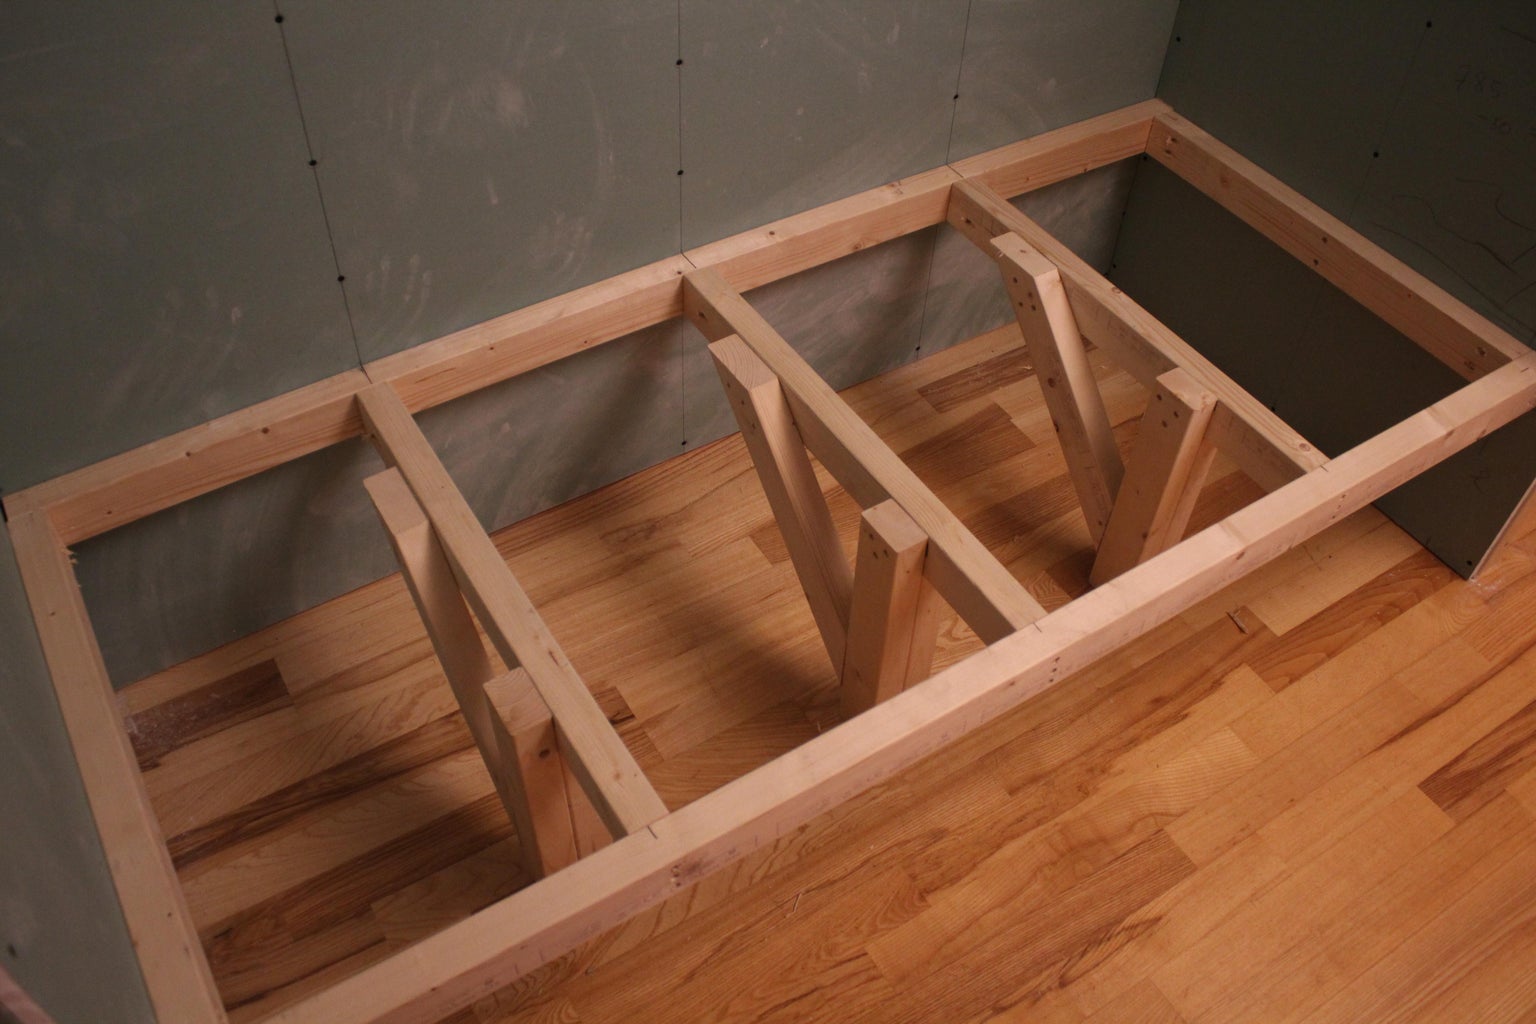
Step 2: The Frame


After cleaning out the nook where the vivarium would eventually be we started building the frame. Since it would be so big and not fit through the door we ended up building the "roof" frame outside and added the sides inside the house. 50x75 (2x3) timber was mainly used for that. As you can see the design is quite simple. Then we just continued adding wood for attaching the plasterboard. We did not bother adding any diagonal bracings as the plasterboard itself would act as a brace.
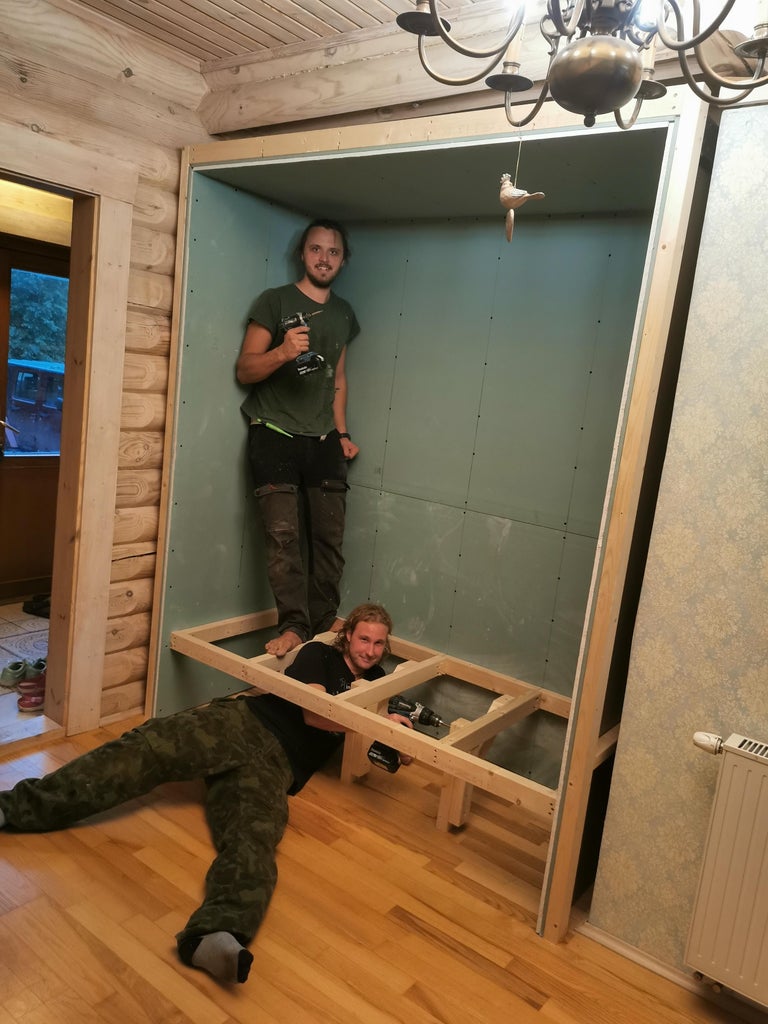
Step 3: Plasterboard


Then we added the plasterboard. It is super easy to work with plasterboard. For cutting, you just need a measuring tape, a straight edge, and a utility knife. Score a line and just fold it. Install using plasterboard screws (the black ones that everybody loves using for construction 😆). In a hindsight using two layers was probably overkill. One layer of extra strong plasterboard would have sufficed. We did the walls and the ceiling and then...
Step 4: The Floor
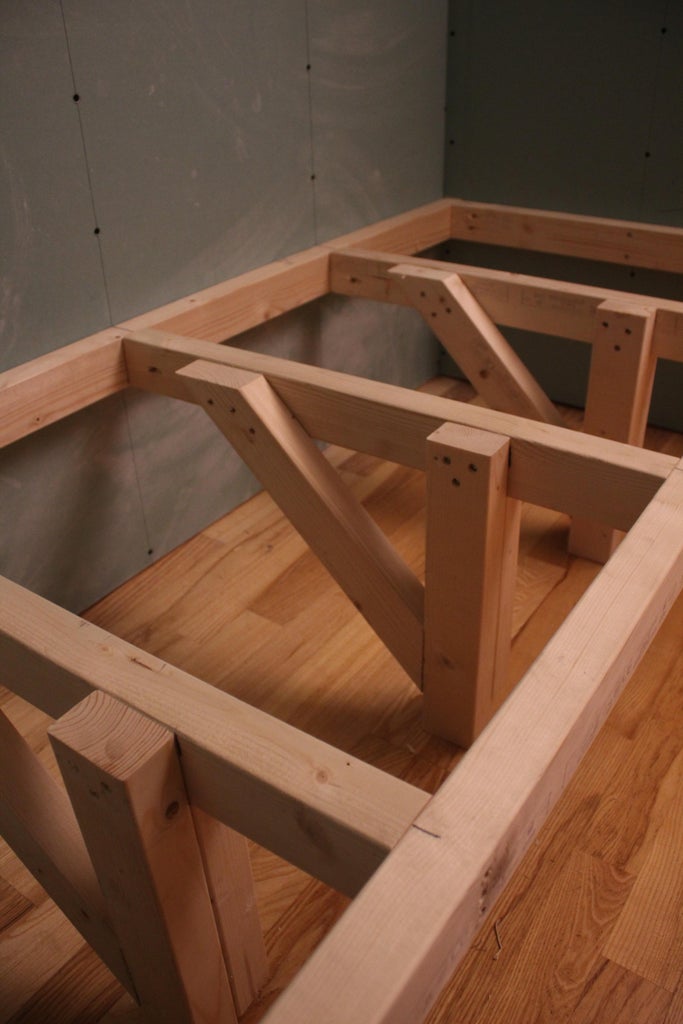
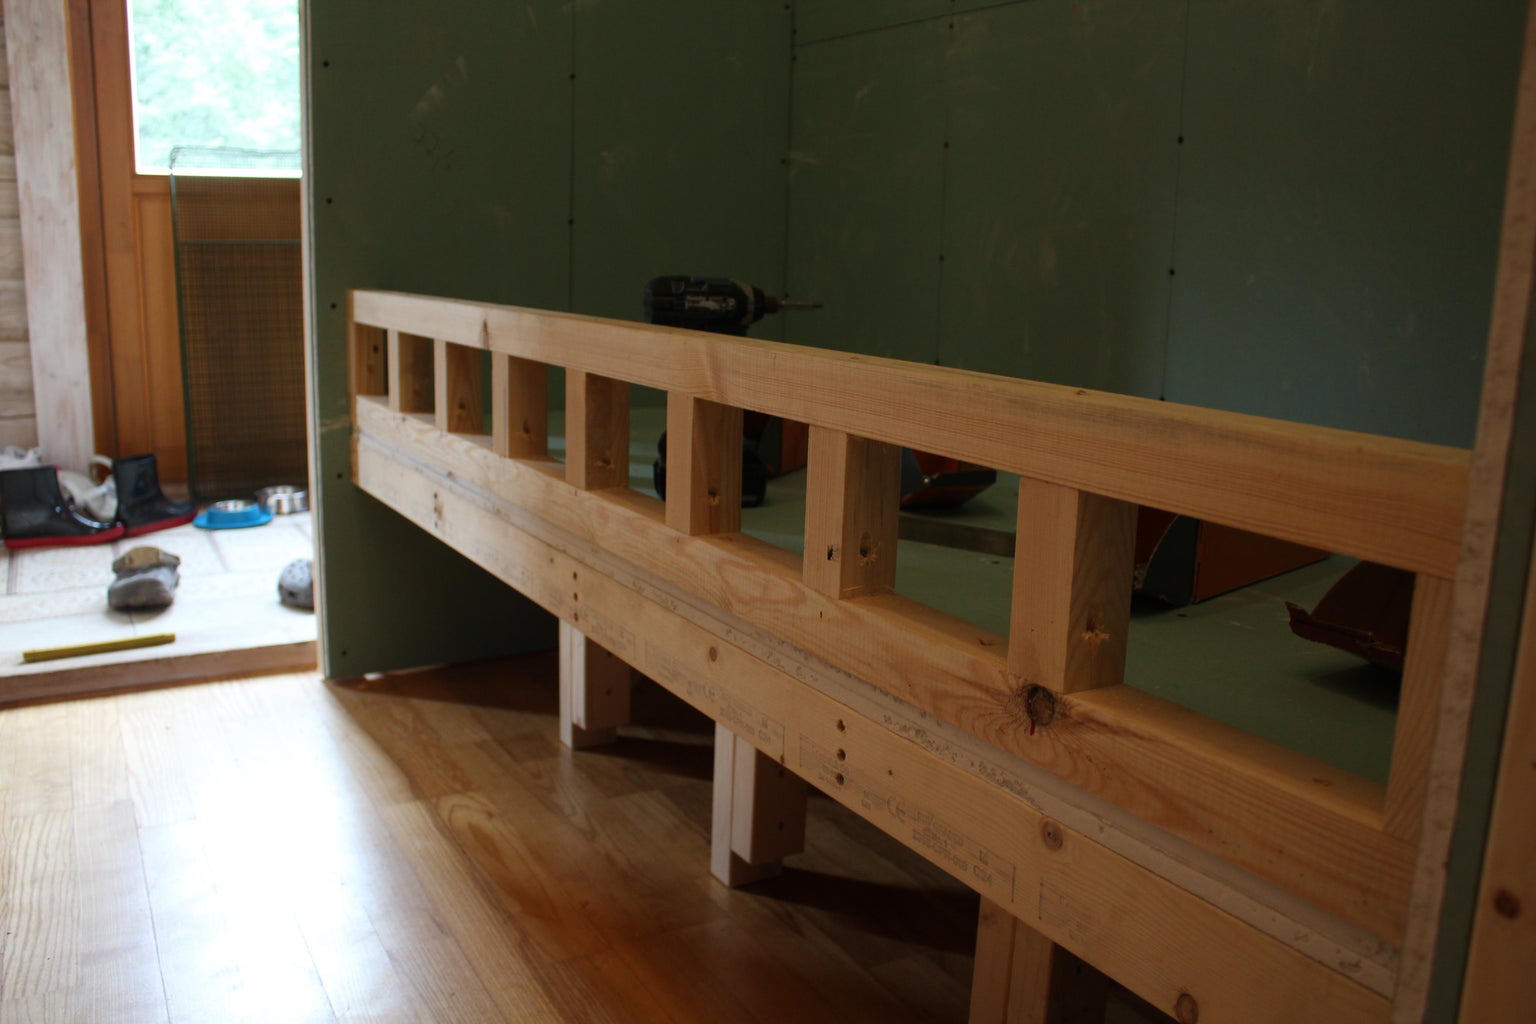
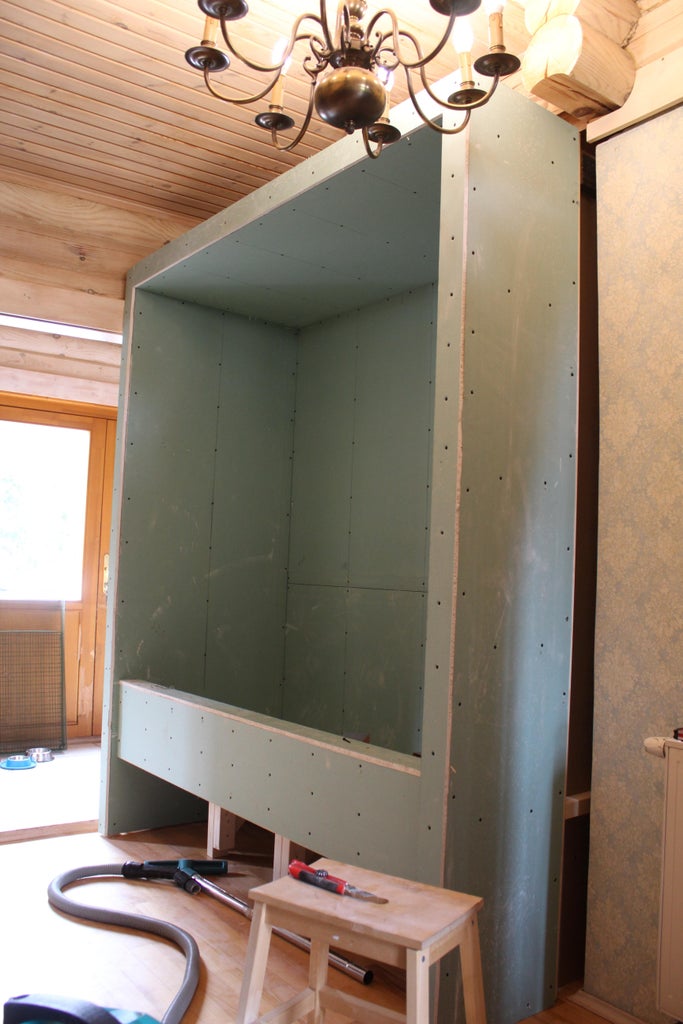
...built the floor frame making sure it was screwed into the studs in the wall. The owner wanted to have the floor raised as it would make maintenance easier and allow for storage underneath. As I was not sure how much weight the bath would hold I decided to add three support legs. Better to be safe than sorry. I think the pictures are quite self-explanatory. Then we added a shallow front wall for a bath to hold the soil and plasterboarded everything.
Step 5: Painting and Waterproofing


I Suck at mudding (yes, with a big S)! I have improved a little since but I am still pretty bad at it. I had the wrong tools (mudding knife too wide), wrong techniques and I did not even use a corner bead (and then wondered why I could not get it nice and straight). As the mud was so thick we decided to use a random orbital sander which created a ton of dust. In conclusion, it was a disaster!
To make the bath waterproof I used a special compound from a company called Kiilto Pro. You probably will not have that exact product in your area (as it is a Scandinavian company) but I am sure the technique is the same for other brands as well. First, all the walls were primed with a special primer. Then the part that was going to be tiled was covered with waterproofing mastic (the blue stuff) and the corners were reinforced with reinforcement tape. A single drainage hole was drilled and waterproofed as well.
Step 6: Tiling


To keep things simple we decided with the owner not to create an angle towards the drainage hole (as you would normally do with shower rooms). The bath would not be actually holding any water but soil instead. If it were to be cleaned out and washed the remaining water could be removed using a squidgy.
The tiles were cut using a diamond blade on an angle grinder but luckily I did not have to do a whole lot of cutting as these small tiles fit the bath perfectly. The walls and the top of the front ledge were tiled as well. The drainage system took some fiddling to be installed nicely. By the way, it is not connected to the sewer system. Instead, the owner puts a small bath underneath and drains the water into it.
Last but not least was to use the grout to fill the voids between the tiles and caulk on all the corners.
Step 7: Doors


The doors were provided by the owner as well and these were glass shower doors. To install them I first added a bottom ledge on which the doors would stand and a middle post. Both were made from pine and later painted black using waterproof paint. Then I just followed the instructions for installing the doors.
As you can see at that point the vivarium was starting to look like something! And boy, was it big - one could have easily built a two-person sauna in there!
Step 8: Ventilation and Electrical


Next up, it was time to add electrical and ventilation. I started by spraypainting all the parts black to better match the interior of the vivarium. In total, I added two adjustable ventilation outlets, a moistureproof socket, and a few electrical outlet boxes. The latter would have covers and be used for running the power cords for lights a tube for the fog machine.
I had also run a power chord (outside) to the top and bottom of the vivarium. The top one was for the lights. and the bottom one was used for the fog machine.
One of the ventilation outlets was installed in the ceiling and one near the bottom. It is important to pay attention to those as they are a potential escape point for the inhabitant. The one I used was pretty nice as it had a really small gap.
Step 9: Interior Design 1- the Log
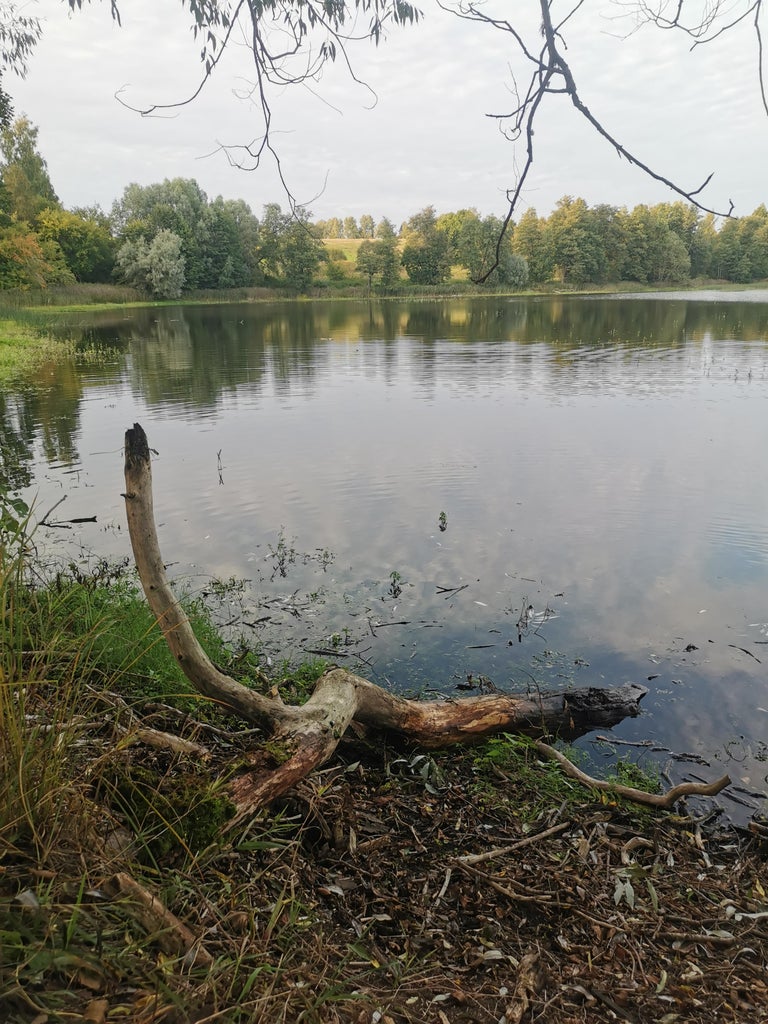
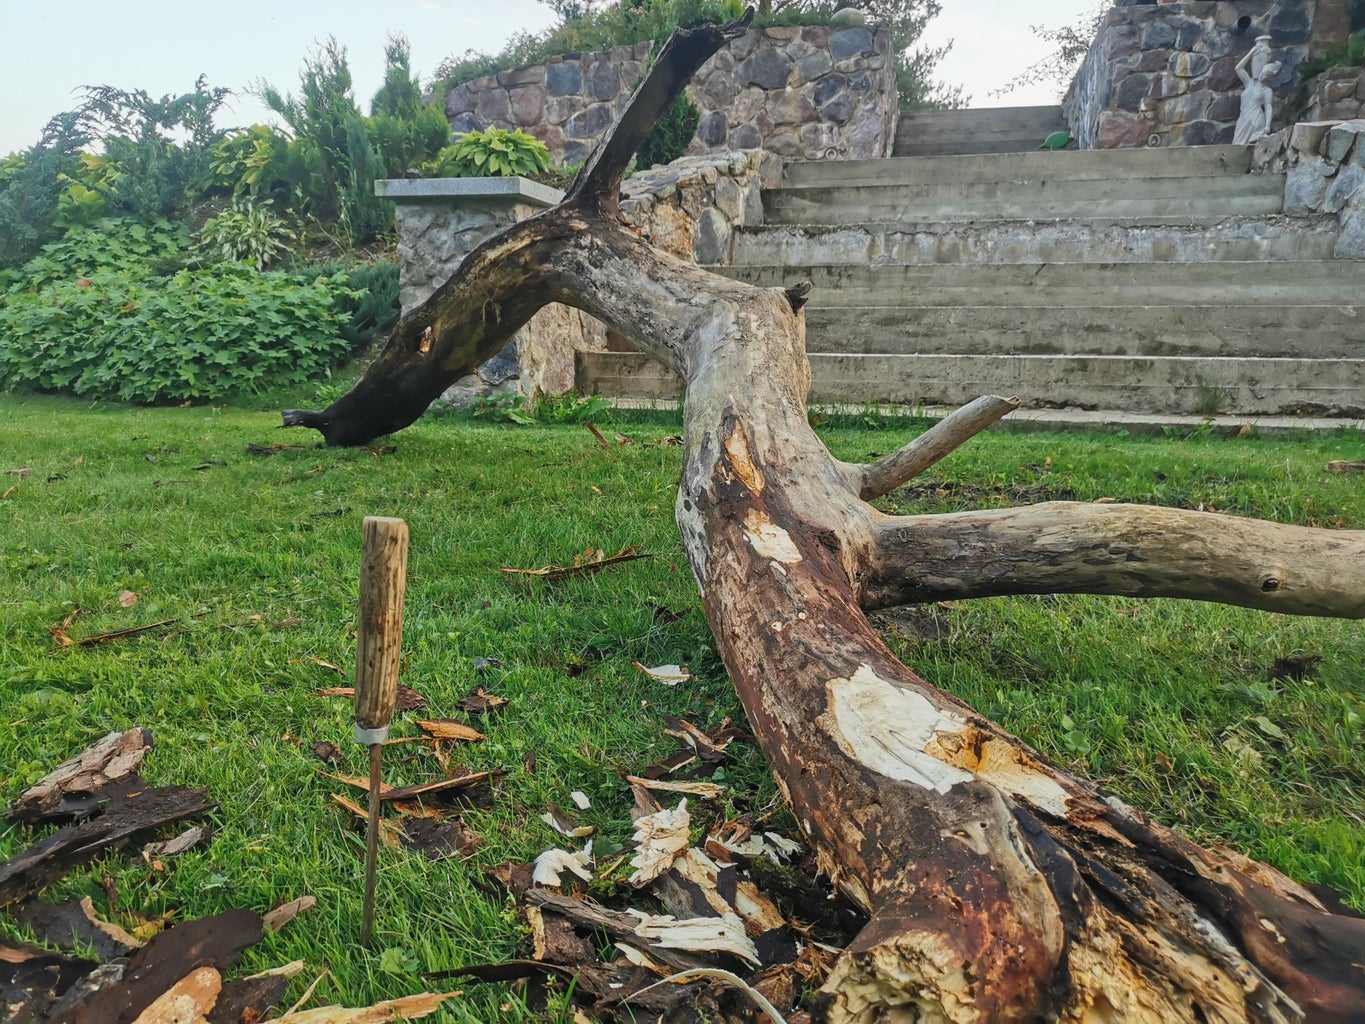
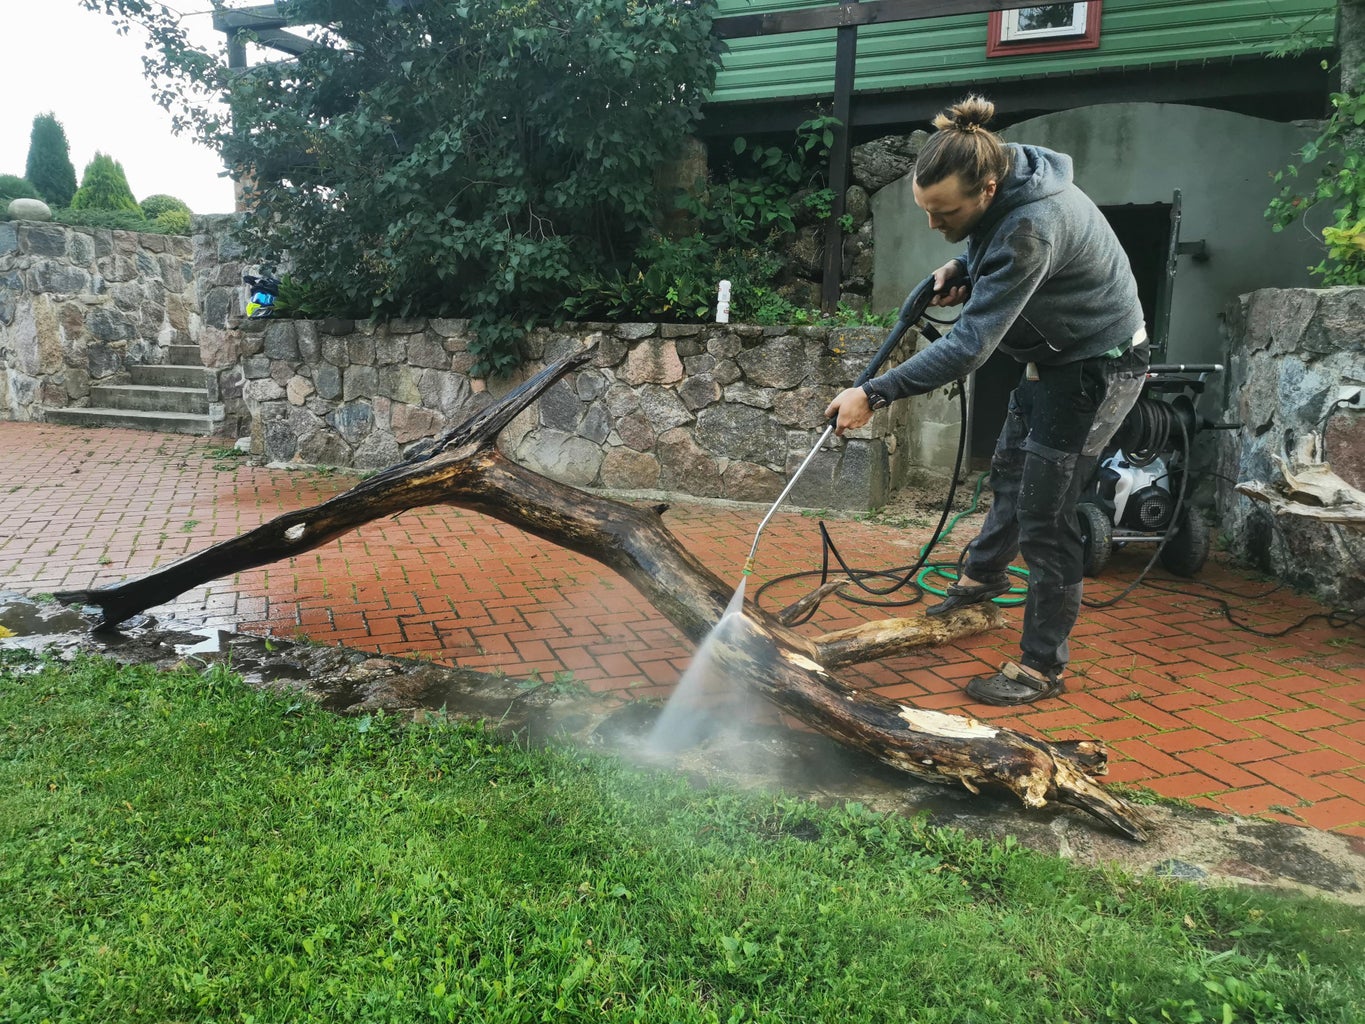
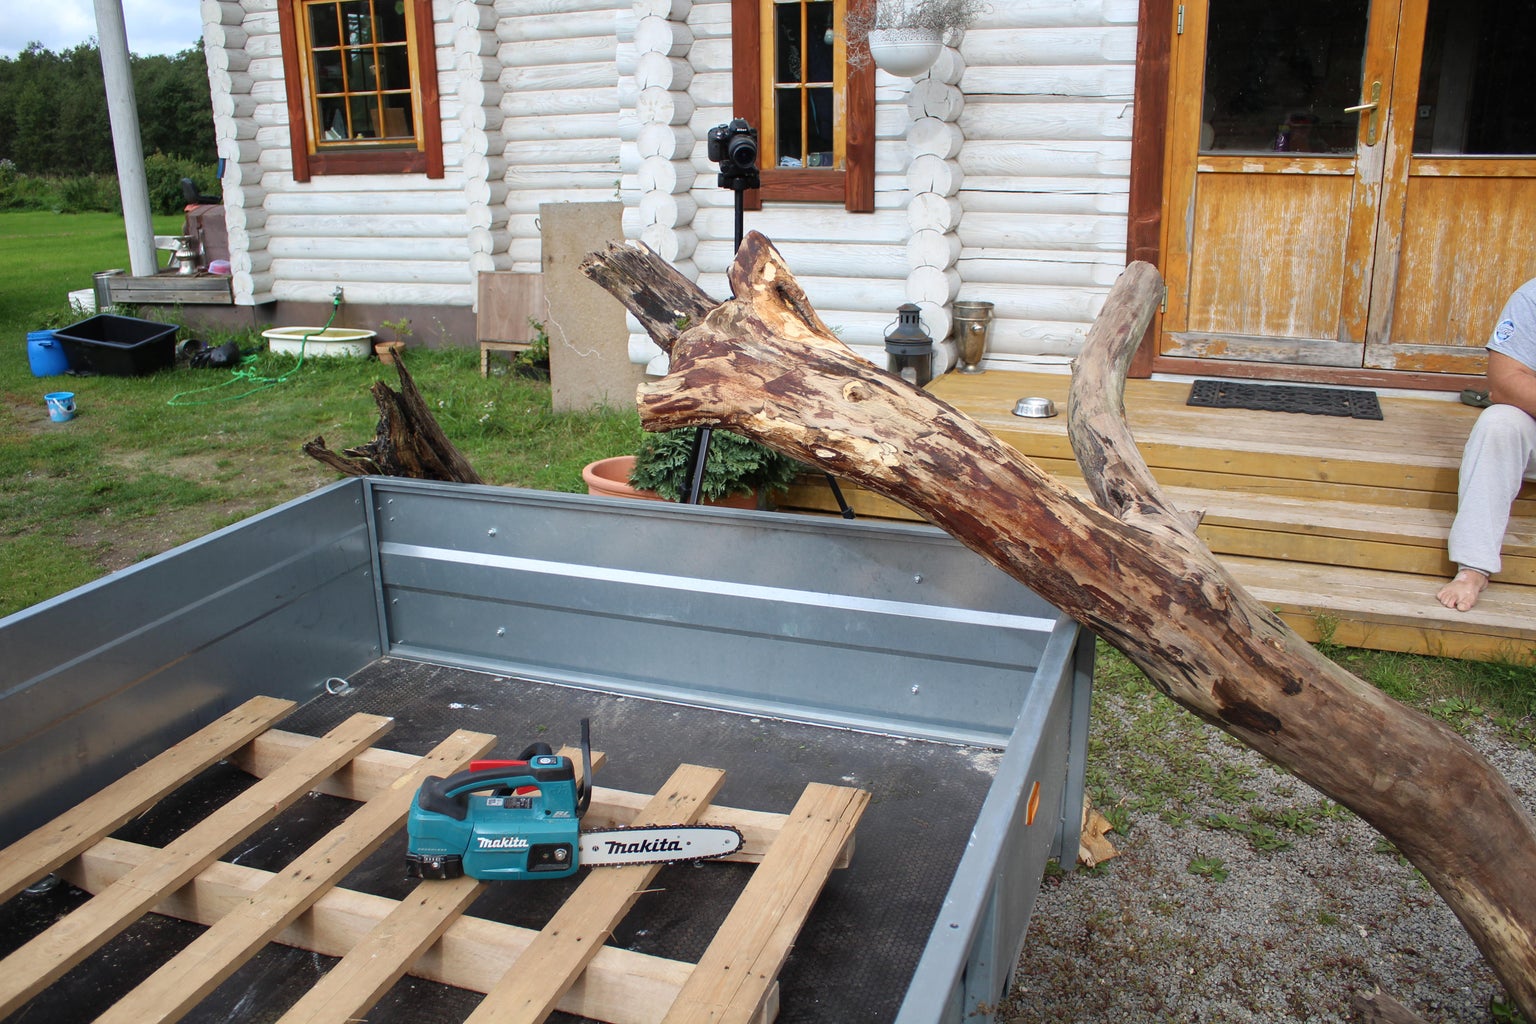
This was the fun part! The owner had a pretty good idea of what she wanted on the inside of the vivarium. She had most of the components but the main one was still missing. We had to find a big log! Luckily it was an easy task as we just so happened to come across one on the shore of a nearby lake. I took it home, removed loose material, and then pressure washed it. To get rid of any critters I placed it inside our sauna for a good month or so.
Step 10: Interior Design 2


As you can see the sidewalls and the ceiling were painted dark green. The back wall got a printout of a jungle. The photo was printed on some sort of plastic/aluminum sheet that was really easy to handle and trim. It came in two panels and was glued to the wall with silicone.
To hang plants and other stuff we decided to add a wire mesh to the walls and the ceiling. Once again it was first painted black to match the interior and then attached with screws (and big washers)
Step 11: Interior Design 3


To finish it off we added some wire mesh crates on the walls and added plants. All the plants had to all be plastic otherwise the Iguana would just consume them.
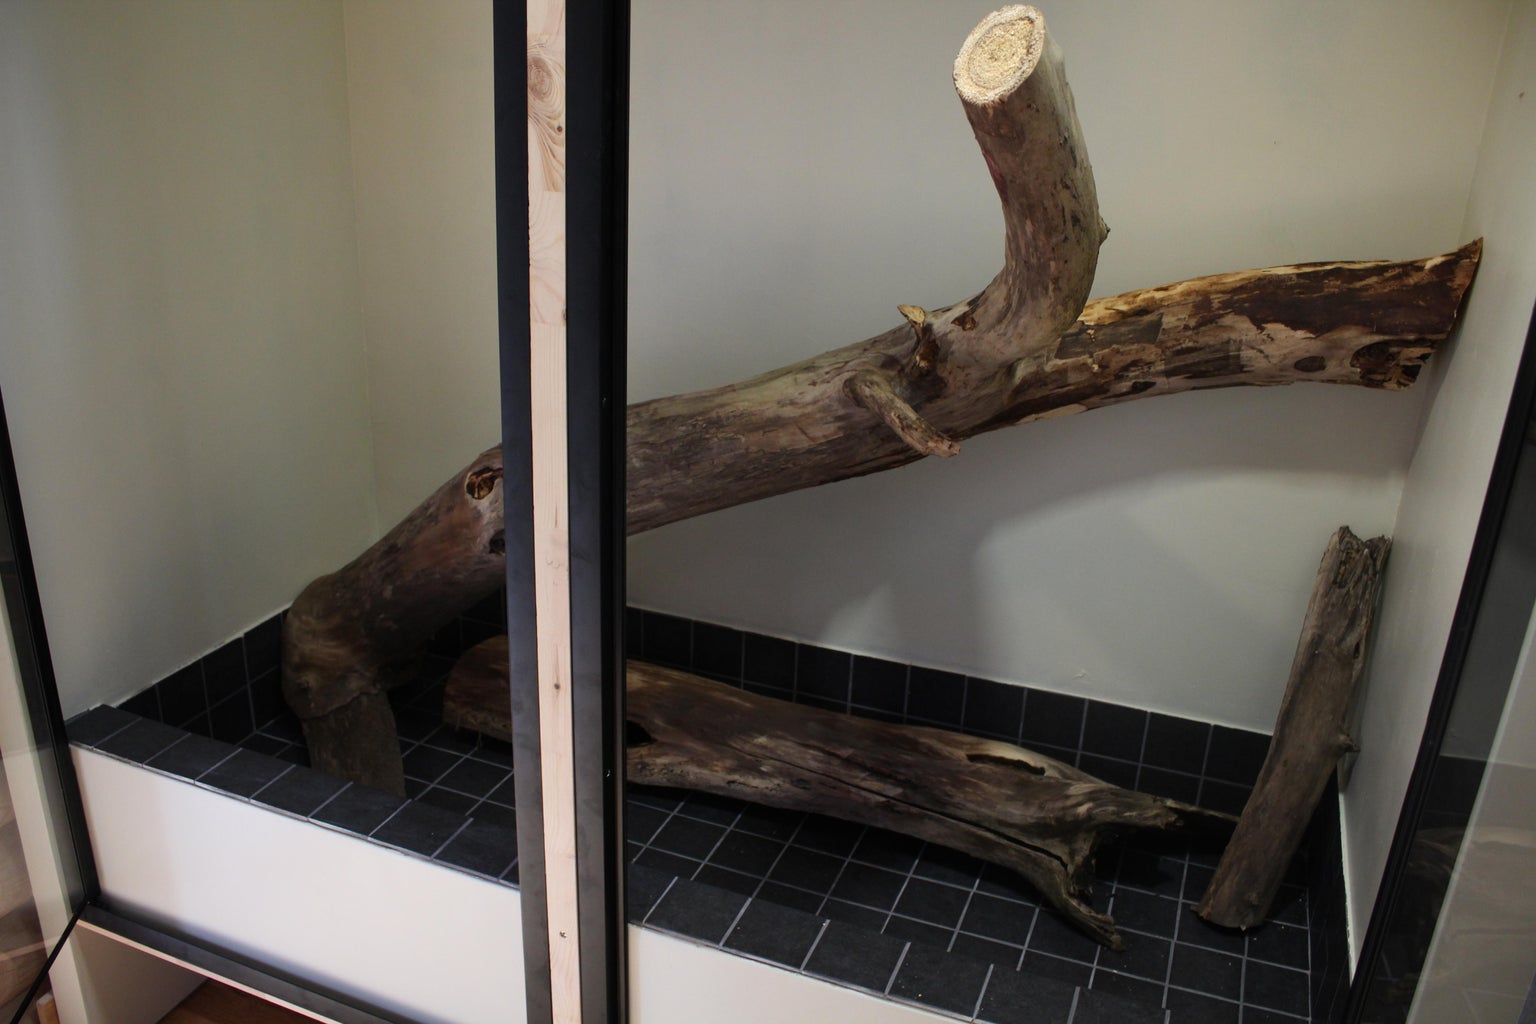
By that time the log was dry and critter-free as well and was also installed. The floor got a layer of mulch and some smaller pieces of wood and other design elements.
To top it off I ran the fog machine tube through a cool-looking statue making it look like the fog is coming out of its mouth. It even had solar and would light up when the main lights were turned off.
Step 12: The End!


And of course, the very last thing to do was to introduce the inhabitant. He was a bit shy at first hiding behind the log, but quickly gained his confidence and found some sweet spots for sleeping. He seems to really love the high grounds where he has a good overlook on everything. It is probably also the warmest up there.
I have gotten some feedback the lights are not powerful enough for a vivarium this big. There are two nightlights and one daylight - I can't remember the wattage on those but seem to keep the temperature up in there (they also heat the vivarium). I do not know if it is true or not but these are the components that the owner provided me with.
I hope my build has inspired you and given you some new ideas. If you have any questions or suggestions please leave them down below. I would love to hear your thoughts!
If you have not already be sure to take a look at the build videos I did!

Grand Prize in the
Pets Challenge


