

Introduction: Building an Acoustic Guitar


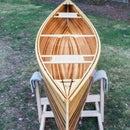
In 2016, I made an instructional video series for building a cedar strip canoe. I was looking for a challenge after I finished the canoe videos so I decided to learn how to build a guitar. The video above is the full montage of the guitar building instructional series I recently finished on my YouTube Channel. In the following Instructable, I will walk through every step of the guitar building process with detailed instructions. I've also documented this and all my other projects on my instagram. Feel free to leave me comments with any questions you have about this process. Thanks so much for watching!
Step 1: What to Know Before You Build...


Before we get started, it's important to know that I am not a luthier by trade. I'm just a hobbiest woodworker that really wanted to build a guitar. There are people that spend decades perfecting the art of guitar building (I am not one of those people). This series provides fast paced, comprehensive video instruction without going into too many of the nitty-gritty details. There is a lot of information on the internet about every step I talk about in my videos. I would encourage anyone using my videos to do additional online research when building their first guitar.
In this first video, "What to know before you build" - I talk about some of the most important things to think about if you're considering building your first acoustic guitar.
Materials
I bought a kit from Luthier Mercantile International (pictured above). They provide guitar building kits that you can customize to your own preferences. I think they start around $700 but the one I got was a bit over $1000 because I wanted to use ziricote for the back and sides. The kits also include plans with real size dimensions.
Tools
Most instructables list the tools that you need to complete the project. For guitar building you really need a pretty serious wood shop set up (it would take a long time to list every tool I used). Throughout the videos I will talk about the tools I used. For many processes there are probably ways to substitute the tools I use for other tools so I will forgo the "recommended tool list". This is an affiliate link to some of my favorite tools and products - feel free to check them out if you're curious.
Skill
I've always said - if you know how to safely use a table saw (and you have internet access) you could probably build a canoe. I do not feel the same way about guitar building. It's one of the most difficult woodworking projects I know of. With that being said, it's not as difficult as I thought it would be before started my first guitar. If you're really interested in taking this project on I would google luthiers in your local area and see if one of them would let you come pick their brain - it really helps to talk to someone in person. I did this with a couple people and it was one of the most helpful things for learning.
Step 2: Making Side Bending Jigs

You will be making and using many different jigs for guitar building. Most of them are relatively simple and easy to make - the jigs for bending the sides and holding them to shape after they're bent are probably the most complicated. In this video I show my process for making these jigs out of particle board.
Step 3: Bending the Sides
Bending the sides is one of my favorite parts of guitar building. It's just very unusual and exciting - you wet the wood, wrap it in tin foil, sandwich it in aluminum sheets with a silicon heating pad, crank it up to about 300 degrees and bend it onto your jig.
For my first guitar I used Indian Rosewood - I loved the rosewood because it was beautiful and relatively easy to work with. For the guitar in the video series I used "Ziricote" which is more rare and expensive. I LOVE how ziricote looks but it was NOT FUN to work with. It's a very stubborn and brittle wood which is not good when you're trying to bend it on tight corners. As you will see in the video, I cracked the first side I tried to bend (an expensive mistake...). The sides are supposed to be book matched so I had to order another pair and with and eventually got those bent correctly.
Here is another video I made about side bending when I was building my first guitar with the rosewood.
Step 4: Attaching the Sides
Once you get the sides bent you attach them together. I clamp them tight into my jig with spreaders made out of turnbuckles and particle board, then glue mahogany blocks where the sides meet at the upper and lower bouts.
Step 5: Radiusing the Sides and Attaching the Kerfing

Guitars bulge outward on the back and soundboard. This was one of the processes that I was most confused by before I started building. Once you get the sides ready to accept radiused plates you glue mahogany kerfing on them. This is to add structural stability and to give more surface area to glue the plates to. I will defer to the video here because it's really hard to explain without visual representations...
Step 6: Installing the End Wedge
The heel of the neck covers the gap where the sides meet at the upper bout. There is nothing structural that sits over the area where the sides meet at the lower bout. There are several things you can do to for this area - I chose to install an "end wedge". This is a fairly simple process that I did only using hand tools. The wood I used is a slightly darker piece of ziricote sandwiched between thin maple strips.
Step 7: Making a Neck Blank
In this video I show the process for gluing up a neck blank out of a solid board of mahogany. I start from a single board of 4/4 mahogany. I cut an angle for the headstock and three short blocks for the heel. I glue those pieces back onto the mahogany board in the measured places to create a blank for the neck.
Step 8: Attaching the Neck
One of the most significant departures I made from traditional guitar building was not using a mortise and tenon for the neck joint. I did a lot of reading about this online and ended up just using a butt joint with bolt inserts. There are a lot of differing opinions about the neck joint. If I was to start making lots of guitars I would probably set up some jigs to cut mortise and tenons but I feel good about both my guitars that I have made with the butt joints. This is an article I used to learn about the butt joint process. I will explain more about the neck joint in subsequent videos also.
Step 9: Installing a Truss Rod

A truss rod is a steel rod you inlay into the neck before you attach the fretboard. Before steel string guitars there was no need for truss rods because nylon strings don't put enough tension on the neck to require additional strength. Over time, the steel strings would effect the shape of the narrow neck so the truss rod adds enough support to keep the neck straight. (this is a simplified explanation...).
I cut the channel on a router table then install it with quick drying epoxy.
Step 10: Shaping the Headstock

There is a thin piece of wood that you glue onto the front of the head (I also sandwiched a veneer in there to be fancy). In this video I glue the head plate, cut the angle on the head plate that the nut sits against, then cut it to shape by taping the shape I want on it and using a duplicate router bit on the router table.
Step 11: Attaching the Fretboard
Almost ready to move on from the neck! In this video I attach an ebony fretboard. I bought it with the fret slots pre-cut, I taper it, put some fret markers on, then glue it on to my neck blank. I has to be glued at a very precise place so I dry-fit it where I wanted it, drilled tiny holes through a couple of the fret slots into the neck blank, then applied the glue and when I went back to clamp it down I lined the holes back up with little nails.
Step 12: Carving the Neck

This is another really fun process - I use hand tools to carve the neck down to shape. It's one of those things that makes you feel like some kind of master craftsman. One of my favorite tools to use from the entire build is the shinto rasp - it makes neck carving super easy.
Step 13: Joining the Plates

Done with the neck!...for now...
A lot of what I'm doing in the next couple videos is just gluing pieces of wood together in different weird ways. This would normally not be a difficult glue-up but the plates are very thin and it has to be a "perfect" joint so you have to take some extra precautions when prepping and gluing...
1. get the gluing faces super straight with a "shooting board"
2. cut a light wedge on one side and set the jigup so that you can wedge the plates against each other
3. apply glue, wedge them together, put weight on the joint so it doesn't buckle, then tap them in tight
4. sand them to desired thickness with a thickness sander
5. cut to shape
Step 14: Installing a Shell Rosette

Rosette installation and sound hole cutting require extreme precision. I usually recommend buying the least expensive tool you can find with good amazon reviews but this dremel base & circle cutting jig made by StewMac is a must have (*it's expensive*). This jig (with a dremel and a good bit) makes it easy to make minuscule adjustments with super clean cuts. See video for process explanation.
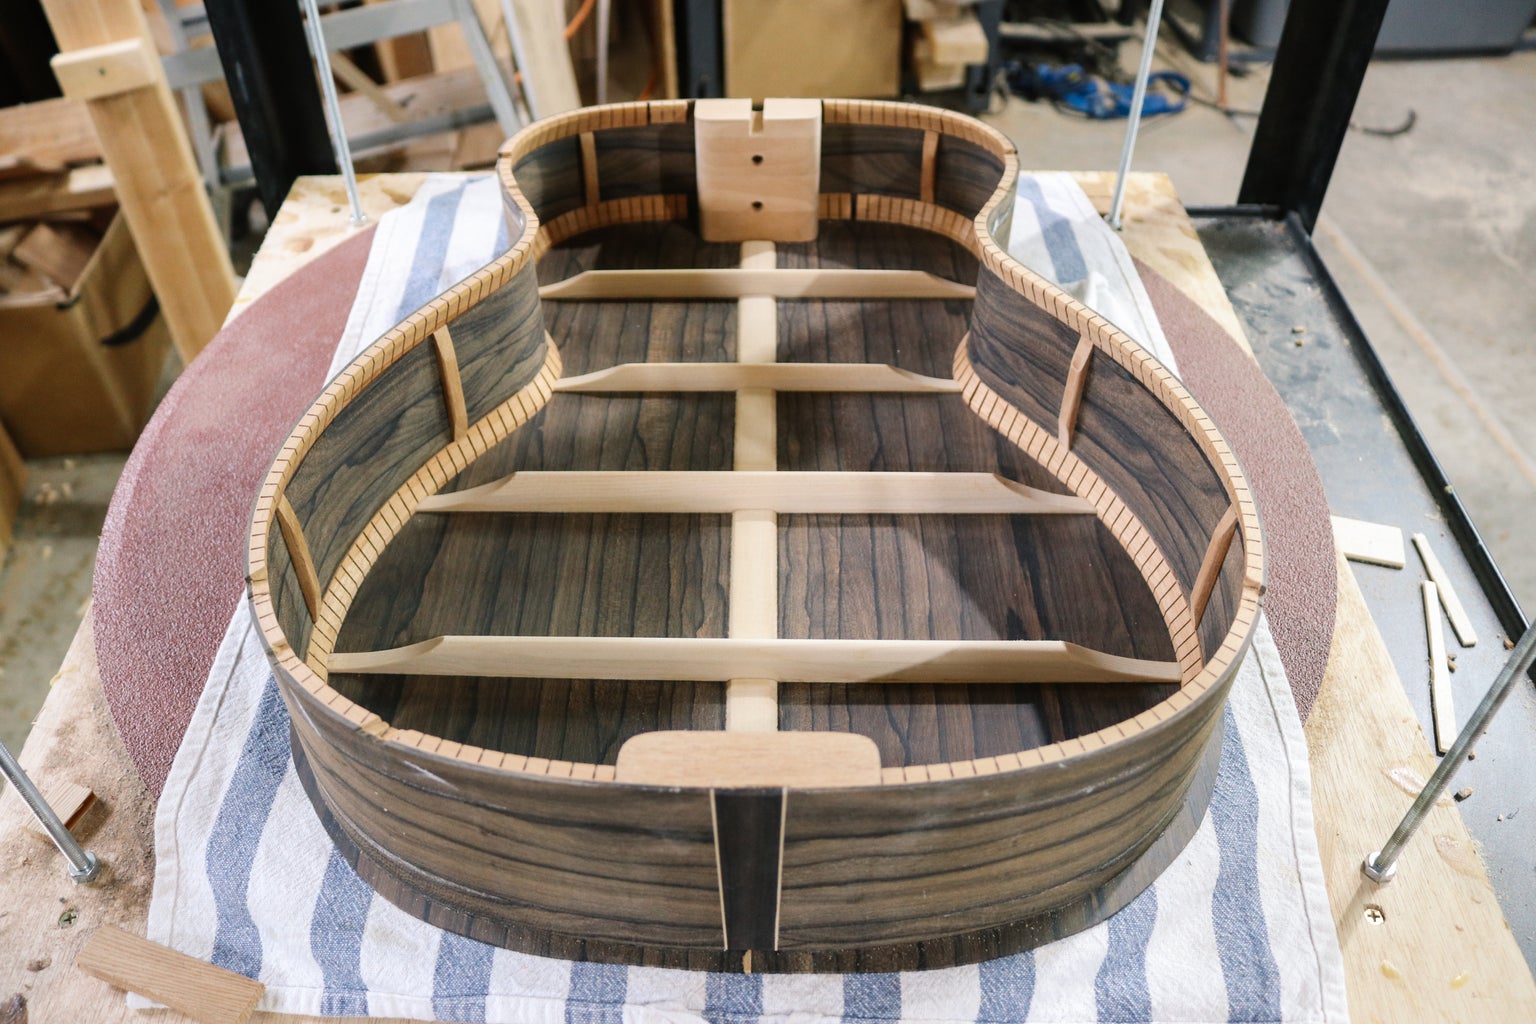
Step 15: Back Bracing
Gluing braces onto the back and soundboard gets kind of tricky. In this video I introduce the go bar deck and show how I use it to glue the braces down. I also show how to carve the braces.
Step 16: Soundboard Bracing


Guitar building is beautiful! The work in this video is a lot of what makes or breaks the tone of the guitar and it is all going to be hidden in the final product on the inside of the guitar. I think a soundboard with carved braces is one of the most beautiful parts of building a guitar - possibly more beautiful than the finished product.
Step 17: Closing the Box
This is another exciting (and nerve-racking) step - attaching the back and soundboard onto the sides. First I cut notches on the edge of the sides for the bracing, then I dry-fit and make sure everything is lined up perfectly, then I glue it up. Same process for the back and the soundboard.
Step 18: Cutting Binding Channels
Speaking of nerve-racking, here I use high powered rotary tools on the edge of this thing I've invested a couple hundred hours into. I cut the soundboard and back flush to the sides on the router table with a flush cut bit, then use a special dremel attachment to cut a channel for the binding.
Step 19: Installing the Binding

The binding on guitars is both decorative and it adds strength and protection to the edges. Here I cut the figured maple binding to length and glue it down by taping it and wrapping it with twill tape. After it's glued down I sand it clean.
Step 20: Attaching the Neck
This is a tricky step. First, you carve the butt of the heel down so just the outside 1/4" edge of the cut you made earlier remains, then you fit it with some slack and pull a piece of sandpaper out of the gap repeatedly until the but matches the curvature of the body, then you dial it in until the side to side neck angle is correct, then you glue the fretboard to the body... It's a lot easier to understand if you watch the video...
Step 21: Installing the Frets
Bang 'em in!
Step 22: Attaching the Bridge
1. cut the bridge out of a rosewood blank
2. shape it to look nice and sand it
3. measure 1000 times to make sure the dry-fit is in the correct place
4. measure another 1000 times
5. glue it down
Step 23: Applying a Tru-oil Finish
Most guitars get sprayed with lacquer for the finish. I really dislike spraying so I wanted to do something different. I got this process from Eric Schaefer (he also has a video series for guitar building).
Watch the video for the full explanation - here's the quick version:
First, I did one more final sanding of the entire guitar and clean it with naptha. Then, I taped the fret board and bridge. Then, I applied "Aqua Coat" pour filler, waited and sanded it back down to wood. Then, I rubbed on 15 coats of "Tru-Oil" (traditionally used as a gun-stock finish).
Obviously there's a lot of little details that I show in the video that I won't explain here. Applying the finish is typically my least favorite part of any woodworking project but as I've gained more experience and knowledge I've learned which parts to be anal about and when I should just call it "good enough". There's a countless number of ways to finish wood with all kinds of methods and superstitions so if you're doing this yourself read as much as you can and talk to lots of different people until you find something you're comfortable with.
Step 24: Final Set Up

Setting up the nut and saddle is a very different skill set than building the guitar. This is what makes or breaks the "playability" of the guitar and I wanted it to be set up perfect. For this reason I took it to Steve Spalding - an experienced instrument repair guy in my area. Steve did an amazing job. Someday I might learn how to do the final set up but it will take more learning and researching.
Step 25: Test Run With Allen Giardinelli

Thanks for looking at my project! The above video is the full montage again if you didn't catch it the first time.
I was at a bar a couple years ago in Ashland Oregon and this guy was playing live music. I really loved his style of playing so after his set I got his information. I called him when I finished the guitar and he agreed to give it a test run - it's him playing during the last 30 seconds of the montage. I'll post a longer video of him playing on my youtube channel in a couple weeks.
Thanks!!!

Participated in the
Woodworking Contest


