

Introduction: Compact Computer Ruler


Many times while trying to design something in Tinkercad or the Silhouette Studio program, I find myself trying to visualize how the finished piece will look. I'm not great at sizes and proportions so I pull out my measuring tap a lot and it's just not convenient. To make things easier, I decided to add a little ruler right to my laptop. I made it out of vinyl and it makes designing things so much easier.
This also works great for my knitting as I'm usually using my computer to read a pattern so I can easily hold up my piece to the ruler to see how I'm doing (I do this a lot for dish clothes as I want to get them as square as I can so I need to measure how long it is compared to how wide it is so I know how many more rows I need to knit to make it square).
Instructable 269
Step 1: Supplies

Supplies:
- Silhouette Paper Cutter - I got this kit which came with the vinyl I used
- Adhesive vinyl in the colors you want
- Ruler - I used two to help me line everything up, lighter colored rulers will be easier to see with the computer, my see-through ones were difficult to read so I had to put white paper behind them
- Fine tip tweezers - this helped me not only place the vinyl pieces but also avoid touching them too much
Step 2: Deciding on Ruler Placement

Before you can do anything figure out where the ruler is going to go and what size it will be.
I am putting this on my personal computer which has a trackpad that goes right up to the bottom and speakers on either side, this leaves the top free for me to put the ruler on. I measured and figured I could make it up to 13 inches long (I ended up going with 12) and 7/8" tall.
If I had put this on my work computer, it didn't have much room along the top or bottom, but I could still use either side. If I had put one on there, it could have been up to 9.5" long and 3/4" wide.
mchau2 pointed out on Instagram that the screen bezel can be a great place to put the ruler. If you have space this can work out really well since it will be right next to the screen (my screen doesn't actually have a bezel, but if it had I would consider it). You could take it a step further and do a ruler along the top and another along the side too.
Step 3: Designing the Ruler


So you can approach designing this ruler two ways: as 1 piece or as multiple pieces.
Above you can see some examples of 1 piece, but since I wanted it to be 12 inches long, cutting it out of sheets of vinyl that are only about 11" long was impossible, but that was fine with me. I decided to make mine multiple pieces, like lines on a ruler.
Once I had the design, I needed to decide on the colors so I could cut it out. I tried a couple different combinations based on the colors I had and finally decided on rainbow the whole way because rainbows are awesome.
Once you know what pieces you need in which colors, group those cuts together and get everything cut out.
I haven't really cut out vinyl before, but I heard you are supposed to just load the sheet and while you can and this worked, it cut out my design about an inch in each way and this was a big waste of vinyl for me, so I ended up putting the vinyl sheets on my cutting mat and cutting them out that way.
Either way works, do which works for you and use the settings for Vinyl.
Attachments

Step 4: Placing the Pieces


If you are using just one piece, you can try using transfer paper and just stick it on that way.
If using multiple pieces like I did, clean where the pieces will be going and then figure out how you will line up all the pieces. I lined mine up along the top edge to keep it straight.
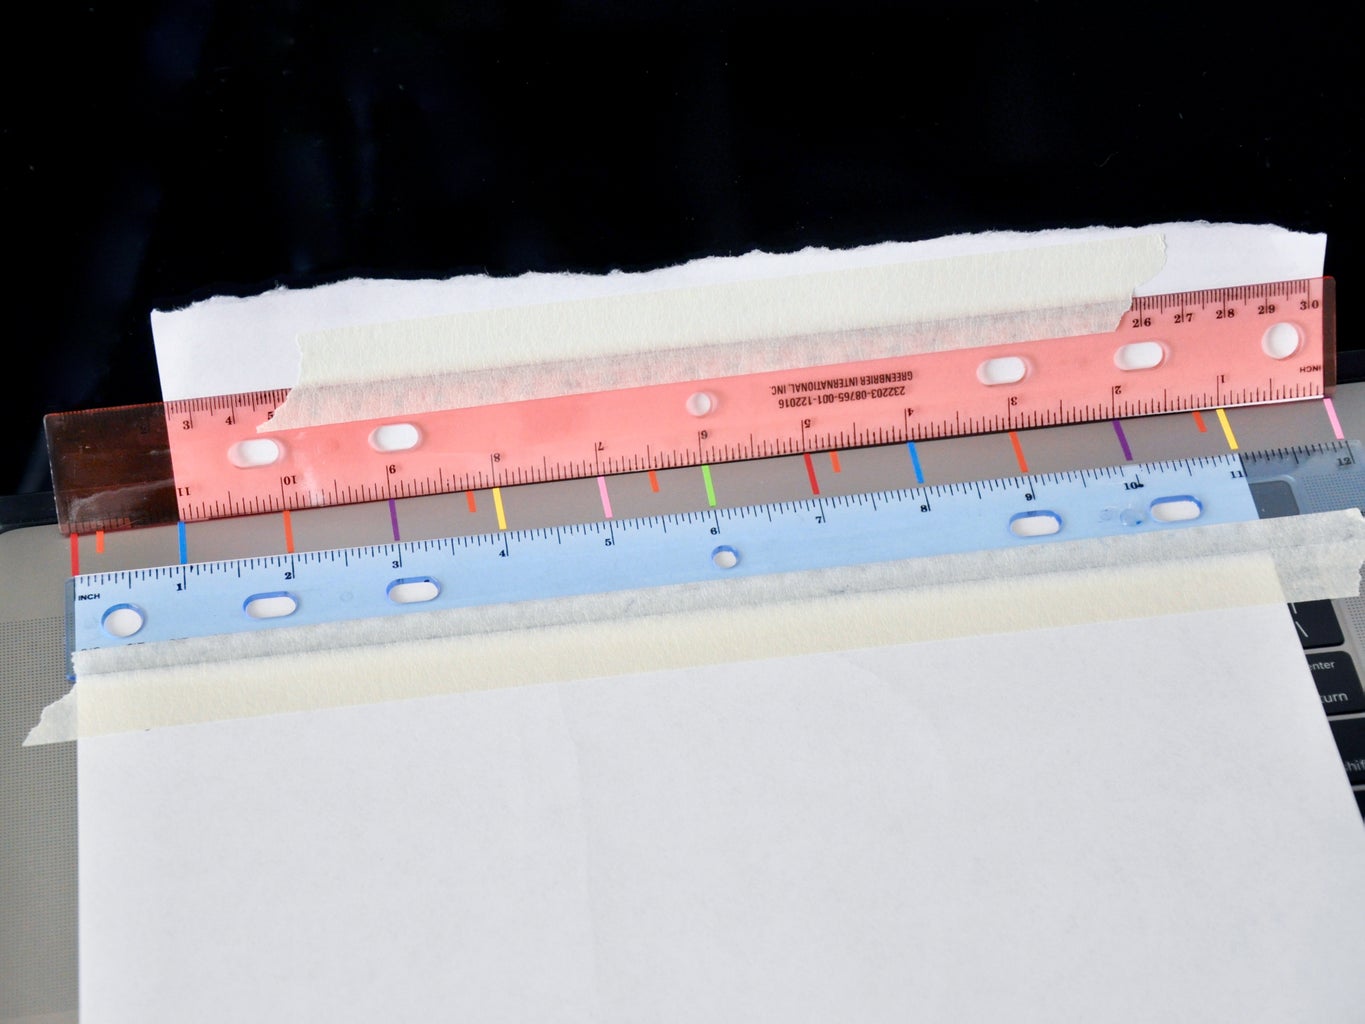
I ended up using two rulers (with white paper behind them) to get all the pieces on right. I started by putting on all the inch marks. Once those were in place, I went by color and added all of the smaller dashes.
NOTE: Taping your ruler down can help as you don't want it to move while you are putting the pieces on.
Once all of the marks were in place, I put on the numbers as centered as I could get them under the large dashes. I actually made sure the numbers were lined up in the Silhouette program (mostly just for the double digits) and then used that as a reference for putting on the numbers.
Step 5: Alternative Way to Put on Pieces

I thought of this after the fact, but you can try cutting out your ruler on plain printer paper and using that to line up your pieces on the keyboard. If you do this, you will probably want to do the slightest external offset on everything first and use that as your cut lines so you can easily put the pieces down.
Also, if you do this, make sure you line it up the way you want it and tape it down so it doesn't shift.
You won't need to cut out the numbers for this really as you can just line them up when you are done with all the lines. You mainly want to make sure the lines are on straight and spaced right.
Step 6: Done!


That's all you need to do!
Once it is on, try not to fiddle with it and it should be fine. I just put mine on so I don't know how long it will last, but hopefully for quite some time.


