Introduction: MLAB | 3D PRINTED CROWN INSPIRED BY QUEEN RAMONDA
Did you know that the crown that's worn by Queen Ramonda, from the upcoming Black Panther film, was made using a 3D printer? Interested in creating your very own Crown? Follow these simple steps to create a Crown fit for a Queen!
Hint: If you need a little inspiration before you get started...
Check out the mLab Episode I: 'Maintain the Crown'. #WakandaForever.
Step 1: Let's Get Started!
In this Step-by-Step, we will show you how to make a 3D model of a Crown inspired by the character Queen Ramonda from the upcoming Black Panther film. In order to create our 3D model, we will use the software, Tinkercad. Tinkercad is an online 3D design or CAD software that allows for you to transform your ideas into 3D models simply using your computer. As an added bonus, it's also free to use!
Now, if the term "CAD" sounds unfamiliar to you, don’t fear. CAD stands for Computer-Aided Design. It is a type of software that allows for us to build 3D objects using our computer.
Once we are finished with our Tinkercad model, we can export the file to a 3D Printer, a machine that uses materials such as plastic in order to print physical objects like our CAD Model of Queen Ramonda's Crown. If you don't have access to a 3D Printer, you can also order a 3D print from Tinkercad or share a snapshot of your design with family and friends via Social Media.
Regardless of what you decide to do with your CAD Model, the most important step is to get started. So...Let's Get Started!
Quick Tips for Setting Up You Tinkercad Workplane!
(These Tips are Optional, But if You are New to Tinkercad, Please Read!)
Edit Grid: Make sure that you go to the lower right corner of your Workplane and 'Edit Grid' in order to change the ‘Units’ to Inches (this is optional, but will make your life so much easier).
Pre-Select your 3D Printer: If you have decided to 3D Print your CAD Model, you can save yourself the guesswork of ensuring your Model will fit your 3D Printer by selecting your 3D Printer of choice using the ‘Preset’ Options. For this project, we are using the MakerBot Replicator 2. Pre-selecting your 3D Printer will allow for you to ensure that the Crown that you are designing will fit within the printing boundaries of the 3D Printer of your choice.
Now, Let’s begin with exploring the ‘Basic Shapes’ on the right-hand side of your Tinkercad window.
Step 2: Let's Explore the Basic Shapes and Controls!
When you are getting started with anything new, especially software, it's sometimes worthwhile to explore and get a feel for the environment.
Let's start by selecting a 'Shape' from the 'Basic Shapes' Toolbar on the Right-Hand-Side of your window and dragging the shape onto your Workplane.
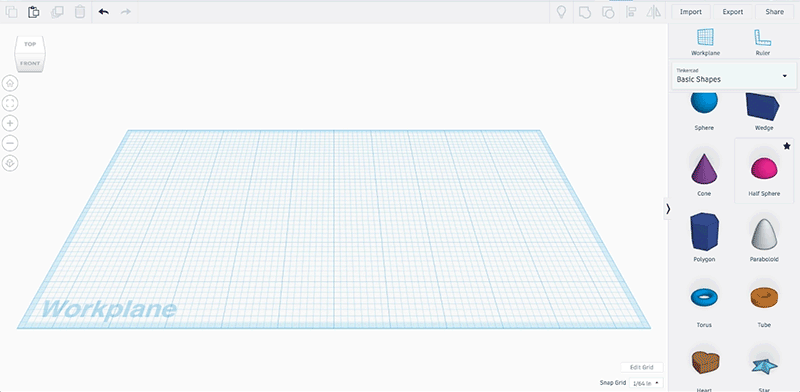
In our case, we selected a pink 'Half Sphere' and started playing around with its 'Dimensions'. Use the tiny white/black boxes around the selected 'Shape' to control the - Length, Width, and Height. Now, let's explore a few other 'Basic Shapes' that we will need in order to create our Crown: Tube, Cone, Roof.
Tip: If you are concerned about the pink color; Don't Panic! We can change the color of the shape, can you figure out how? Hint: Look at the 'Shape' Menu above your Workplane and the 'Solid' Feature.
Step 3: Make the Cap for Your Crown
Now that we have a little bit of experience with Tinkercad, let's get started with our first 'Basic Shape'.
Before we can get started, let's clear our Workplane of any shapes or models in order to begin creating the cap for our Crown on a clean Workplane.
Hint: While we will list the dimensions or measurements we used in order to create our version of Queen Ramonda's Crown for the Makerbot Replicator 2 3D Printer, please do not feel that you have to replicate every step exactly. Remember, the exciting part about using a CAD Software such as Tinkercad is that you can make anything your heart desires. Simply use the following as suggestions for designing your Crown.

Part A:
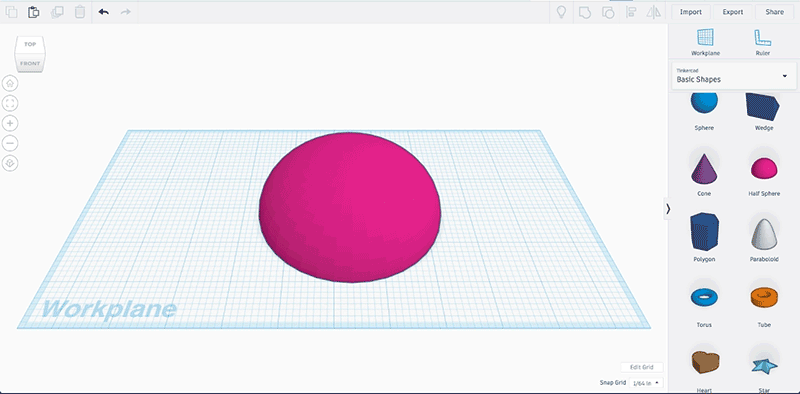
- Select a 'Half Sphere' from our 'Basic Shapes' Toolbar and bring it to our Workplane.
- Change to the desired Length and Width of the Half Sphere, ensuring the Length=Width
- In the above example, we made our Length = Width = 4.00 Inches
- Adjust to the desired Height of the Half Sphere
- In the above example, our adjusted Height = 2.00 Inches
Part B:
- Duplicate the Half Sphere
- At this moment, you should have (2) identical Half Sphere shapes on your Workplane
- Move one of the Half Spheres into the Workplane
- Tip: You can do this by selecting one of the Half Spheres; click and drag down the black triangle above the selected 'Half Sphere' until the shape is slightly below the Workplane as shown.
- Go to the Shape Toolbar and change the selected Half Sphere into a Hole
- Adjust to the desired Length and Width of the transparent Half Sphere
- In the above example, we made our Length = Width = 3.75 Inches
- Adjust to the desired distance between the Half Spheres
- In the above example, we made our Distance = 1/8 Inch
Once we have the Cap for our Crown completed, it's time to create the Headband for the Crown.
Step 4: Make the Headband for Your Crown
Bravo! We have the first part of our Crown, the Cap, Done!
Now start on the Headband for the Crown, which allows for the Crown to rest comfortably on the heads of the Royal Family of Wakanda.
Part A:
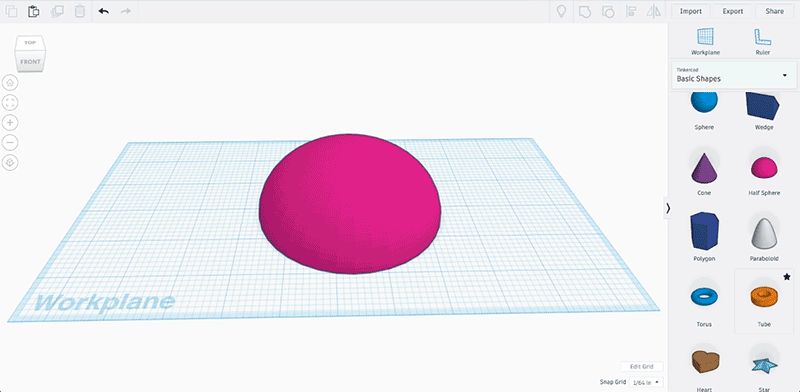
- Select a 'Tube' from our 'Basic Shapes' Toolbar and bring it to our Workplane alongside our Cap.
- Adjust to the desired Length and Width of the Tube, ensuring the Length=Width
- In the above example, we made our Length = Width= 4.00 Inches
- In the Shape Toolbar, adjust to desired Radius for the Tube.
- In the above example, we made our Radius = 2
- Adjust to desired Wall Thickness for the Tube
- In the above example, we made our Wall Thickness = 0.15
- Adjust to desired number of Sides for the Tube
- In the above example, we made our Sides = 12
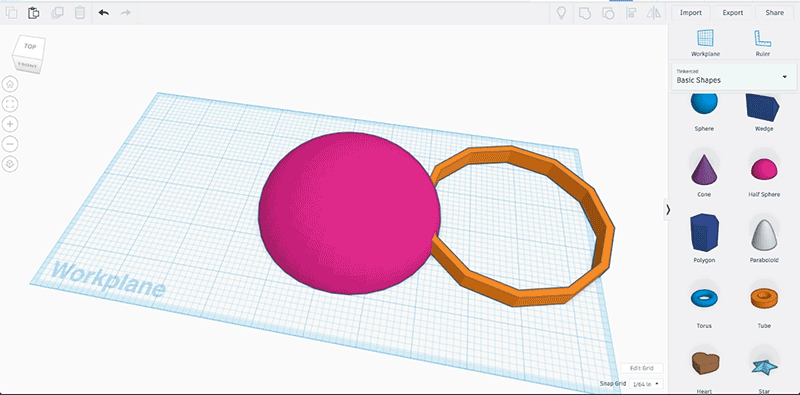
Part B:
- Drag your Tube across the Workplane to your Cap (i.e. the two 'Half Spheres' from the previous step).
- Align your Tube and the Cap along their midpoints.
- Adjust the Height of the Tube
In the above example, we made our Height = 1/4 Inch
As soon as we have the Headband for our Crown, it's time to create Top of the Crown.
Step 5: Make the Top of Your Crown
While the 'Cap' and 'Headband' are nice components to any Crown, it's really the Top of the Crown that draws the attentions of one's subjects!

Part A:
- Select a 'Cone' from our 'Basic Shapes' Toolbar to the Workplane
- In the Shape Toolbar, adjust to the desired Base Radius of the Cone
- In the above example, we made our Base Radius = 2
- Adjust to the desired Height of the Cone
- In the above example, we made our Height = 1.0
- Adjust to the desired 'Sides' of the Cone
- In the above example, we made our Sides = 12
- Adjust the Height of the Cone off the Workplane
- Hint: Adjust the Height of the Cone off the Workplane by selecting the black triangle above the shape
- In the above example, we adjusted the Height off the Workplane = 0.125 Inches
- Select all the Shapes - Cap, Headband and Cone and Align them along the Midpoint
- Hint: On your keyboard, hold down CTRL + A (this selects all the shapes). Then, click the middle Black Dots along the 'Length' and 'Width' of the 'Selected Shapes' (this aligns all the shapes at the midpoint).

Part B:
- In the Shape Toolbar, adjust to the desired Top Radius of the Cone
- In the above example, we made our Top Radius = 3.75
- Adjust Cone to the desired Height and Move it closer to the 'Headband'
- Hint: Make sure that the 'Cone' is in close contact with the 'Headband'. Use the arrows to move Cone downwards so it's resting on top of the 'Headband'.
Now, it's time to bring all of these components together!
Step 6: Let's Add the Finishing Touches!
Hold Tight! We are almost there!
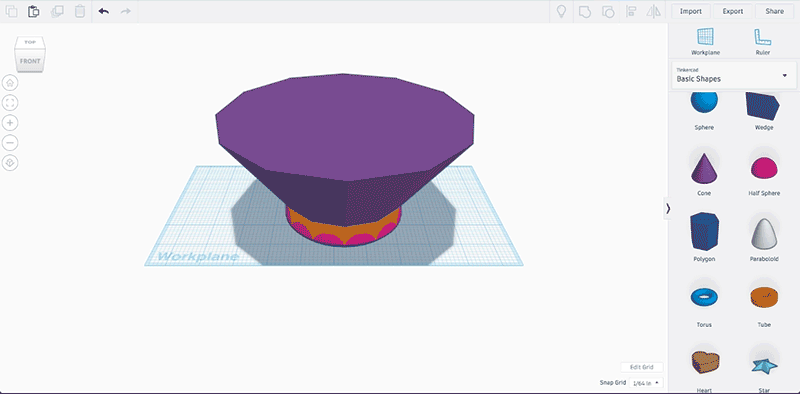
Part A:
- Duplicate the Cone
- Hint: The Duplicate tool is locate on the Top-Left Corner of the 'Menu Bar'. It is the 3rd icon from the left, next to the 'Paste" tool.
- Shrink the size of the Duplicate Cone
- In the above example, we made our Length = Width = 6.25 Inches
- Move the Duplicate Cone so that it is slightly above the Original Cone
- Change the Duplicate Cone to a Hole
- Hint: Select the 'Hole' tool which is located in the Shape Toolbar
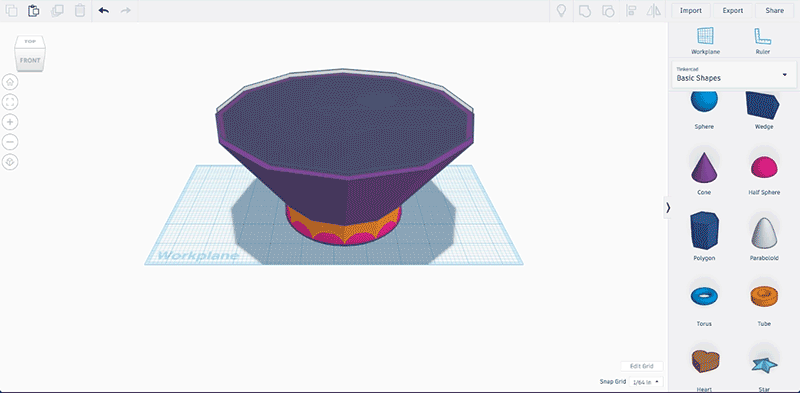
Part B:
- Use the Group tool to combine the Duplicate Cone and the Original Cone. This will create a hole in the top of the Crown.
- Click & Drag your mouse across all of the Shapes on your Workplane
- Use the Group tool to combine all of the selected Shapes on your Workplane
- Feel free to change the color!!
Voila! You have just made a Crown fit for the Queen of Wakanda using Tinkercad!
Step 7: Tips and Tricks to Further Customize Your Crown
When it comes to your Crown, it's very important to customize it in order to make it your very own.
As you have seen so far, Tinkercad allows for you to make quite advanced CAD Models using a variety of Basic Shapes and techniques. For example, you can easily change the color of your Crown or add any other customization that speaks to the Wakandan inside of you. For a little inspiration, look at the customization we did with our Crown!
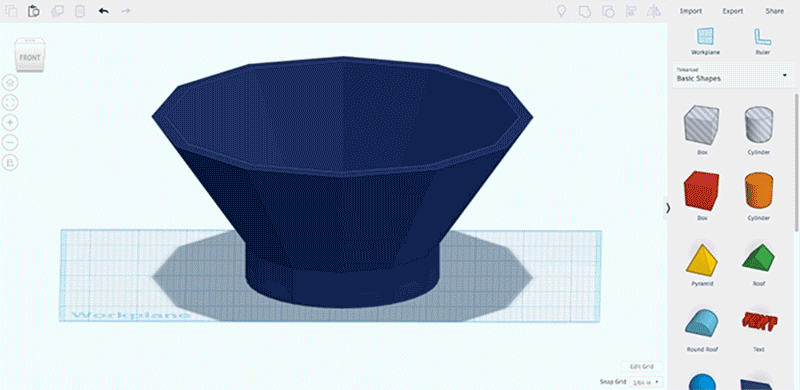
Now, go ahead and play around with our Customized 3D Crown below. Use your mouse or trackpad to move, zoom, and rotate the model. Hint: You can also use the control buttons on the top left corner of the screen.
Don't forget to share snapshots of your creations with us on Social Media using the Hashtags - #MakeAnything #BlackPanther #Mbadika.
Step 8: Bonus: Export Crown for the 3D Printer!
If you have access to a 3D Printer; Congratulations! You can make your Crown CAD Model into reality.
On Tinkercad, you can go to the upper Right Hand Corner and Export your CAD Model as a .STL File which you can upload to the 3D Printing Software which corresponds to your specific 3D Printer.
- If .STL sounds a like an alien format, don't panic just yet. STL files are a very popular file format for 3D or CAD Models and its similar to exporting a Document as a Microsoft Word (.doc) or PDF format (.pdf).
- Once you upload the .STL File to your 3D Printing Software, the software will transform your CAD model into a language that machines, in particular 3D Printers, can understand.
So, in order to recap:
- .STL = Language for 3D Modeling and Printing Software
- .gCode = Language for 3D Printers to understand CAD Models
In our case, we used Autodesk Print Studio, which allows for you to upload .STL files and convert the file into the .gCode that corresponds to your specific 3D Printer.


