

Introduction: Absolute Angle Encoder


This instructable explains how to make an absolute angle encoder using an Arduino UNO R3, a reference capacitor, and a variable capacitor.
The readings are absolute in that the current angle is displayed when the encoder is powered up.
Accuracy is better than 1 degree over the entire range.
The estimated cost of materials is less than $20.00.
Images
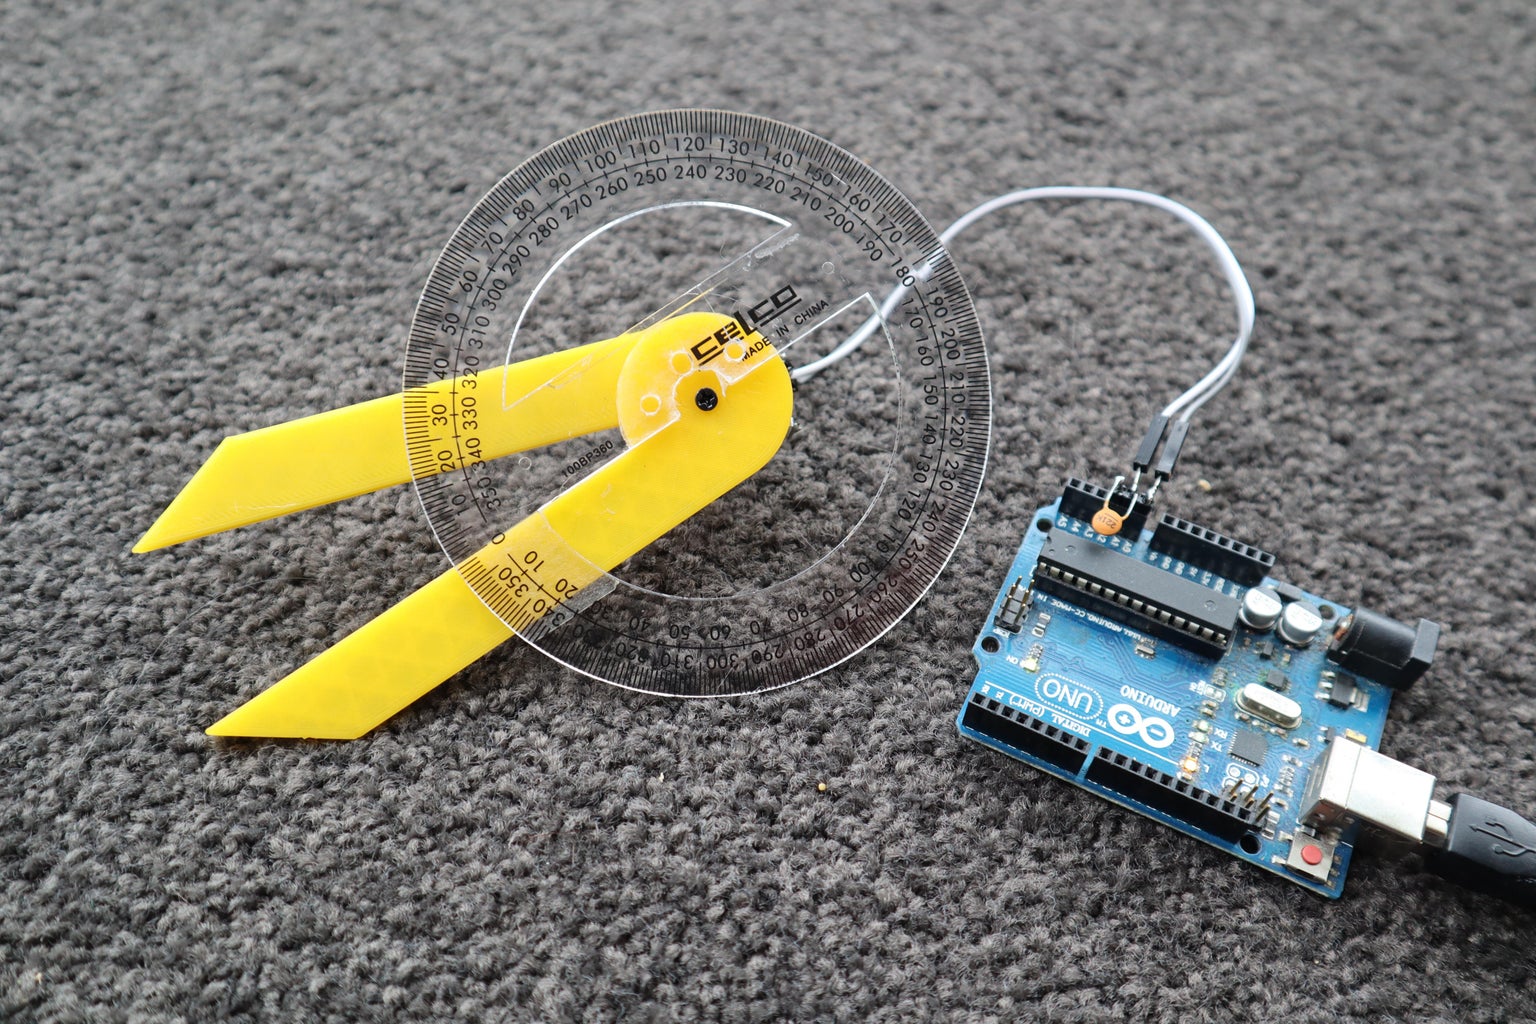
- The cover photo shows the capacitance meter attached to an Arduino UNO R3. The reference capacitor is the small brown blob.
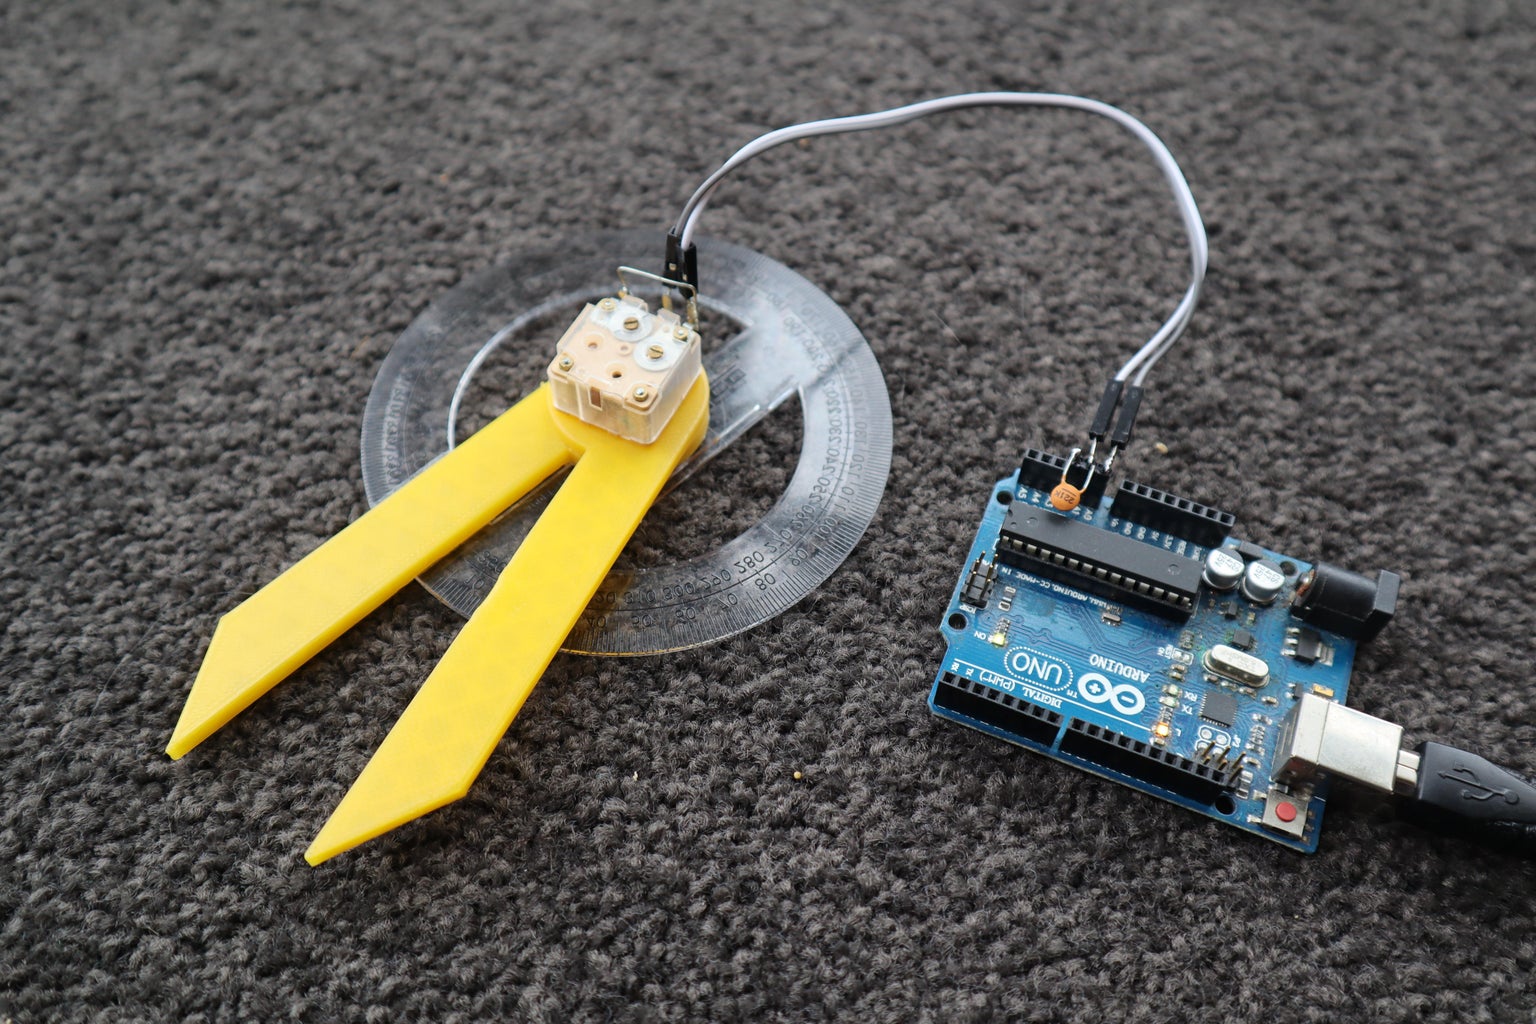
- Photo 2 shows the encoder underside.
- The video shows the encoder in operation.
Supplies
The followings parts were obtained from https://www.aliexpress.com/
- 1 only Arduino UNO R3 with USB cable
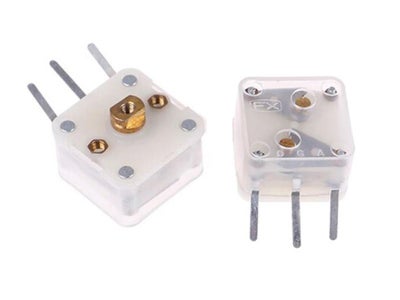
- 1 only 60pF/140pF variable capacitor for pocket radios (photo 1)
The following parts were obtained locally:
- 1 only 220pF disc ceramic capacitor
- 3 only M2.5 x 5mm flat head Phillips Drive bolts
The estimated cost of materials is less than $20.00.
Step 1: Circuit Diagram
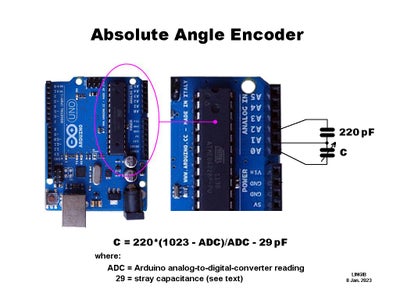
The circuit diagram is shown in photo 1.
The variable capacitance is represented by C.
Both sections of the variable capacitor are wired in parallel.
The internal trimmer capacitors have both been set to minimum.
Step 2: Theory
The circuit is a variation of the simple capacitance meter described in my instructable https://www.instructables.com/Simple-Capaitance-Meter/
The reference capacitance has been reduced from 10nF (nanofarads) to 220pF (picofarads) to improve the resolution.
A small variable capacitor is used for capacitance C.
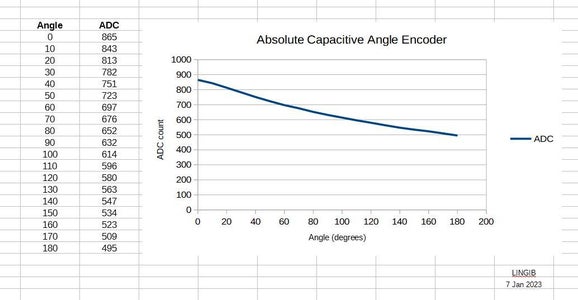
In this project we are not interested in the capacitance values. Instead the variations in ADC count are recorded into an array at 10 degree intervals.
Photo 1 shows how the ADC count varies when the capacitor shaft is rotated.
The absolute angle is determined using the array and interpolation as shown in the following code.
// ----- Interpolation table
/* ADC Count at 10 degree intervals */
const int Lookup[] = {865, 843, 813, 782, 751, 723, 697, 676, 652, 632, 614, 596, 580, 563, 547, 534, 523, 509, 495};
// ----- Interpolate
for (int i = 18; i > 0 ; i--) {
if (Lookup[i - 1] > Adc) {
Serial.print( ((float)(Lookup[i - 1] - Adc)) / ((float)(Lookup[i - 1] - Lookup[i])) * 10.0 + (i - 1) * 10.0);
break;
}
}
The final resolution is within 1 degree.
Step 3: Software
Method:
- Download the attached file “absolute_capacitance_angle_meter.ino”
- Copy the contents into a new Arduino sketch. (Use a text editor such as Notepad++ ... not a word processor.)
- Save the sketch as "absolute_capacitance_angle_meter" (without the quotes).
- Compile and upload the sketch to your Arduino.
Attachments

Step 4: Calibration
Method:
- Attach a protractor to the upper arm using double-sided tape.
- Upload and run the code
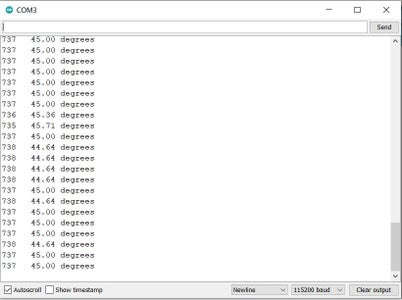
- Open your Serial Monitor at 115200 bauds.
- The left hand column in photo 1 shows the ADC (analog-to-digital-converter) count.
- Rotate the capacitor from 0 through180 degrees and record the ADC count every 10 degrees [1]
- Over-write the values (left-to-right) in the Lookup[] array found in the header.
- Recompile and upload the code to your Arduino
- Done
Note
[1]
Estimate the last count if your capacitor does not rotate a full 180 degrees.
Step 5: STL Files


Photo 1 shows the PLA arm on which the variable capacitor is attached. The STL file for this arm is:
- capacitive_encoder_arm1.stl
Photo 2 show the PLA arm that is attached to the capacitor shaft. The STL file for this arm is:
- capacitive_encoder_arm2.stl
All mounting bolts are M2.5 x 5mm
The arms were printed on a Voxilab Aquila 3D printer using 1.75mm PLA, a 0.4mm nozzle, and a layer height of 0.2mm


Step 6: Summary
This instructable explains how to make an absolute angle encoder using an Arduino UNO R3, a reference capacitor and a variable capacitor.
The readings are absolute in that the current angle is displayed when the encoder is powered up.
Accuracy is better than 1 degree over the entire range.
The estimated cost of materials is less than $20.00.
Click here to view my other instructables.

Participated in the
Anything Goes Contest


