

Introduction: Assassin's Creed Odyssey Snake Handle Sword


This sword was designed after the snake handle sword concept art found in Cosplay Guidelines released by Ubisoft for their 2018 Assassin's Creed Odyssey video game.

Requirements:
- Digital Files.
- 3d Printer
- Filament
- Glue
- Clamps (optional)
- Primer
- Metallic Silver, Metallic Black, and Metallic Brass spray paint. Metallic Copper spray paint is optional.
- Acrylic black paint
- Painters tape
- Gloves (optional)
- Sand paper of various grits
- Filler (such as wood filler or ABS slurry)
Step 1: Print the Design
Download the digital files from myminifactory.com.
Print each piece in 0.3 mm layer height with 15% fill. For more accurate fittings print 0.2 mm layer height with 20% fill. Design was split up into multiple pieces for easier print and to reduce the amount of print supports.
Step 2: Assemble the Design


Once all pieces are printed, begin gluing the pieces together. Each file piece is numbered so glue the pieces in order. Use clamps to hold the pieces together as the glue dries. I recommend giving the glued pieces 24-48 hrs to dry and set completely.
Step 3: Post Processing the Design
1). Once the glue has set completely, use a filler to fill in the seams of the design. Sand down the filler as needed.

2). Apply primer. After drying, sand the primer. I like to wet sand as it produces less dust, longer life of the sandpaper and allows a smooth surface compared to dry sanding. Apply additional primer as need and re-repeat the sanding process as needed.
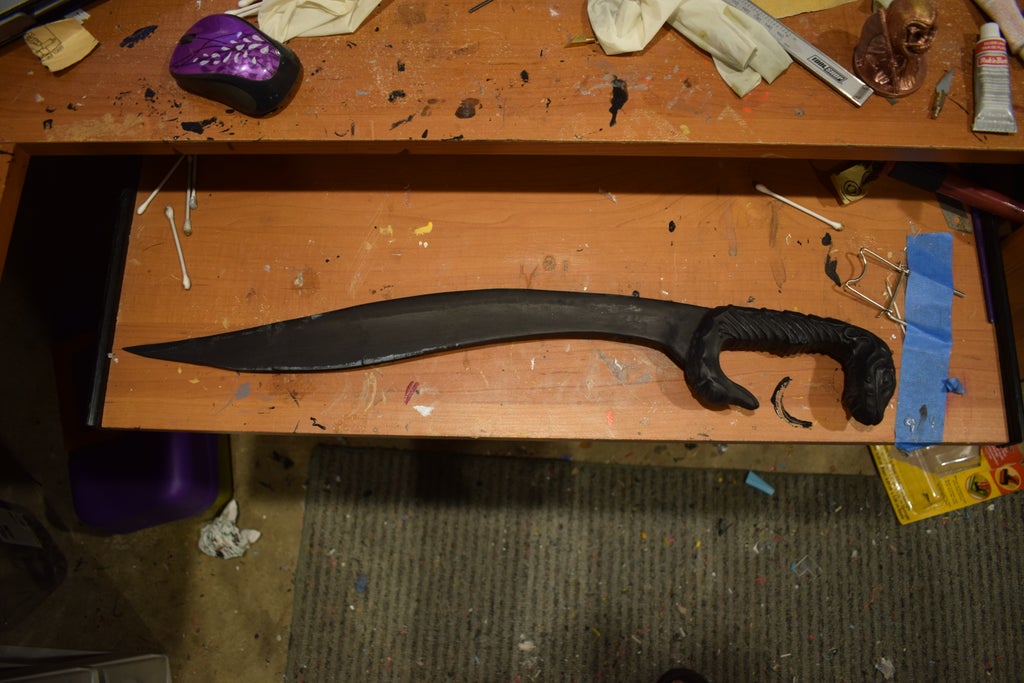
Step 4: Painting the Blade

1). In a well ventilated area, start painting the blade by applying a black base coat. I recommend wearing latex gloves to avoid getting paint on your hands if you do not hang the print for painting.
2). With the silver metallic spray paint make quick passes at a short distance away from the blade.
3). Repeat step 2 with the black paint.
4). Repeat steps 2 and 3 until you you have a galvanized metal finish. Vary the distance you hold the paint away from the blade for each color pass.
Step 5: Painting the Handle
1). Mask off the upper part of the blade below the handle. This will help prevent you from accidentally painting the blade with the colors for the handle.

2). Begin spray painting the handle. I ended up switching between brass and copper paints for a "chameleon" like effect.

Step 6: Add Dirt Effect.

Only brand new swords are shiny. A used sword is going to have some dinginess to it. With some black acrylic paint, rub in the black paint to the low points and edges of the design. Wipe off excess paint.
Step 7: Add Edge Details


With silver paint, paint the edges of the design. These are mostly the raised areas of the design.
Step 8: Final Results


