Introduction: Gliding Car
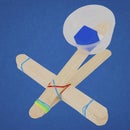
This car is designed to be pushed off of a tabletop, glide gently to the ground, and continue rolling!
You can find the lesson plan, 1-page project sheet, and more project ideas at STEM-Inventions.com
Step 1: Materials
The Engineering Creation Kit has everything you need for this project and many more from STEM Inventions.
- Hot glue gun for kids
- Craft sticks
- Milkshake straws
- Skewers
- Cardstock
- Wheels(Bulk pack)
- Masking Tape (Dispenser)
When you make a purchase through these links, I may earn an affiliate commission at zero cost to you.
Step 2: Advanced Idea: Flying Car
This advanced idea uses the same rubber band motor as the Rubber Band Helicopter project.
This particular design is too heavy to be lifted by the propeller, but the thrust does carry the car off of the table and continues to swiftly propel it as it descends.
Step 3: Safety, Tips and Troubleshooting
- Don't allow students to carelessly fling their cars around. All launches should be deliberate and measured.
- If students try to throw their car to find out if it can fly, be sure that they do so in an unobstructed area that is clear of other students.
- If the car is somersaulting backwards, check for: it has weight at the front; the wings are not too big; the wings are positioned in the center of the frame; the tail is not bent sharply upwards
- If the car is somersaulting forwards, check for: the wings are positioned in the center of the frame; the leading edge of the wing is not bent downward
- If the car is turning sharply in one direction, check for: the wings are not centered; one wing is bent at a significantly different angle than the other wing; the user accidentally flinging the car sideways during launch
- Adding more weight to the front can help solve these problems to an extent. Extra weight will pull the car in a straight path, helping the car overcome minor to moderate flaws in the wings and tail.


