

Introduction: Skull Buttons


All the best things are custom: custom paint job, custom tailored clothes, and now, custom shirt buttons! I've wanted a nautical/pirate themed shirt for a long time, but they just don't make fun adult clothes like they do for kids. When I finally found a fun patterned shirt that hit the sailing theme I knew it was time to make some custom buttons to really take things to the next level.
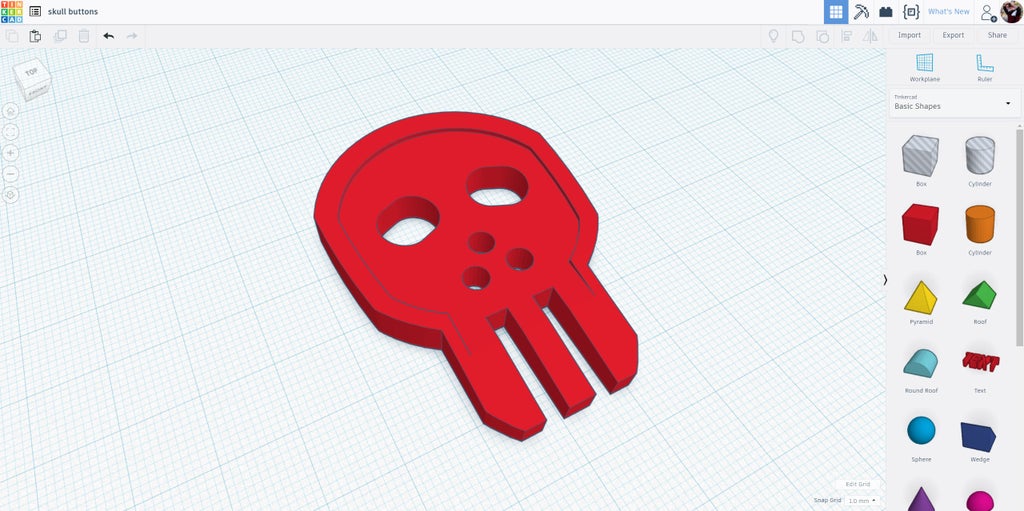
For this quick project I used Tinkercad, a totally free browser-based CAD tool. Though it may look playful and simple (and, it is), it's actually a power design tool with a very high ceiling with loads of features. Below you can see the design process as I was making my custom buttons.
My Tinkercad file is free to remix and use however you like. I'd love to see your variations and creations, so please share in the comments below if you've made your own!
These custom buttons really give my naval shirt a new spin, and the detail I added is satisfying when someone notices. Feel free to download the STL file below and print off your own, or follow along as I show you how I made these buttons and try it yourself.
Ready to button up your modeling skills? Let's make!
Attachments

Step 1: Reference Measure

Before starting any design I wanted to ground myself with some baseline dimensions of what a normal adult button is. To get an accurate reading I used digital calipers.
Measuring in millimeters is great for accuracy, but also translates very well to the Tinkercad interface, which is what I used to model the buttons. Tinkercad is free and browser based, so there nothing to download!
I'll make the buttons in this Instructable resemble a skull, but you can make any shape you like.
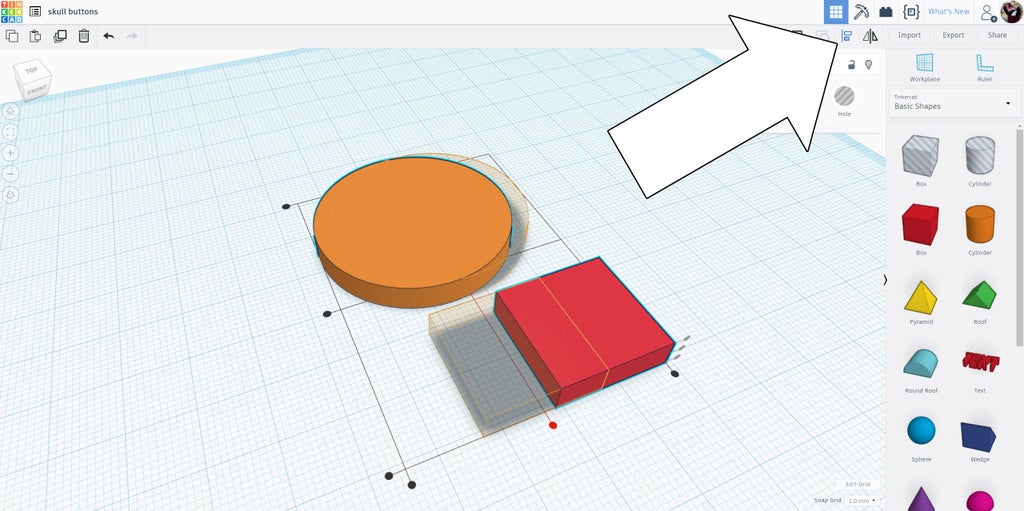
Step 2: Start Dragging Shapes

Start a new design and drop in a box and a cylinder onto the workplane. Select both primitives and grab the white handle on the top of the shapes to flatten them down. No need to be exact here since we'll be modifying the shapes again, just so long as they are the same height as each other. I think I used a height of about 7mm.
Select both shapes and use the align tool in the top right to align them along one axis.
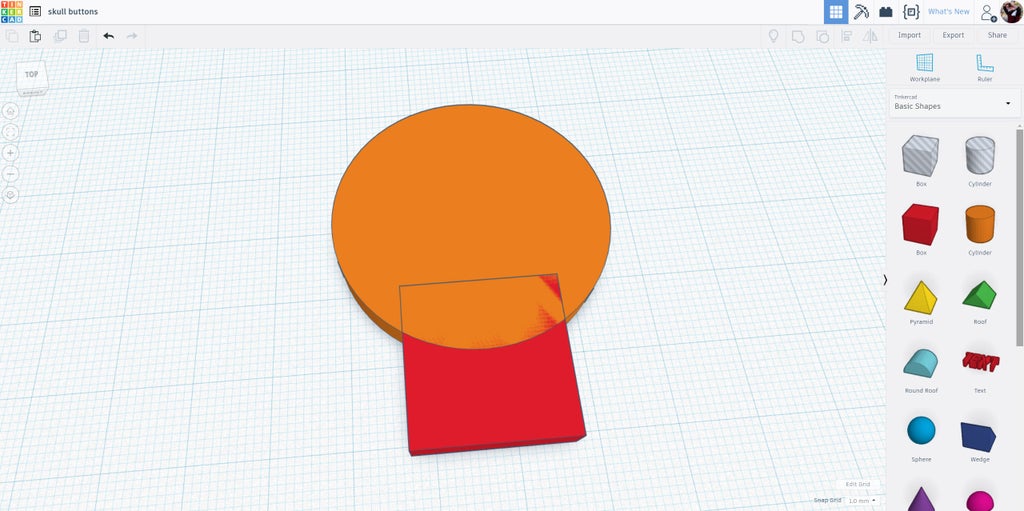
We want the cylinder above the box, but don't want to mess up their alignment with each other. Simply hold the shift key while moving the shapes to keep them locked to an axis while they are being moved.
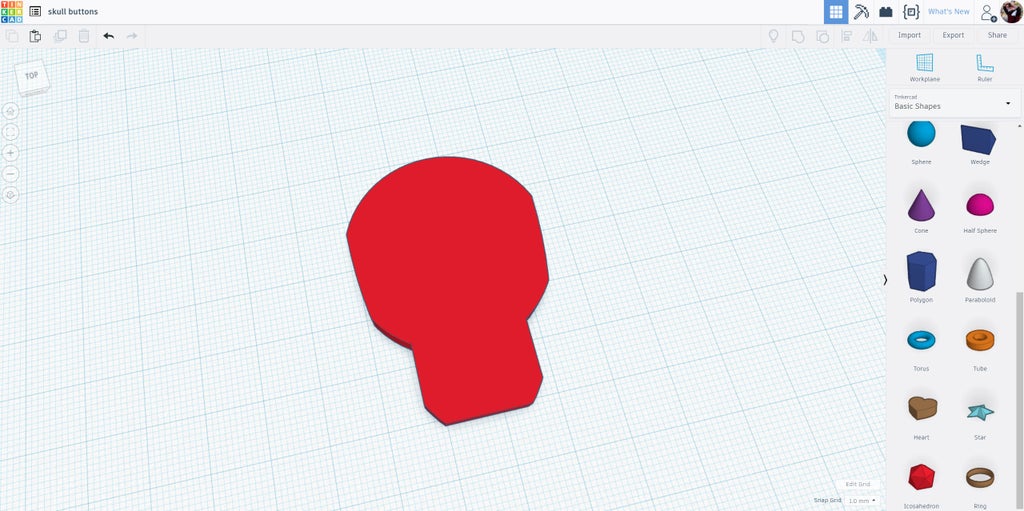
This is the basic shape of the skull.
Step 3: Refine Shape Perimeter

To give these primitives more definition I used a tube shape, found by scrolling down the shape list on the right side of the screen. Once the tube was on the workplane I increased the sides from the options window that appears, this will give the tube a smooth appearance. In the same options window make the tube a hole.
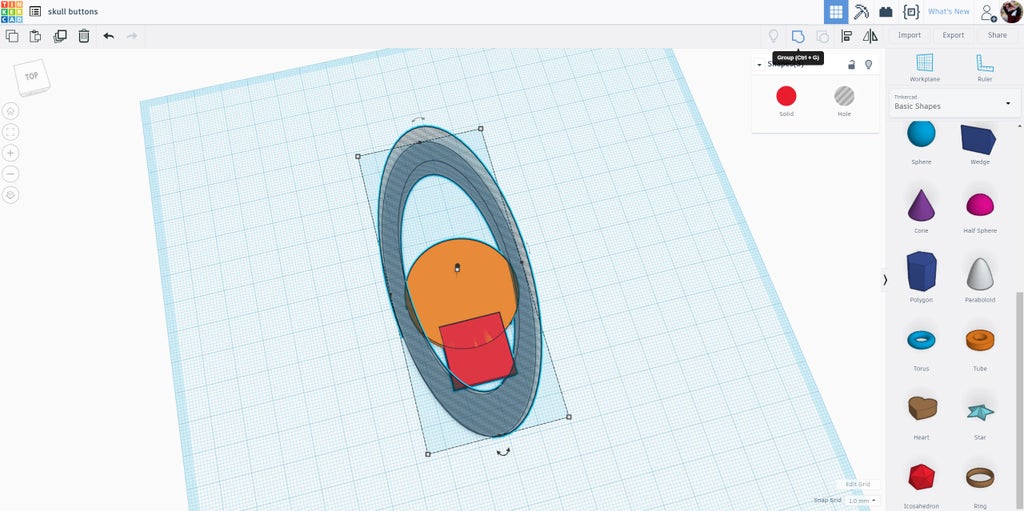
The tube was aligned with the cylinder and box along the axis to place the tube in line with the shapes. The tube was moved into the middle and the black center handles on each end were used to elongate the tube. The aim is to have the inside of the tube clip the sides of the circle and the corners of the box.
When the hole tube was in place all 3 shapes were selected and grouped using the group button on the top ribbon.
Step 4: Face Cutouts

With the basic skull shape done, some openings can be made to create eye holes, a nose, and teeth. To give the eyes a little more shape than just a cylinder hole I chose a metacapsule, which is an elongated circle shape. You can find that shape by clicking on the basic shapes box on the right side of the screen, scrolling down to featured shape generators, then finding metacapsule.

A matacapsule shape, a cylinder, and a box were dropped onto the workplane and all made into holes.
The shapes height were reduced to be slightly higher than the skull, this makes them easier to deal with placing and sizing.
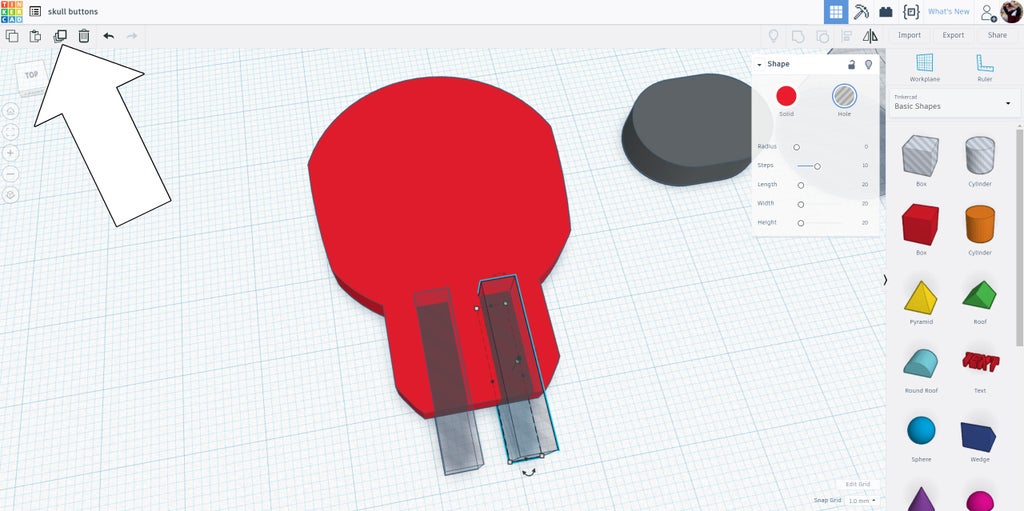
The box shape was elongated along one axis and narrowed on the other, creating long rectangle shapes. These boxes will be the gaps between the teeth, and were placed on the bottom of the skull. When I had one gap in place I used the duplicate command, ctrl+D or the button on the top left of the screen. The duplicated shape will appear in the same place the as the original, so you can just drag the shape off the original. Hold shift to lock the direction while moving the piece to keep the tooth gaps in line.
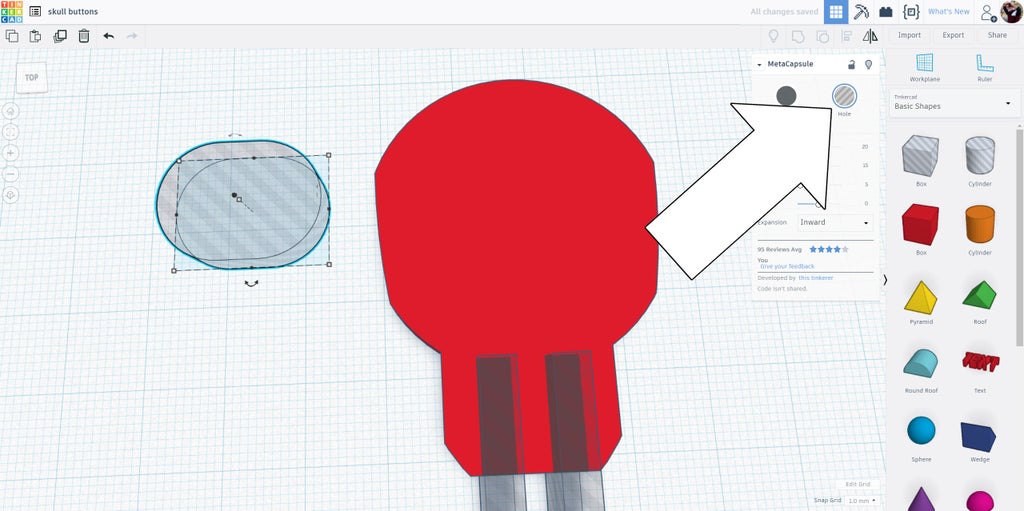
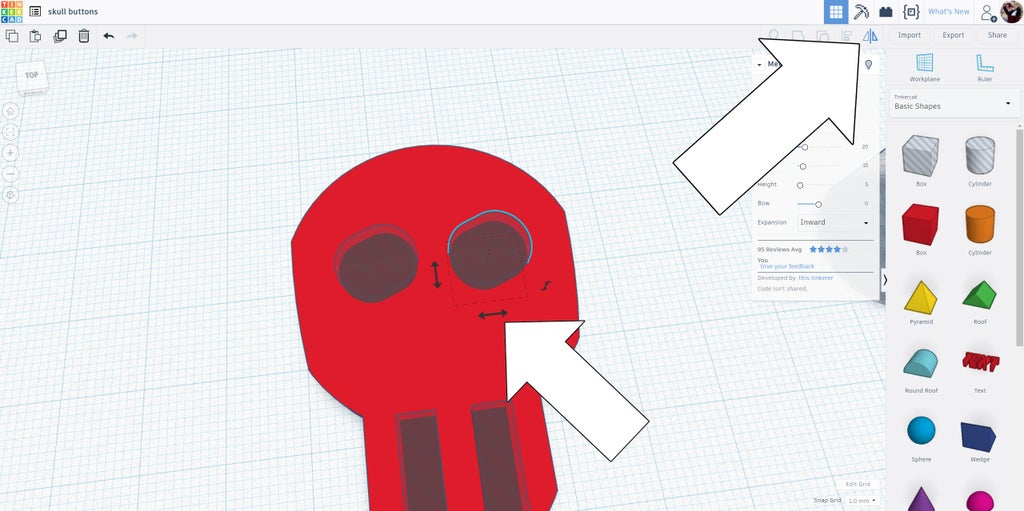
The metacapsule was resized using the small black handles on the sides of the shape, giving an eye socket shape. If you haven't already, make the shape into a hole.
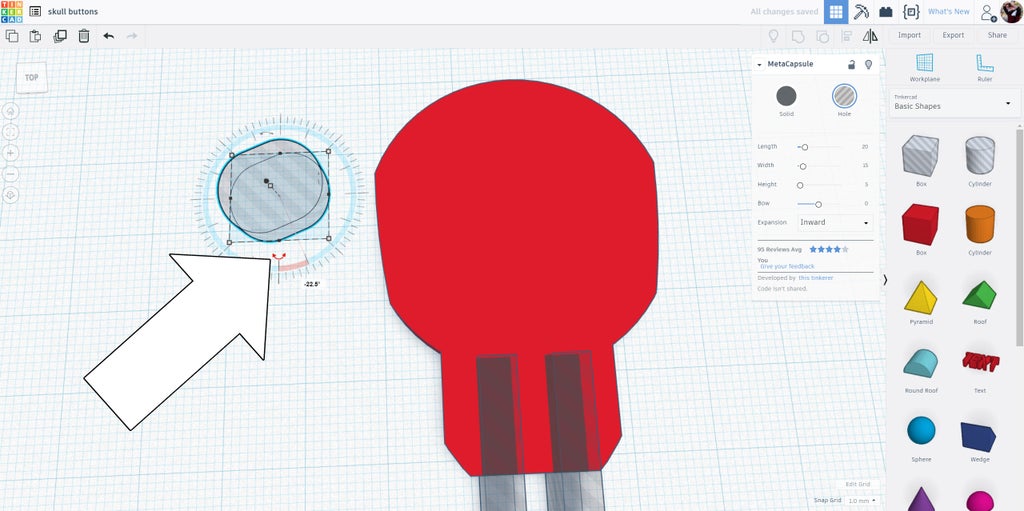
With the metacapsule selected the rotational arrow was clicked and dragged to rotate the shape about 22°. The metacapsule was then moved into place onto the skull where the eye should be.
The matacapsule was then duplicated, moved over while holding shift to keep it locked along the same axis.
The duplicate made is of course facing the wrong direction. We could rotate it using the grip arrows on the shape, or we could just use the mirror button in the top right, then selecting which axis we want the rotation.
The nose cavity openings will be where the buttons are sewn onto the garment, so need to be large enough to fit a needle through. I also decided to be creative and try doing a 3-hole opening instead of a traditional 4-hole that most buttons have.
The cylinder was resized, holding shift while dragging on the white corner handle of the shape to constrain the proportions.
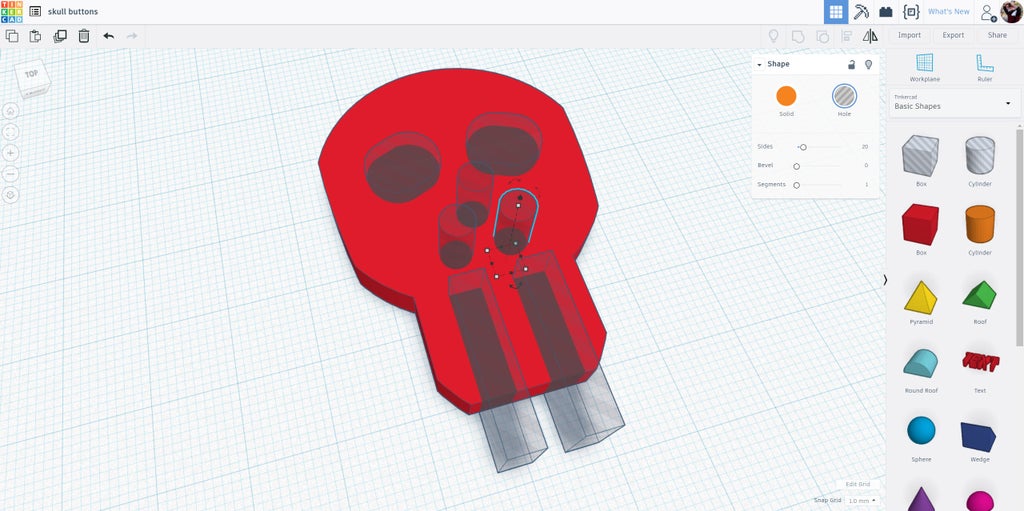
The nose openings were positioned in the center of the skull and arranged in a triangle configuration.
Step 5: Button Ridge

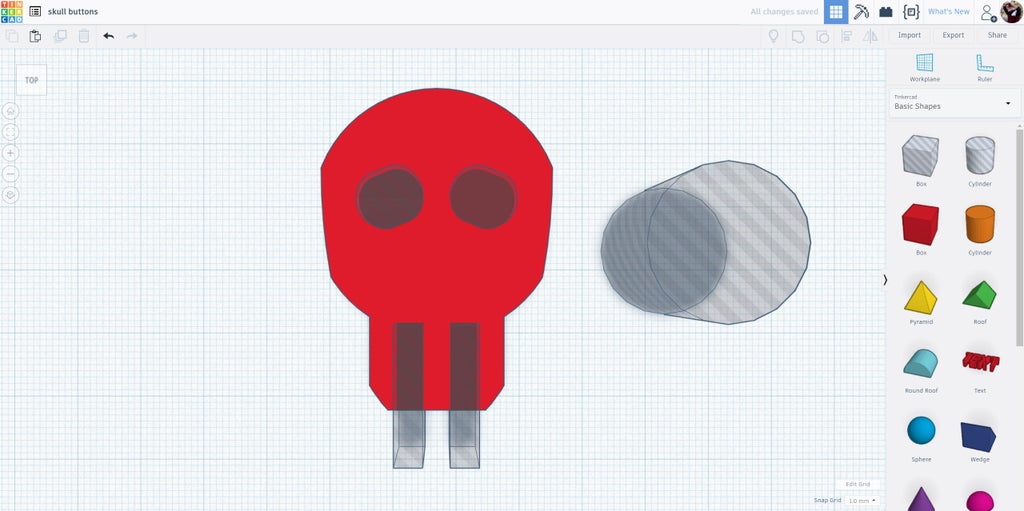
Clothing buttons have a thick edge that gives the button strength and prevents the button from slipping through the button hole. To make something like that select the skull shape and make 2 duplicates, moving the copies to the side.
Make one of the copies a hole, keep the other copy as a solid but enlarge it by holding shift and dragging one of the white corner handles to constrain the proportions. The height will also increase when the copy is enlarged, so reduce the height back down to match the original.
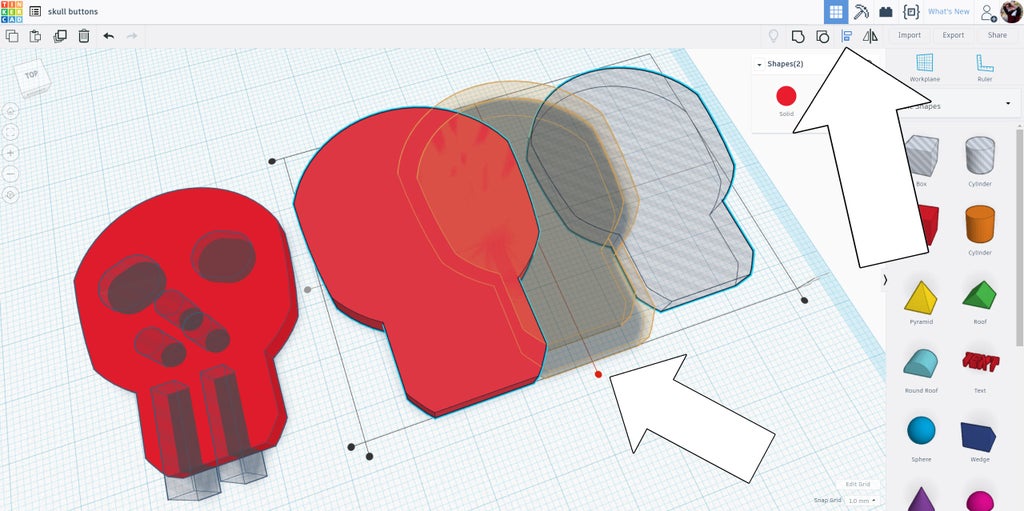
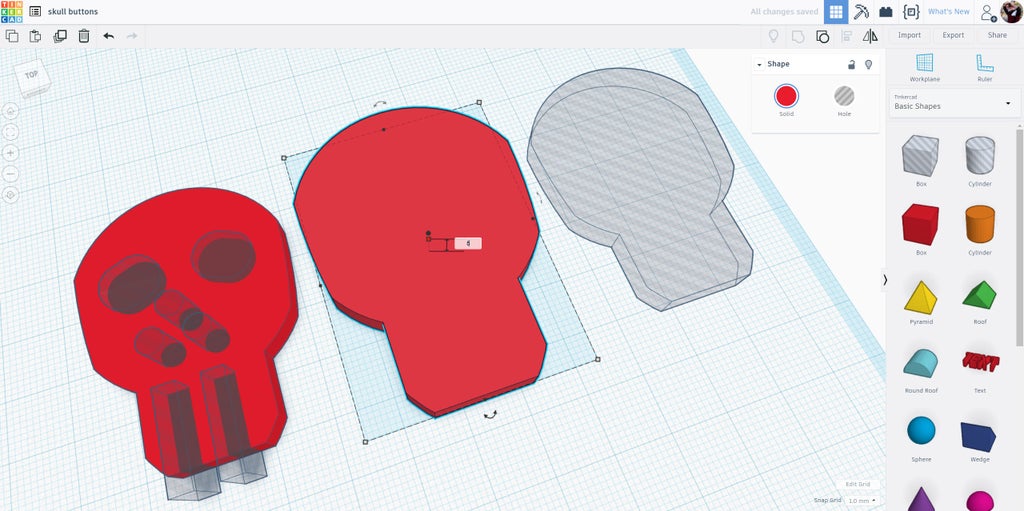
Select the hole copy and the enlarged copy, then align them by using the align tool.
Use the group tool to group the enlarged copy with the hole copy, creating a cutout of the skull. We'll use this to make the raised perimeter for our button.
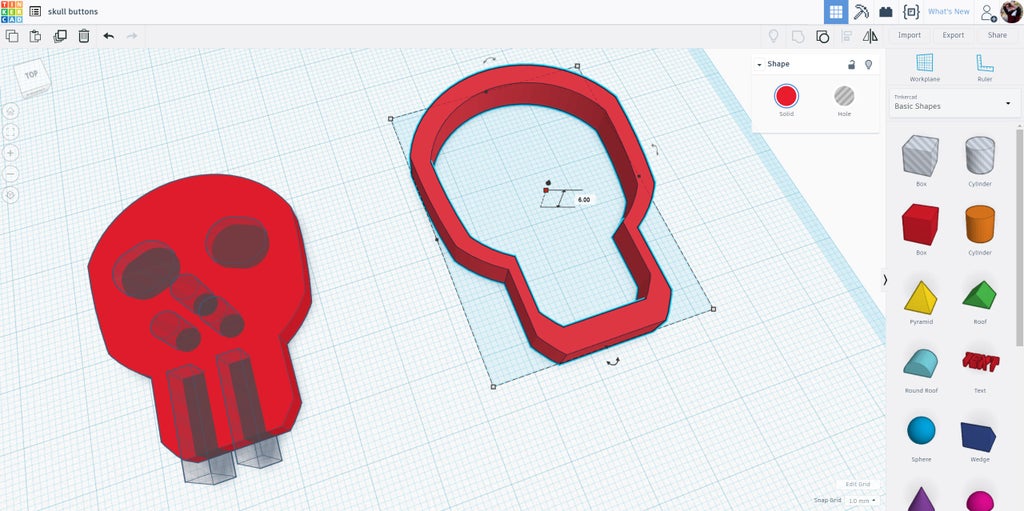
Step 6: Combining Shapes

Move the cutout shape back onto the skull design with the hole shapes for the face. Before grouping everything, change the height of the cutout shape to be a few millimeters higher than the base skull.
Drag a window around everything and click the group button, or ctrl+G.
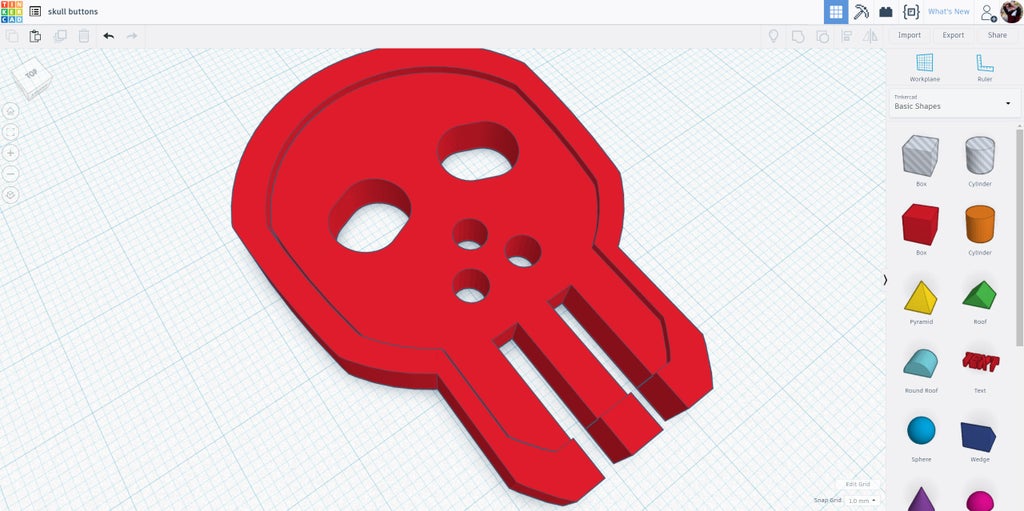
Step 7: Taper Teeth

You could stop here and be totally fine, but I wanted to take the design a little further by taping the bottom teeth so they would be less likely to catch on the clothing when buttoning up.
A new box hole was dragged on the workplane and reshaped until it was wide enough to cover the teeth.
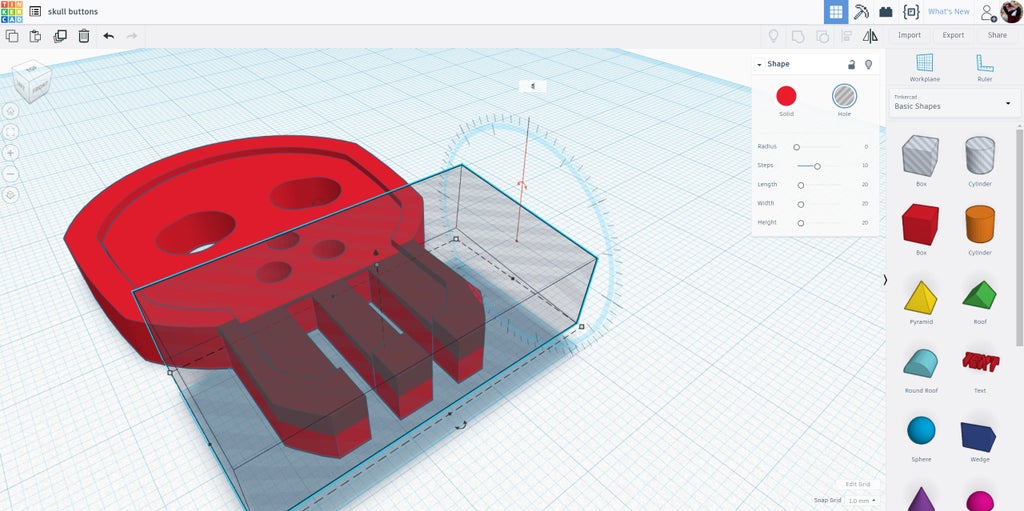
The box hole is dragged over the teeth area, ensuring complete coverage, and then raised off the workplane to the top of the button face. The rotation arrow is clicked and dragged to give the box a ~10° incline.
The box hole was then height adjusted to cut through the teeth section without removing too much material. The rotational angle can be adjusted, or you can use the undo command ctrl+Z to revent back to before the initial rotation.
Here's what my button looked like after clipping the top of the teeth off.
Step 8: Final Sizing

The last step was to make any small dimensional changed to the button to make sure it was the right size.
When sizing, it's important to make sure your sewing holes don't become t small that your needle won't fit through them any more.

I sized this button to be 3.5mm thick, just like my reference button.
Step 9: Print

I printed a matrix of 9 buttons on my printer. I used a Makerbot for this print. However, desktop 3D printers have dropped dramatically in price over the last year, with great printers to be had for under $400. I've had great success with my Creality CR-10 printer, which has a build volume much larger than the Makerbot for a faction of the price. I couldn't use it for this build as it was printing something else at the time I took this footage.
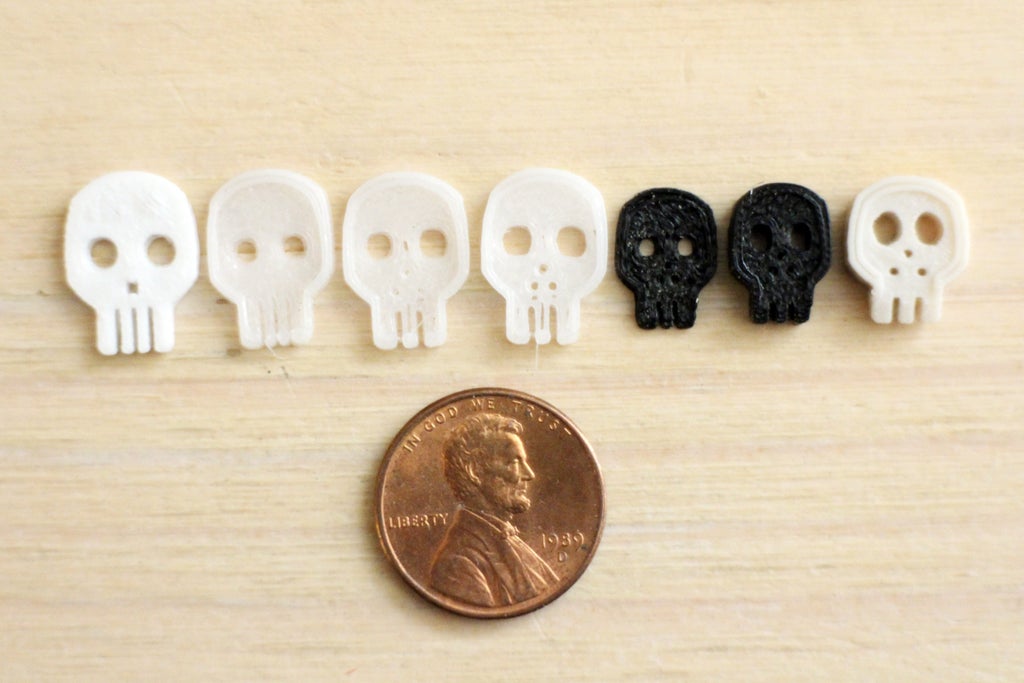
Here are the iterations of the buttons as I was refining the design. I started much larger and thinner than I wanted, and the narrow teeth bent easily. I moved on to making a border, enlarging the eye sockets, and making the nose openings for sewing larger.
Step 10: Remove Factory Buttons + Sew New Buttons

To sew the new buttons I needed a needle and thread that matched my garment, I also need a seam ripper to remove the buttons from the shirt.
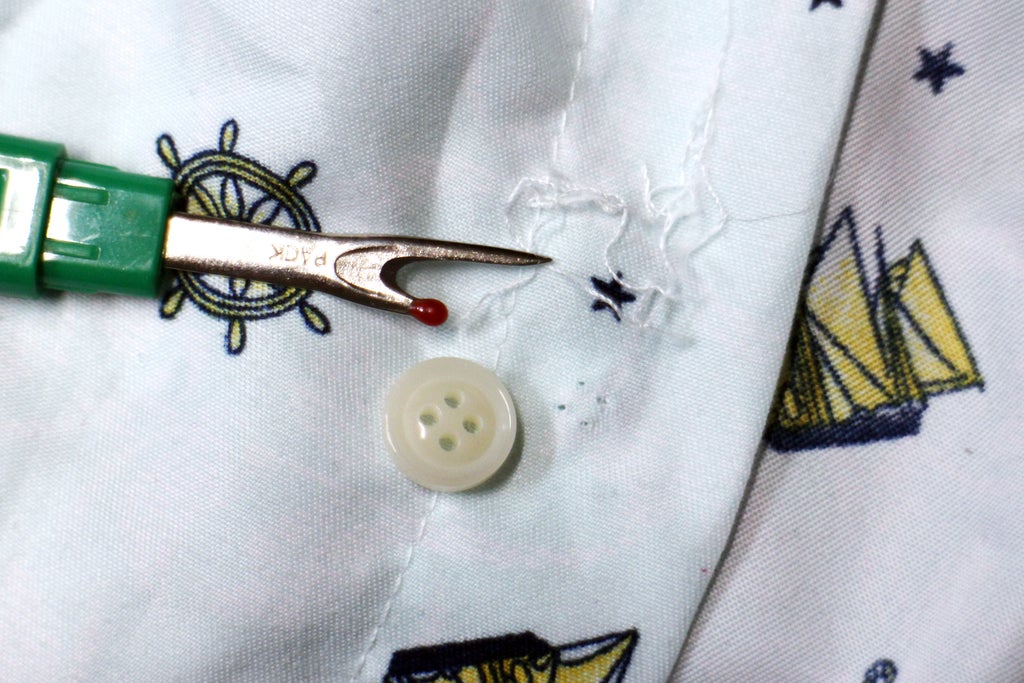
The button threads were carefully severed, then gently removed from the shirt. Once the button was removed it left clear openings where it was stitched to the shirt, allowing me easy reference on where to place the new buttons.
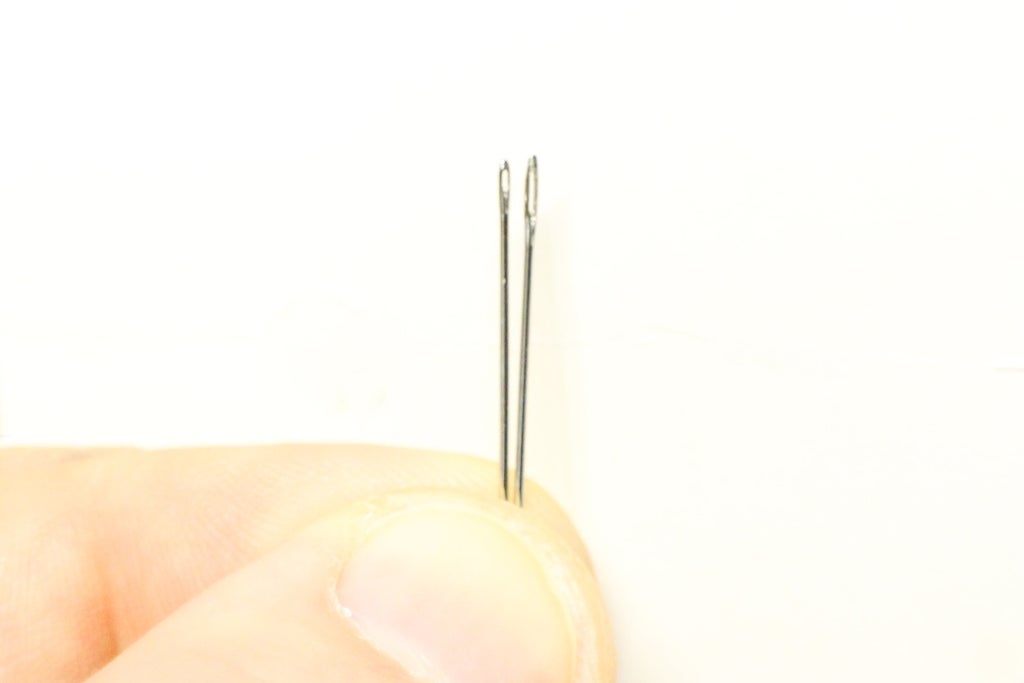
The sewing hopes in the nose of my skull buttons was quite narrow. While both of the needles show above fit through the openings, the one on the left had a much narrower eye at the end of the needle, so that's the one I used.
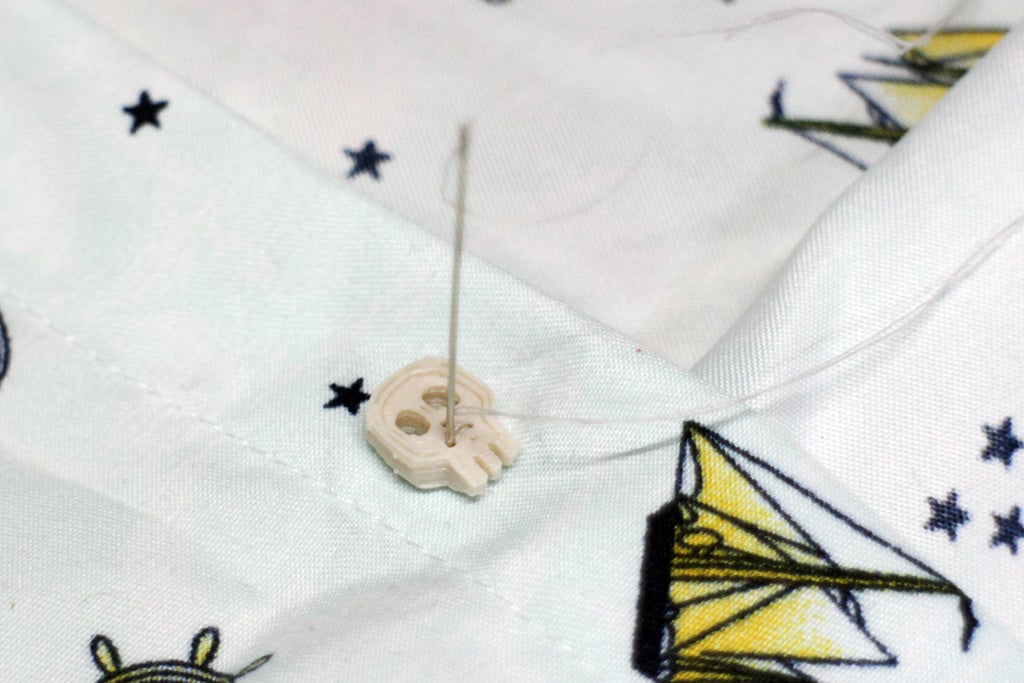
Thread the needle and start sewing from the back side of the fabric, drawing the needle through the existing button hole opening. Thread the button onto the needle, then plunge the needle in a different nose opening and into the fabric. Repeat the process through all nose openings to secure the button.
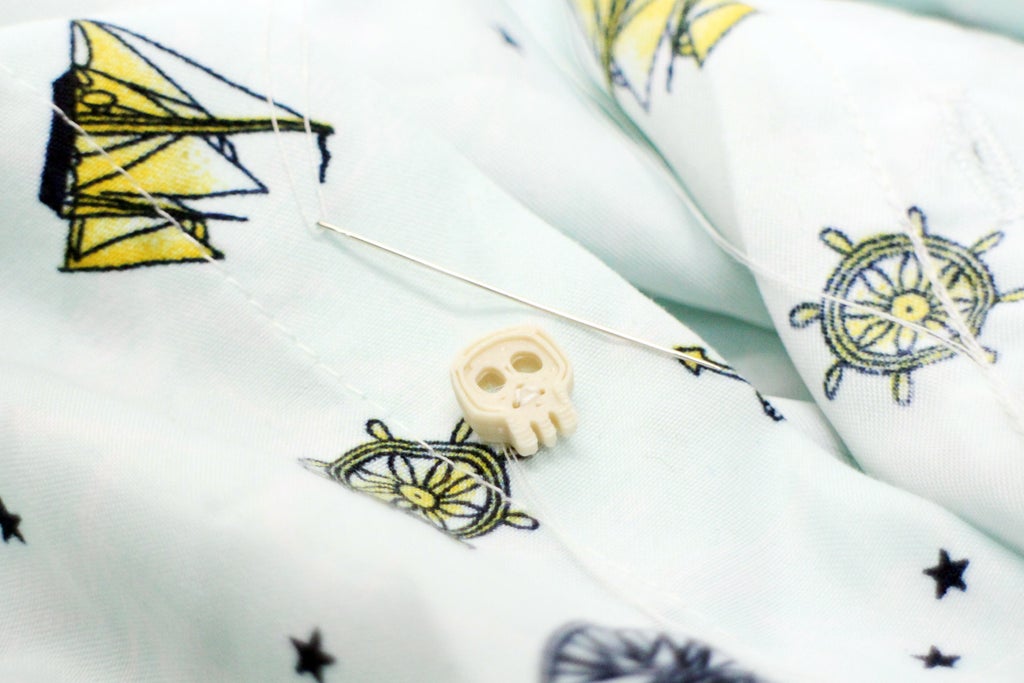
Before cutting the thread, pass the needle through so it exits in between the button and the shirt, then wrap the thread around underneath the button. This will tighten up the stitches and create a small standoff under the button, making buttoning and unbuttoning easier. Thread the needle through the windings then cut and tie off. Repeat for all buttons.
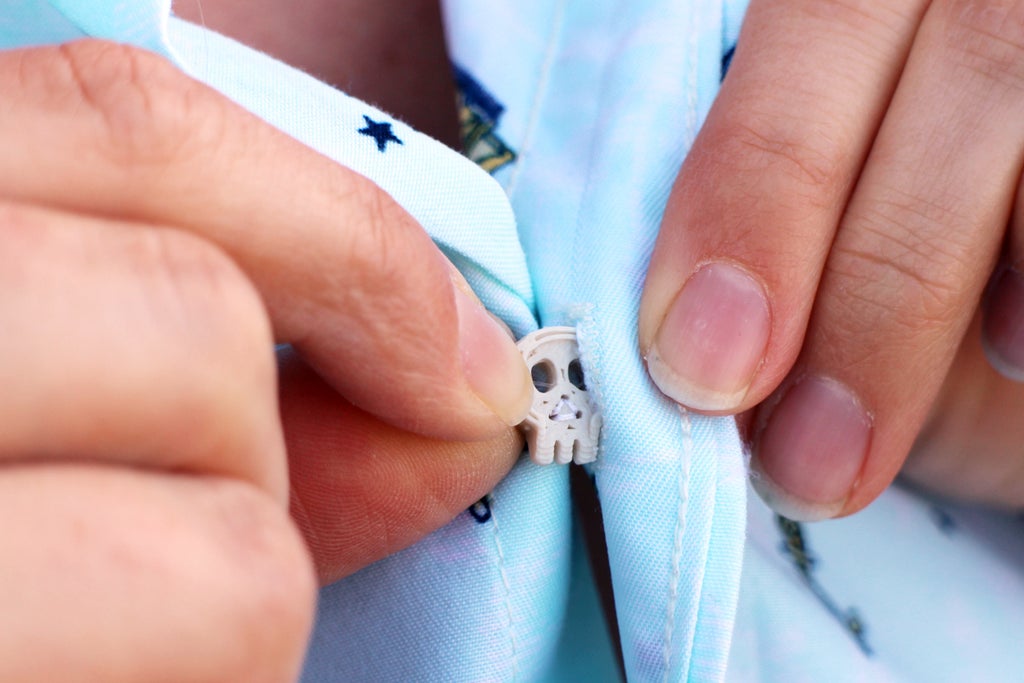
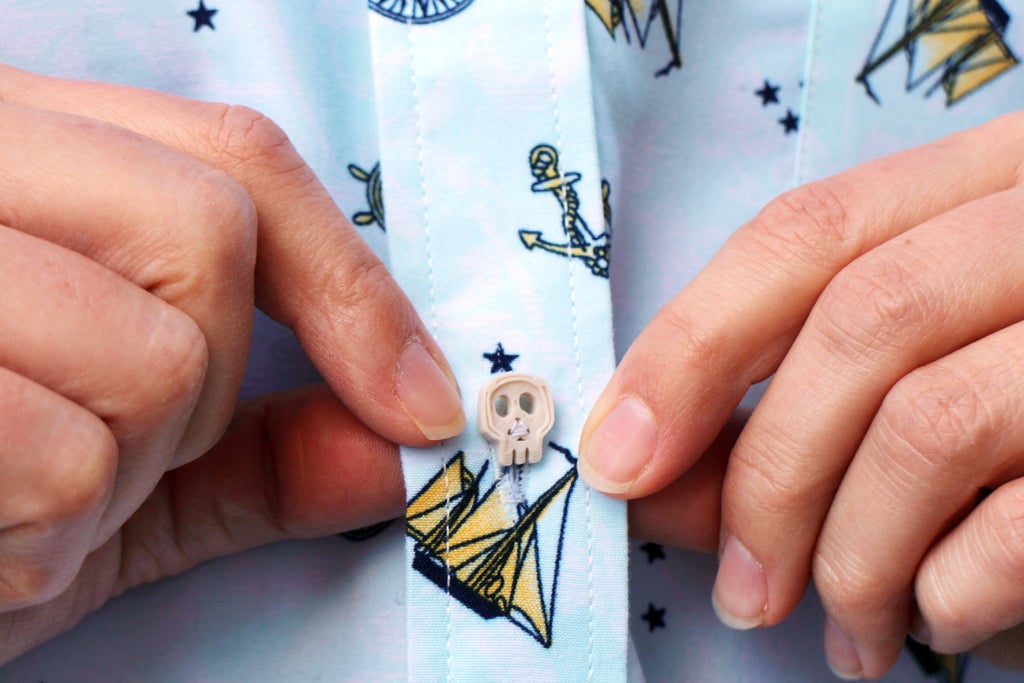
Step 11: Stay Classy

These subtle buttons give you some fashion swagger that only the truly observant would notice, and when they do you'll give them a knowing wink.
Of course, skull shapes aren't the only button designs you can make with this. There's really no limit to what buttons you can make with this technique: how about letters that spell your name, or hamburgers, or dinosaurs, or... Well, maybe you can show me your best creations.
Happy making :)
Have you made your own custom shirt buttons? I want to see them!
Happy making :)

Participated in the
Sew Warm Contest 2018

Participated in the
Epilog Challenge 9


