

Introduction: App Controlled Colour Cloud


Hi,
in this instructable I show you how to build a room lighting from a gravel path grid. The whole thing can be controlled via WLAN with an app.
https://youtu.be/NQPSnQKSuoU
There were some problems with the project. But in the end you can make it without special tools. Patience, some courage and time.
Before we start: if you like the project, please vote for me in the plastics competition :)
THANK YOU
Supplies
- White Heavy Duty Gravel Grid
- Wemos D1 mini
- Soldering stuff
- adressable RGB-LEDs
- a baseplate (i've used 3mm plywood
- a diffusor (i've used very thin white plastic sheet)
- Lots of very small screws (or a very good and suitable glue)
- drillpress makes it much easier
- cutting tools
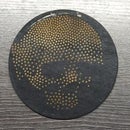
Step 1: Honey Combs


I still had a remnant of the grids left over from the gravel path. Big enough for a decorative object. And these honeycombs look just too good to hide under the gravel.
I roughly taped a kind of cloud shape with tape. Then I marked the shape with a marker and cut it out with a scroll saw. You can also cut it out with a handsaw, jigsaw or angle grinder. The material is apolar plastic. Very easy to work with, but almost impossible to glue.
Polypropylene.
Step 2: Baseplate


In the previous step I wrote that this kind of plastic cannot be glued.
Well, there are some glues which can be used. But none of them worked for me.
But since this plastic has a weed fleece, it can be glued very well to wood with wood glue. But you should not use as much glue as I did. Especially the part in the honeycombs. I had to remove it later by hand. That was very annoying.
So spread wood glue on the edges and glue it with a lot of pressure on a suitable surface.
I cut out the base plate with a starting cutter. But this is also possible with a saw.
Then you should clean the edges.
Step 3: LEDs


This part takes up most of the time.
First I made a template to mark the middle of each honeycomb to drill it later.
Just try on a piece of wood which drill fits best. With me it was 9,7mm. The LEDs are only plugged in. On the backside you should mark the wiring path (to that cable crossings somewhere).
Drill, plug, solder. And repeat.
Step 4: ESP8266 (Wemos D1 Mini)


The ESP8266 (an ESP32 would also work) is simply soldered according to WLED's instructions.
I have built in a quite big capacitor. Whether this is necessary, I can not say for sure. Just make sure, that you supply the LEDs separately with voltage. Just look at the power supply, how many amps it draws. I only used a 2A/5V (charger of a smartphone) as supply voltage.
-> https://github.com/Aircoookie/WLED/wiki
The level shifter is not necessary in this project. The software can be flashed either via the Arduino IDE or with the ESP tool. Nothing in the code has to be adapted. This can all be done later directly in the web interface.
(Using the ESP-tool and flashing a binary is as easy as copying a file on a harddrive.)
I can only recommend an ESP32 if you want to add a touch function for example.
The USB connector at the bottom is for power supply. So it was easier for me to hide the plug later.
Step 5: Diffusion


This is the part where everything went wrong for me at first.
Not until this point I had noticed that I can't stick/glue anything on the grid. So I took advantage of the small round connector pieces and drilled holes to screw on my diffusion foil. First I had to drill the small hole through foil and grid. Then another bigger one through the foil to leave enough space for the screwing. The foil also expands a little. And because it is so thin, it also tends to curl a little. But if you drill the holes in the foil big enough, none of this will happen.
Drilling, removing, drill bigger, place the screw. Repeat.
Step 6: Cut


Now I had a perfectly fitting foil, but it was still much too big all around.
To cut it to size, I drew the shape with a pencil and then removed all screws. Then I cut out the template by hand with nail scissors. OK. This is really no fun. But I have not found a better method.
A knife didn't work. The router didn't work, too.
Step 7: Final Thoughts


Probably you have already installed the WLED app before and tested it a bit.
The whole WLED project is just brilliant.
I am very happy with the result. The cloud goes off completely at night and starts again by itself in the early morning. Currently I am using the effect "Pride Parade" in low speed.
Especially because we don't have a rectangle or square here, the effects are very dynamic.
Next time I would just look for another diffuser. And directly use an ESP32 to add touch later. You could also install a light sensor.
So, if you like it:
please vote for me :)
Thx for reading.

Participated in the
Plastic Contest


