

Introduction: Scaffold Storage System


Just moved into an unfurnished flat and rather than do the Ikea thing, I've decided to build myself some furniture... First up, a storage system...
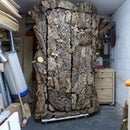
I decided to go with scaffolding tubing and planks as the base material. Scaffolding by nature is designed to assemble/disassemble easily, is strong and would give the piece a unique look. It is also modular, meaning you can always add to the unit if you require more space. Scaffolding, planks in particular, can often be picked up used meaning you can do it reasonably cheap..
Tools Needed:
Hacksaw
Saw
Allen Keys
Sandpaper/ Varnish
Spirit Level
Measuring Tape
Step 1: Design

I wanted this to be able to store the majority of my things so set about designing a unit that would have sections to accommodate clothes, sports/hobby stuff and tools. I also added a small desk/workbench for future projects.
I started by doing a simple sketch, keeping in mind the standards lengths I could purchase the scaffolding tubing and planks in to minimize waste material.
Step 2: Make


This project is very simple to do, only taking a day or two all together:
- Cut the tubing to length with a hacksaw
- Measure out any shelves that aren't 'off the shelve' lengths
- Cut the planks with a saw
- (Optional) I cut V-groves into the small shelves to help them locate on the cross tubes. I set my mitre saw to a 45° bevel, engaged the depth stop and cut. And then finished the cut with a hand saw.
- Sand and finish in your choice of vanish/stains/oils etc.
Step 3: Assemble


With everything cut, its time to assemble. The clamps simply tighten together with an allen key, so the whole unit goes up very quickly!
I just sat the planks on the cross bars without fixings which works perfectly well. You could also drill some some holes and bolt them down...
Finished and ready to fill with your stuff!!
Cheers for looking..


