

Introduction: Sculpted Oak Desk


Having not done a big project in far too long, I decided to use some work holiday to get back in the garage... Time to make myself a desk!
The designing started with hand sketching various ideas/forms. My requirements were to have a cabinet with a couple of drawers, one of which would be deep enough for document filing, additional drawers for pencils/drawing equipment ect under the top and a back panel I could mount a monitor stand to. The dimension were based on my old desk but slightly bigger. After I was happy with an idea, I progressed into some CAD modelling. From this I produced some rough, dimensioned plans to get me started. Scans of these have been included, they don't have all the steps required and I did end up making some changes during the build, but they were sufficient to get me through..
Hope you enjoy and please comment if you want any more details...
Materials:
- American white oak
- Maple for the drawer sides and back
- Plywood for the drawer bottoms
- Walnut dowel
- M6 and M10 Insert Nuts
- Connector bolts
- Threaded rod
- Wood glue
- Danish oil
Tools I used:
- Table, mitre, circular, jig' and hand saws
- Drill + bits
- Biscuit joiner
- Router
- Screw drivers, spanners
- Clamps
- Angle grinder with Kutzall carving disc and dremel
- Planes and spokeshave
- Files, rasps, sander
- Measuring tape, squares, angle gauges
and don't forget, safety glasses and dust mask!
Step 1: Desk Top and Main Legs


I started with the desk top... Using the table and mitre saw, 4 planks were cut to the width and length required. The length was made long enough for the actual top and the 2 side pieces that slope down underneath. The plank edges were planed to ensure they fitted together without any gaps. Biscuit joints were cut and the planks were then glued and clamped together.
The next day the desk top could be cut to length with 45° ends. The two sloping pieces then needed to be mitred at 20° and 30°, to vertical. This required them to be passed through the table saw upright, so I made a simple jig that could slide along the table saw fence and allowed the work piece to be clamped to it.
Pieces that would fit between the top and sloping slides were then cut. These would provide support to the sides which would be under load from the legs and cabinet, but also something to attached the drawer slides to.
The blanks for the main, long legs were then rough cut to length with a compound mitre cut at the top to allow them to splay out when fitted. These legs would be bolted through the left slope; first they were held and screwed into position. This allowed me to then use a 90° guide and 8mm bit to drill down through the slope piece and into the leg. Threaded rod with some epoxy could then be screwed into the leg. Each leg has 2 rods to prevent them rotating.
With the legs able to be assembled to the desk top, they were shaped. I made a simple tapering jig (sacrificial board with toggle clamps) which allowed me to pass the legs through the table saw and taper them from ~70mm at the top down to ~30mm. With a spokeshave a slight curve was worked into the underside and the edges rounded over. A piece to transition from the legs to the desk underside was also glued into place and later shaped.
With all the components finished for the desktop sub-assembly they were glued together..
Step 2: Back Shelf


2 planks were cut and glued together to form a panel for the desk back. Once dried the sides were cut to a 45° angle.
The shelf was made from one plank. To follow the shape of the back it needed to have mitres cut at 45° and 22.5°, these were cut to allow the wood grain to wrap up, across and down the shelf.
In order to allow my computer monitor to be mounted to the back panel, the width of the shelf was reduced in the center portion. This was marked then cut with a jigsaw. The entire front edge of the shelf was then chamfered at two different heights; using a router in the stepped back portion and the table saw for the sides. I then used a spokeshave and rasp to blend between these.
Slots were cut into the back of the shelf to allow cables to pass up to speakers that will sit on it.
The shelf and side pieces were then glued together. The shelf is attached to the back panel using insert nuts and connector bolts. The back panel is then similarly bolted into the desk top.
Step 3: Cabinet


The design I ended up with for the cabinet wasn't exactly square.... Looking at it from the front, the left side is offset by 10°, the right by 5° and the entire front leans forward by 10°... Lots of interesting angles to cut!
First I needed to glue up another panel that would be long enough to do all sides of the cabinet, this followed the same process as the panel for the desk top; cut>biscuits>glue>clamps . This big panel was then rough cut with a circular saw to the lengths required for each of the cabinet sides.
Using an angle gauge the table saw blade was set to the required angles and all the cabinet panels were mitred. Some pieces needed to be cut flat and others to be clamped to the sled to go through vertically, depending on whether the angle was more or less than the 45° max the table saw blade could be set to.
The top of the cabinet would be bolted to the right side of the desk top, with spacers to give a shadow gap between them. 6 holes were drilled to allow M10 bolts to be inserted through the cabinets little top drawer, and screwed into insert nuts that would be in the underside of the desk top.
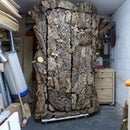
After all the pieces were cut and fitted, it was time for the glue up. In order to be able to clamp the pieces properly I glued small blocks near the edge of each panel with a notch cut in that would allow me to clamp perpendicularly across the angled joint. These could be chiseled off after the cabinet had dried and any marks sanded away. Lots of clamps required and straps added for good measure!
After this had dried, I went back and drilled holes across the joint to add dowels for extra strength. These were done on the non visible side.
Small legs/feet were then cut, tapered and fitted to the bottom of the cabinet in a similar fashion to the main legs. With both sets able to be assembled the legs could now all be trimmed to their final length. The desk was raised up on a workbench and made level. Measuring down to the floor and taking away the amount it was raised up by, gave a distance to work out what height to set a pencil to from the floor to mark the required desk height.
Step 4: Drawers


The drawers were all largely produced in the same way.
The sides were cut to length; and for the cabinet drawers also mitred and beveled to fit the cabinet shape. A rabbit was cut into the back of each drawer and a slot routed to accept the drawer slides. The internal front of each drawer also had a rabbit cut into it. The drawer back just needed to be cut to the correct shape and the four pieces could then have a groove cut near the bottom to fit the floating bottom panel into.
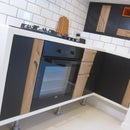
The bottom was cut in plywood and prior to gluing up the drawers; stained blue, then painted white. This was then lightly sanded to give a washed out look.
The drawers could then be assembled and glued together. After they were dry, I drilled and added some walnut dowel through the front of the side pieces into the front. This adds a bit of strength but is mainly for aesthetics.
The drawer slides could then be cut to width/length and screwed into the inside of the cabinet and underside of the desk top. The drawers could then be fitted and tweaked to get them to slide in/out nicely.
The actual drawer fronts could then be made. I decided these would be sculpted to integrate the drawer handles/pulls. Multiple pieces of timber needed to be glued together to get enough thickness to carve away. Before carving I marked some rough guide lines, but most of the time after I start the design ends up going in a totally different direction as I start to see what it looks like. I used a carving disk on the angle grinder, a dremel, spokeshave, gouges and rasps to produce all the flowing curves and lines I wanted. These were then screwed to the drawers and the transitions between adjoining drawers refined.
Step 5: Finishing


With all the components made, there was some final fettling to get all the fits and gaps refined. Then it was all sanded down to a 120 or 240 grit finish and a few coats of danish oil added.
It could then be assembled.. the main legs, cabinet and back/shelf are all bolted into the desk top making it easy to disassemble and move if needed. It is rather heavy!! I later added a cable tray and laptop shelf to hang under the back of the top to keep things tidy.
I set out to challenge myself with this design/build and am very pleased with the outcome. It's very sturdy and fulfills all my space, storage and unique look requirements. Hope you enjoyed, go make something!

Participated in the
Epilog Challenge 9


