

Introduction: Starlight - LED - 12V - 3D Printed


Inspired by the challenge on the subject "Make It Glow", I have decided to design and print this lamp.
The special feature of this lamp are the indirectly shining star corners.
According to the seller, the light output of the LED is 250 lumens, The lamp is therefore probably not suitable for illuminating a desk. It is more likely to be used as a mood or bedside lamp. With 3000K the light is considered warm white. The power consumption is 2.5 watt.
If you want it a little brighter, you can also use an LED with the same dimensions and 350 lumens, but with 3.5W power consumption.
Dimensions:
- H max. 400 mm
- base 195 x 160 mm
- lampschade Ø 140 mm, L 112 mm
Supplies


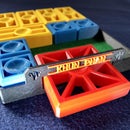
Parts to print:
- base
- struts (3x)
- connector
- lampshade
- back
- ring
- bracket
- knobs (6x)
- glass fixring
Metall parts:
- threaded rod Ø 4 mm
- washers Ø 15 x 5 x 1 mm (14x)
- nuts Ø 4 mm (6x) for knobs
- screws Ø m3 plus matching nuts (2x)
- self-tapping screws Ø 2,2 x 9 mm (5x)
Lamp "glass":
- Ø 65 mm polycarbonate twin-wall sheet, thickness 6mm
Electrics:
- 2 pole AC/DC power jack 5,5/2,1mm (
- 4G bulb socket
- 2 Position Mini Toggle Switch
- 4G LED bulb 2,5W/250 Lm or 4G LED bulb 3,5W/350 Lm. IMPORTANT!: I do not advise the installation of a higher wattage bulb, because of too much heat development!
- 12 V AC/DC power adapter
- switch wire, ca. 10cm
Most of these parts you can find here:
LED 250 Lm
https://www.amazon.de/dp/B00LC0DSEC/ref=cm_sw_em_r...
or
LED 350 Lm
https://www.amazon.de/dp/B09PG7LD5J?psc=1&ref=ppx_yo2ov_dt_b_product_details
Bulb socket:
https://www.amazon.de/dp/B00279SBDA/ref=cm_sw_em_r...
Switch:
https://www.amazon.de/gp/product/B01MXLZ7R1/ref=ppx_yo_dt_b_asin_title_o03_s00?ie=UTF8&psc=1
Power jack:
Power adapter:
https://www.amazon.de/dp/B00LEFGDOM/ref=cm_sw_em_...
Further:
- drill, Ø 2mm
- fretsaw
- metal saw
- soldering Iron
- solder
- soldering grease
- (super)glue
- sandpaper
- Phillips screwdriver
- flat pliers
- piercer
Step 1: Printing


Print Settings
- printer brand: Prusa
- printer: MK3S / Mini / Flashforge Finder
- supports: No
- resolution: 0,2
- infill: 15% except: mount lampshade 30%, knobs 50%
- filament brand: Prusa; ICE
- filament color: Galaxy Black; Romantic Red, Wintershine White
- filament material: PLA
Remark: As all parts are designed to fit very precisely, it may happen that you have to rework one or the other part a bit with sandpaper and/or cutter due to different dimensional accuracy of the printers and the different behavior of the filaments.
Attachments


Step 2: Saw and Insert Twin-wall Sheet "glass"


For this work step you need:
- polycarbonate twin-wall sheet, thickness 6 mm
- "lamp_lampshade.stl"
- "lamp_glassfixring".stl
- fretsaw with very fine saw blade
- fineliner or piercer
There is hardly anyone who will have a polycarbonate twin-wall sheet in stock at home, and no one is likely to buy a whole 1m x 2m sheet just for a few square centimeters. Perhaps there are similar plates in smaller sizes. Otherwise I recommend polycarbonate glass 3mm thick, 70% translucency or transparent polycarbonate glass. These are available in our DIY stores in small sizes.
To cut the polycarbonate glass exactly for this tube, I put the back of the lampshade on the "glass" and pull along the inside with a thin felt-tip pen or a pricker. The lampshade must not slip in this process.
The glass insert has a diameter of 65mm. The insert sits so tightly after insertion that the use of glue is not necessary in my case. A small step ensures that the glass - when inserting - cannot slip through to the front.
If the "glass" is too loose, you can fix it with the "lamp_glassfixring.stl" from the inside with some super glue.
Step 3: Assembling Light Unit


For the next step you kneed
- "lamp_bracket.stl
- 4G bulb socket
- 2x self-tapping screws Ø 2,2x 2,9 mm
- 2 mm drill
- 4G LED bulb 2,5W/250 Lm or 3,5W/350 Lm IMPORTANT!: I do not advise the installation of a higher wattage bulb, because of too much heat development!
- piercer
The LED bulb socket must be screwed onto the "lamp_bracket.stl". For this you have to drill two holes with Ø 2mm into the socket. Before you do this, mark the holes with a piercer.
Step 4: Install LED Socket Together With the Connector


For this step you need:
- lampshade with inserted polycarbonate "glass"
- the prepared bulb socket (the assembly can also be done with the LED in place)
- "lamp_connector.stl"
- 2 screws Ø m3 plus matching nuts
- screwdriver
- flat pliers
It is now 3 parts that must be screwed together. The rear nut can only be positioned with flat pliers. This is a bit fiddly, but doable!
Step 5: Installation AC/DC Socket and Switch


Now you need:
- the prepared lampshade
- "lamp_back.stl"
- 2 pin AC/DC Socket 5,5/2,1mm
- 2 Position Mini Toggle Switch
- spanner 10 and 9 mm
Do not be confused. In my case, I used a 3-pin AC/DC socket that I still had on stock.
Insert the switch and the socket - as shown in the pictures.
Step 6: Soldering


For the next step you need:
- soldering iron
- solder
- soldering grease
- switch wire, ca. 10 cm
- Take one of the wires coming from the LED socket and solder it to one of the pins of the AC/DC socket
- Solder the other wire coming from the LED socket to one of the pins from the switch.
- Finally, take a piece of wire about 10cm long and connect the empty pins from the switch and the socket.
Step 7: Attach Back


And now you need:
- 3 self-tapping screws Ø 2,2 x 9 mm
- piercer or drill, Ø 2mm
- Phillips screwdriver
After the electrics are completed, the back can now be attached.
The drill holes in the "lamp_back.stl" are only marked and should be treated with a piercer or pre-drilled with a Ø 2 mm drill bit.
Step 8: Prepare Fixing Knobs


You go on with:
- 6 x "lamp_knob.stl"
- 6x nuts Ø 4mm thread
- (superglue)
The nuts are pressed into the recess with a little force. In my case, they sit so tight that additional gluing with superglue is not necessary.
You have the choice between two different knobs.
Step 9: Saw the Threaded Rods


Now you need:
- threaded rod Ø 4 mm
- metal saw
Before we can start assembling the lamp, we first have to cut 3 different threaded rods:
- 65 mm
- 45 mm
- 30 mm
As an alternative to a threaded rod, threaded screws of the appropriate length and diameter can also be used. In this case, only the heads would have to be sawed off.
Step 10: Assembly


For this last step you need:
- the completed lampshade
- the completed fixing knobs
- "lamp_base.stl"b
- "lamp_strut.stl" (3x)
- "lamp_ring.stl"
- 14 washers Ø 15 x 5 x 1 mm
- threaded rods (65, 45, 30 mm)
Start by inserting the two struts at the base. - as shown in the pictures. To do this you will need the 65 mm long threaded rod. Inserting the washers is a bit fiddly. Now screw on the locking knobs on both sides.
Next, insert the remaining strut. For this you need the 45 mm long threaded rod.
The last step is to connect the single strut to the connecting piece of the lampshade. For this you take the 30 mm long threaded rod.
Actually, the lamp is now ready ... except for the ring, which not only protects against the sharp corners but also gives the lamp its unique appearance!
The ring has on the inner side 5 small notches. At one notch is the word "Top". This notch belongs at the top! Then put some superglue in the notches and insert the ring from the front. The notches are in the front of the ring. Make sure that the ring is flush with the lampshade.
Done! Have fun with this lamp!

Runner Up in the
Make it Glow Contest


